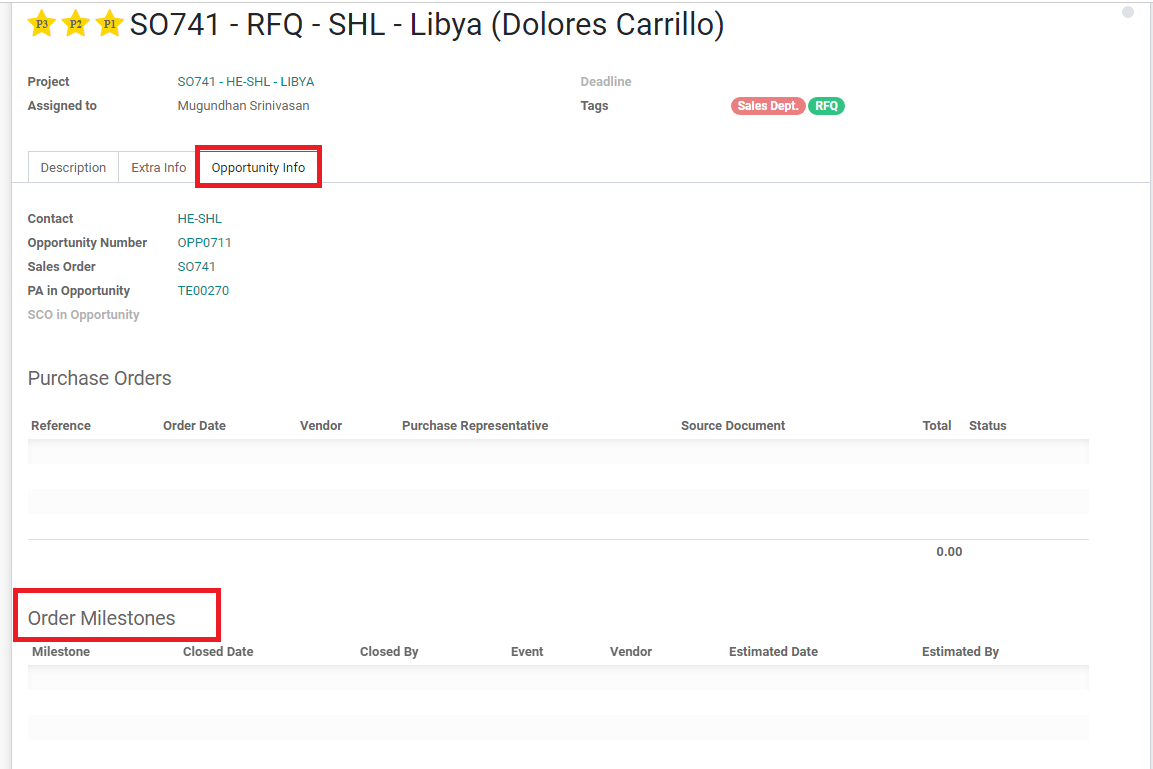
How to Fill Out Order Milestones
| 5 minutesSalesperson must fill out the Order Milestones once the order is confirmed by the Customer. Order Milestones is a section that is used to fill out the most important dates/steps of any Order. There are several purposes of Order Milestones section:
Predefined milestones/dates of the steps of an order are important for tracking progress and ensuring every order is completed on-time.
Defining milestones/dates for Customer payment/order confirmation/factory packaging is subject to circumstances outside of our immediate control, making setting accurate milestones difficult. However, regulating the parts of the process that are within our control and tracking the process are important to completing registrations in the shortest time possible.
This SOP will explain how to enter estimated dates into Order Milestones. How to handle actual dates in Order Milestones is described in Closing an Order SOP.
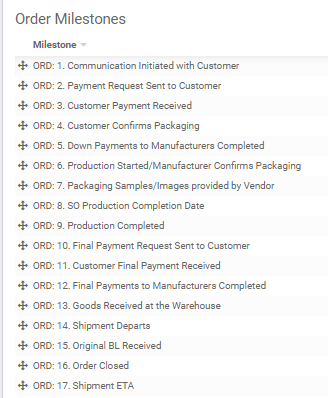
ORD: 1. Communication Initiated with Customer – the date the task was created (fill Closed Date & Closed By) and proceed to ORD.2
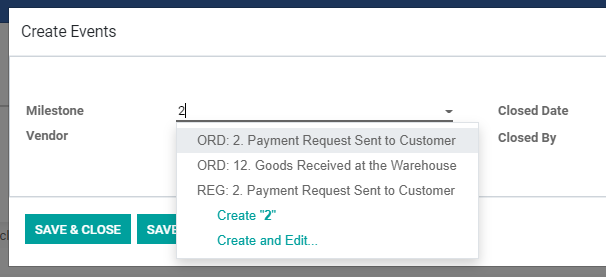
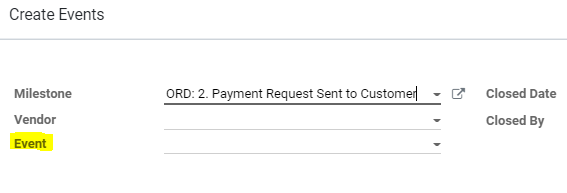
ORD: 2. Payment Request Sent to Customer – the date Accounting Dept. send the down payment request email (fill Estimated Date & set Event Date in Calendar with reminder and Closed Date & Closed By, Attendees: Sales Dept. Manager and Sales Director) and proceed to ORD. 3
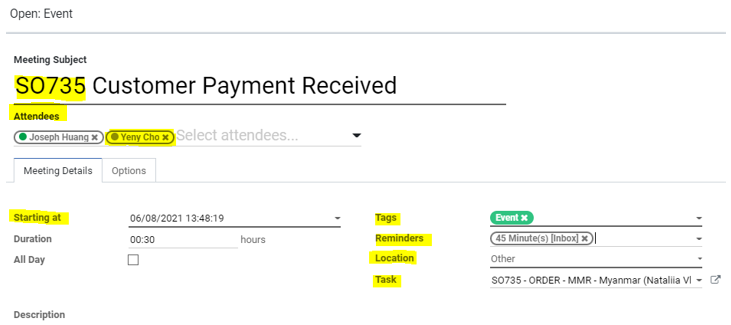
ORD: 3. Customer Payment Received – the estimated date is according to the Payment Terms stated in the Sales Contract (fill Estimated Date & set Event Date in Calendar with reminder and Closed Date & Closed By, Attendees: Sales Dept. Manager, Sales Director and Accounting Dept. Manager)
ORD: 4. Customer Confirms Packaging – the estimated date should be 3 days after Salesperson has sent the PDCA to the Customer (fill Estimated Date & set Event Date in Calendar with reminder and Closed Date & Closed By, Attendees: Sales Dept. Manager and Sales Director) and proceed to ORD. 8
ORD: 5-6. Purchasing person fills out
ORD: 7. Packaging Samples/Images provided by Vendor – the date Vendor provides with samples/images of the printed packaging before packing of the product
ORD: 8. SO Production Completion Date – the date production will be completed for the Customer. Production time is stated in the Sales Contract. The days are calculated from the date the Customer has confirmed the PDCA with the Salesperson. (fill Estimated Date & set Event Date in Calendar with reminder (Attendees: Purchasing person, Purchasing Manager, Sales Manager, Sales Director))
ORD: 9. Purchasing person fills out. Purchasing person will add the initial estimated production completion dates provided by the Vendors. If the dates should change, the Purchasing person will inform the Salesperson via Task. The estimated dates will not be changed in the Milestones.
ORD: 10. Final Payment Request Sent to the Customer - the date Accounting Dept. send the final payment request email (fill Closed Date & Closed By) and proceed to ORD.11
ORD: 11. Customer Final Payment Received - the estimated date is according to the Payment Terms stated in the Sales Contract (fill Estimated Date & set Event Date in Calendar with reminder, Closed Date & Closed By)
ORD: 12. Purchasing person fills out
ORD: 13-15. Logistics person fills out
ORD: 16. Order Closed – the date the task is sent to Sales Manager to close the order (fill Closed Date & Closed By)
ORD: 17. Logistics person sets Event Date in Calendar with reminder (When Salesperson receives notification on the event date, Salesperson is to set an Activity 3 weeks after to follow up with the Customer for next order)