Social Media Posts
| 27 minutes

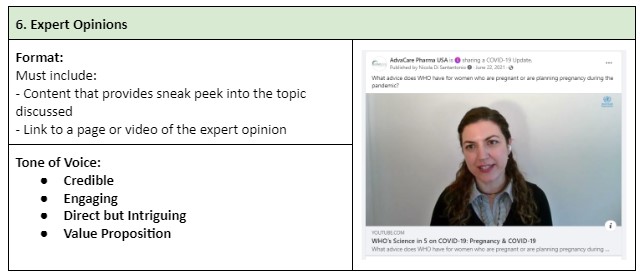
Content Writing Guideline
Content/Hashtag Preparation Guideline
Hashtags help users find content on a specific topic. By adding hashtags to the post content, the post will have a higher chance of getting discovered by other users, including those not connected to the Company Page. What's more, users can follow hashtags on LinkedIn, meaning that posts containing the chosen “hashtags” will appear on the follower’s feed. This part of the SOP covers step on how to select and relevant hashtags to the SM Post, but also provides some insight into how to prepare the post content based on “trending” posts:
- A few hashtags must be included in every SM Post, including:
- #AdvaCarePharma
- When promoting a special brand, product, product range/brand of the company, include the brand as a hashtag. For example: #AdvaMate, #AdvaLife, #ParaCare, #AmoxiCare, #AccuPoint, etc.
- When promoting Medical Devices product or product range, include the brand division as hashtags. For example: #AccuPoint, #InjectionInstruments, etc.
- Come up with a few hashtags related to the post theme, in various ways of writing. For example, for posts related to cancer fighting medications, consider hashtags such as: #fightcancer #cancermedicine #oncology #oncologymedicine
- Add some other relevant secondary keywords from the post as additional hashtags. To get some ideas about the topics discussed in the industry on Social Media, do a quick search on each SM platform and view the recent well liked posts.
- From the list of main hashtags (other than the mandatory hashtags), select the most suitable hashtags related to the topic/messaging intended to be conveyed, while also considering the amount of existing Followers/Posts of the hashtag on each respective SM Platforms. This can be done through:
- LinkedIn: use the link https://www.linkedin.com/feed/hashtag/[hasthtag]/
- Facebook: https://www.facebook.com/hashtag/[hashtag]
- Start eliminating the list of hashtags to ideally no more than 8 total.
- Format the hashtags and use them in combination with the Content Text if applicable.
- It is recommended to format the hashtags using capital letters at the start of each word, to make it more easily recognizable. For example: #WorldCancerDay instead of #worldcancerday
- Make sure that no punctuations nor symbols are incorporated in the hashtags.
Alternatively, use a hashtag generator tool to get some ideas
Following the above example, if the cancer post also involves a topic about developing countries, you may want to include hashtags that cover the theme of medicine access in developing countries, such as: #AffordableHealthcare #CancerCareForAll #HealthEquity #CloseTheCareGap
Replace the [hashtag] with the actual word and open the link. LinkedIn will show the number of followers of said hashtag.

Here, Campaign Specialist may decide to use the hashtags that have more followers over less for similar keywords. However, this is not a must, it is understandable if Campaign Specialists may choose a hashtag that is more relevant, even though it may have less followers.
Replace the [hashtag] with the actual word and open the link. Facebook will show the number of posts of said hashtag. Note that facebook does not show the number of posts/followers for keywords with insufficient volume. This tool can be considered secondary.
UTM Link Generation Guideline
If links to AdvaCare site pages will be used in the post, it is important to include UTM links to better track the performance of every post. This is especially important for posts that will be boosted with an additional approved budget. The process on how to create a UTM link that connects to the ERP system can be found here: UTM Link Generation
Image Preparation Guideline
Including images on Social Media Posts is crucial for various reasons. Visual content enhances the overall appeal of the posts, making them more likely to capture the audience's attention as they scroll through their feeds. Posts with images tend to receive higher engagement, fostering likes, shares, and comments. Visuals convey information efficiently, aiding in storytelling and evoking emotions, ultimately building brand recognition. Additionally, social media algorithms often prioritize content with visual elements, boosting the visibility of the posts and encouraging click-throughs to linked content.
Depending on the Post Type, various Image Templates are available for use to create the images suitable for every Post Theme. These image templates are available here:
Z:\Shared drives\AdvaCare Marketing Control\AdvaCare Marketing Campaigns\TEMPLATES\SOCIAL MEDIA TEMPLATES
Campaign Specialist may prepare the image banners by themselves, or assign the task to Design Specialist if required. In the case where Design Specialist’s time will be required, make sure to:
- Send a task to Design Specialist, while tagging Marketing Dept. Manager with the description of the task.
- In the task description, provide as completely as possible the following points REQUIREMENTS:
- Template to use. Select a template from the Template folder and inform the Designer exactly which template to use by sharing the location and file name.
- Direction of background image to use. Eg. Empowered women in healthcare
- Image/color correction requirement if applicable. For specific themes, some color schemes may be applicable, make sure to communicate what the Campaign Specialist has in mind ahead of time to the Design Specialist. eg. Breast Cancer Awareness Days is associated with pink, this color needs to be incorporated in the banner for breast cancer awareness.
- Text. Primary text, secondary text, etc. depending on the template. Prepare these things ahead of time for the designer.
- Source if applicable.
- Deadline. Provide a reasonable deadline (at least 2 days time) for the Design Specialist to accommodate the task in their schedule. However, do include some time before the post schedule for Campaign Specialist to check and request revisions if required.
- Set an activity to the Design Specialist with the expected deadline. Should there be a scheduling issue, Marketing Dept. Manager will jump in and coordinate.
- Images must be saved in the drive location:
- Once the image is finalized by the Designer, make sure to rename the final image with the Alt Text - or a simple description of the banner.
Z:\Shared drives\AdvaCare Marketing Control\AdvaCare Digital Marketing\AC_Marketing_SocialMedia
→ Under the subfolder - YEAR > MONTH > WEEK
Draft Confirmation
- After all Social Media Posts are drafted on the G-sheet and all relevant links/images added in the post, do a quick final review of the draft.
- It is recommended to use a tool for grammar/punctuation check such as Grammarly or GPT. All that is required is a quick copy paste on the said platform.
- After all drafts are ready to go, Campaign Specialist can send a task to the Marketing Dept. Manager under the Permanent Campaign: Social Media Posts task to check the drafts.
- Marketing Dept. Manager will provide feedback over the task, either to approve or request revisions on some posts.
- Back on the G-Sheet, go ahead and edit the Status of the drafts approved as “Ready”.
- Proceed to make any revisions required and repeat the Steps 1-5 until all posts for the following week are under “Ready” stage.
Note: for Campaign related Social Media Posts where information related to products, market or certifications may be involved, Campaign Specialist needs to also send a task to BD Dept. Manager to check and confirm for approval.

Scheduling posts ahead of time is important to avoid the busyness of daily tasks causing delays in posting, when templates are all ready to go.
- LinkedIn Post Scheduling:
- Access the LinkedIn company page.
- Click on the "+" button in the upper left corner to create a new post.
- Compose the post content according to these guidelines:
- Text: Copy and paste the text from the SM Post Status G-sheet. Adjust the spacing as required to look as intended.
- Hashtags: Make sure the hashtags are copy pasted and shown correctly. Hashtags are shown in bolder text than normal text.
- Banners: if an image/banner is applicable for the post, click on the “Add Media ” button on the bottom left part of the post pop-up. Copy and paste the drive location of the banner on the Open pop up, select the banner and click “Open”.
- Links: if link(s) are to be included in a post, LinkedIn will automatically pull in a preview of the linked page (unless a media is uploaded) with an image, site title, site domain and the est. time to read the page. Especially when having more than 1 link, make sure that the preview shown is the one intended to be shown. If the wrong preview has been added, click “x” to remove the link preview, remove the links and add in the first link that is intended to be shown. Once the correct preview is shown, add back the second link and so on.
- Click on the drop-down arrow next to the "Post" button and select "Schedule for later" or click on the “Clock” icon - “Schedule for later” button at the bottom right next to the post button.
- Select the desired date and time for the scheduled post. Most posts are to be scheduled according to the assigned date on the SM Post Schedule G-sheet at 05:30 PM to allow some time for Campaign Specialist to quickly check should there be an issue during the upload. Click “Next” and the post is now scheduled.
- Review again the scheduled post details (grammar, punctuations, content, hashtags, hyperlinks, images, etc.) and confirm the scheduling.
- On the SM Post Status Sheet, mark the status of the post as “Scheduled”.
- Facebook Post Scheduling:
- Log in to the company's Facebook page.
- Navigate to the page's “Meta Business Suite” section.
- Click on the "Create Post" or "Create a Post" button.
- Compose the post content following these guidelines:
- Post to: Make sure the correct “AdvaCare Pharma USA” has been selected.
- Banners: if an image/banner is applicable for the post, click on the “Add photo” button on the bottom left part of the Media section. Click “Upload from desktop”, copy and paste the drive location of the banner on the Open pop up, select the banner and click “Open”.
- Text: Copy and paste the text from the SM Post Status G-sheet . Adjust the spacing as required to look as intended.
- Hashtags: Make sure the hashtags are copy pasted and shown correctly. Each hashtag is shown in light blue highlights.
- Links: if link(s) are to be included in a post, Facebook will automatically pull in a preview of the linked page (unless a media is uploaded) with an image, site title, site link and the description of the page. Especially when having more than 1 link, make sure that the preview shown is the one intended to be shown. If the wrong preview has been added, click “x” to remove the link preview, remove the links and add in first the link that is intended to be shown. Once the correct preview is shown, add back the second link and so on.
- Facebook will show a feed preview on the right side of the screen. Review the post. Check both desktop and mobile previews by clicking on the Desktop or Mobile icons. Make sure the post looks good on both versions.
- Click on “Scheduling options” - “Set date and time”.
- Select the desired date and time for the scheduled post. Most posts are to be scheduled according to the assigned date on the SM Post Schedule G-sheet at 05:30 PM to allow some time for Campaign Specialist to quickly check should there be an issue during the upload. Click “Schedule” and the post is now scheduled.
- Review again the scheduled post details (grammar, punctuations, content, hashtags, hyperlinks, images, etc.) and confirm the scheduling.
- On the SM Post Status Sheet, mark the status of the post as “Scheduled”.
Note: when copy pasting from an excel or g-sheet cell, quotation marks (“ “) are often added at the beginning and end of the pasted text. Make sure to remove the quotation marks.
Once uploaded, click on the “ALT” button to add Alternative text of the image.
Type in the Alternative Text and click on the “Add” button below. Click “Next”.
Note: Marketing Specialist may also opt to create a post from a Calendar overview - “Planner” of the Meta Business Suite in order to view the other past and scheduled posts. This can be accessed from the side panel: “Planner” - “Week” or “Month” view and clicking on the desired time slot to schedule the post. Here, it allows the Poster to select the Date and Time first prior to the Post Content writing.
Once uploaded, click on the “Edit photo” button, and click on the Alt text button.
Type in the Alternative Text and click on the “Apply” button below.
Note: when copy pasting from an excel or g-sheet cell, quotation marks (“ “) are often added at the beginning and end of the pasted text. Make sure to remove the quotation marks.
On the day and time of posting, Campaign Specialist want to make sure to check that the scheduled post has been:
- Published (posted) as per scheduled
- Published for Public view
- Pulls all content correctly as intended (text, hashtags, media, hyperlinks, link previews).
If there are no issues with the post, go ahead and mark the status of the post as “Posted” on the SM Post Status Sheet.

Should there be any mistakes found at this point, go ahead and edit the posts by:
- LinkedIn Post Revision:
- On the top right corner of the post, click on the “...” icon.
- Click to select “Edit post” from the options.
- Make the fixes required.
- Click “Save” and review the post again.
- If there are no issues with the post, go ahead and mark the status of the post as “Posted” on the SM Post Status Sheet.
- Facebook Post Revision:
- On the top right corner of the post, click on the “...” icon.
- Click to select “Edit post” from the options.
- Make the fixes required.
- Click “Save” and review the post again.
- If there are no issues with the post, go ahead and mark the status of the post as “Posted” on the SM Post Status Sheet.
Note: if problems occur externally (from the image file being broken, link previews not showing due to the source link), Campaign Specialist may need to adjust the media/links first before editing the post.
Note: if problems occur externally (from the image file being broken, link previews not showing due to the source link), Campaign Specialist may need to adjust the media/links first before editing the post.
At the moment only certain posts are being promoted and distributed. These posts include the post types:
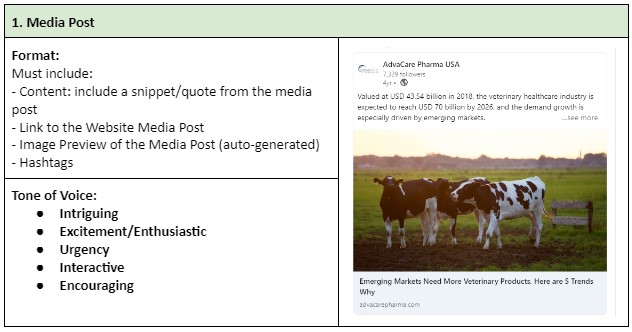
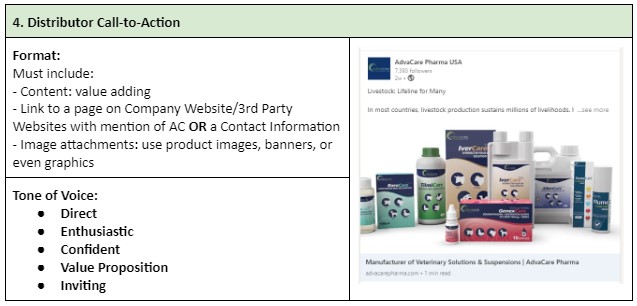
- Media Post
- Distributor CTA
- Expert Opinions
Following are the two main ways to to promote a post and how it is done, by budget requirements:
- Post Sharing on Employee Page
- Log in to the Director’s Individual LinkedIn account.
- Locate the Company’s LinkedIn page and click to open its Feed.
- Locate the post to be shared. At the bottom of the post, click on the “Repost” button and click to select “Repost” again from the dropdown to share the post as is.
- Post Boosting
- Prior to starting the Post Boosting process, Campaign Specialist must first send their proposal and request approval for the Boost from the Marketing Dept. Manager.
- Under a relevant task (this is normally the task where the Main/Side Campaign is handled, related to that SM Post - eg. WM Post Task, Social Media Outreach Task, etc.), send a task to the Marketing Dept. Manager with the request for Budget Approval with the following details:
- Marketing Dept. Manager will assess the budget approval request and provide feedback for any changes required. Once Marketing Dept. has approved the proposal, Marketing Dept. Manager will request the approval of the Director following the Budget Approval SOP .
- Once approved, Marketing Dept. Manager will create a subtask for the post campaign boost post, with the Task name: Main/Side Campaign: [Theme Name] > SM Post Boost.
- The task is then assigned to Campaign Specialist to fill in with the description of the post boost, as well as information related to assessment in the future.
- Log in to the Director’s Individual LinkedIn account.
- Locate the Company’s LinkedIn page and click to open its Feed.
- Locate the post to be boosted. At the top of the post, click on the “Boost” button.
- Once redirected to LinkedIn Campaign Manager - Boost post page, fill in the different settings:
- Objective: Choose the advertising objective based on the goals. Note that the settings after Objective is selected is under the Audience section.
- Brand awareness
- Website visits
- Engagement
- Automatic Audience Expansion (increase reach within linkedin)
- Include LinkedIn Audience Network (place ads on external sites used by LI users)
- Get Leads through a LinkedIn CTA & Form
- Audience: Select the audience to target based on one of the criteria below, and proceed to fill in the respective fields:
- Profile
- Locations: Countries
- Profile language: “English” is commonly used unless running a highly targeted regional campaign
- Company industries: generally used options include - Medical Equipment Manufacturing, Medical Practices, Retail Health and Personal Care Products, Health and Human Services, Veterinary Services, Wholesale Import and Export
- Job Seniorities
- Job Functions
- Job Titles
- Same as above - setting exclusions are just as important to weed out irrelevant audiences, particularly the country list that is Blacklisted/Restricted.
- Interest
- Locations: Countries
- Member groups: Various relevant groups
- Same as above - setting exclusions are just as important to weed out irrelevant audiences, particularly the country list that is Blacklisted/Restricted.
- LinkedIn Audience Template - check if existing templates have been created. New audience templates can be created per product range.
- Saved Audience - can be used if applicable.
- Post Boost Period: Select the period when the post boost is to be run.
- Budget: Set the budget cap for the post boost in that period.
- Billing account: the default setting
- Check the Preview of the post on the right panel, and double check that all settings are set as intended.
- Click “Boost”.
- Log in to the company's Facebook page and locate the post to be boosted.
- At the bottom right corner of the post, click on the “Boost post” button.
- Once redirected to the Ad Manager post page, fill in the different settings:
- Goal: Choose the advertising setting based on the goals.
- Get more messages
- Greeting
- Started Question
- Apps
- Get more engagement
- Button Label
- Other Information
- Get more leads
- Contact Form
- Button
- Get more website visitors
- Button Label
- Website URL
- Get more calls
- Preview the ad through the Ad preview section on the right panel.
- Once the goal settings are done, proceed to set the “Audience” setting. The general settings are:
- Gender: Men
- Age: 25-65+
- Locations: depending on each campaign
- Detailed targeting: type on the empty field and select from the available dropdown, repeat as necessary. The options include Demographics, Interests: apply relevant positions to the campaign, for example “doctor”, “distributor”, “importer”, “agriculture”, “medicine”, “veterinary medicine”, “healthcare and medical services”, etc.
- Additional targeting: add other target audiences applicable from the selection, such as “People who like your Page”, “People who like your Page and people similar to them”. Do not select “People in your local area”.
- Next, set the Duration and Budget of the campaign, as approved in the beginning Budget Approval section above.
- Proceed with the payment process with the Marketing Dept. Manager when all settings are ready, and click “Publish”.
Budget approval: None
Available accounts: Director’s Individual LinkedIn account.
Posts to share: every single Media Post, Distributor CTA or Expert Opinions without frequency limit
Timing and frequency: Within 24-48 hours of posting, for every post above.
Budget approval: Required (reference budget: $20-40/7 days per platform or depending on campaign)
Available accounts: Company LinkedIn Page, Compage Facebook Page
Posts to share: Media Post, Distributor CTA or Expert Opinions posts related to Main/Side Campaign
Timing and frequency: No more than 1x a month, can be applied for longer period per boost
1) Purpose of payment: [summary of the objectives]
Marketing goal:
- [Marketing goal 1]
- [Marketing goal 2]
…
Target Countries:
- [Country 1]
- [Country 2]
…
2) Stakeholders involved: [Platform Name]
3) Amount: $[Budget], duration [# of days] days
4) Contact in ERP (link): N/A
5) Audience details: [Setting of the audience]
Note: If a campaign has a broad selection of target countries that needs to be limited/checked, iInclude BD Dept. Manager in the task to confirm the target countries selection.
Note: LinkedIn Post Boost has the minimum budget of $10 per day.
b.i. LinkedIn Post Boosting
Options typically include:
>> For the above 3 options, the Advanced options include:
>> For this option, post boost only applies within LinkedIn, but with the additional CTA and Form setting where Campaign Specialist can set the:
Button Label (CTA), Type of Email to Collect, and Privacy Policy URL.
Note: use the company website’s privacy policy page for this URL. https://www.advacarepharma.com/en/privacy-policy
Inclusion
Note: the set Audience Setting can be saved in LI Campaign Manager for future re-use.
Exclusion
Inclusion
Exclusion
Make sure to click save after the settings are inputted.
b.ii. Facebook Post Boosting
Options typically include:
>> For this option, Messaging which will be shown to audiences who clicked on the ads. Set the following:
Set the automated greeting by preparing the text and selecting how to address the audience (First Name, Last Name, Full Name or Name of the page).
Prepare a question that the audience can preselect once communication is started. An automated answer can also be prepared ahead of time (optional).
Click “Save” after the message template has been set.
>> Next, select any other additional Apps where the audience can directly send a message on, outside of Facebook messenger (optional).
At the moment, the only applicable additional option for messenger is WhatsApp.
>> For this option, a button (CTA) can be added right under the post. Set the following:
No button - ideal to keep engagements limited to the post itself to be liked, commented or shared.
Other buttons (Book now, Learn more, etc.) - can be used when deciding to either redirect the traffic to other pages or channels.
If a button is chosen, additional information will need to be inputted accordingly, such as a phone number, WA account, link, etc.
>> For this option, a Form is created for audiences to send inquiries directly from the Facebook post. Set the following:
Set the Form Name, Headline and Description (Optional), Contact information to be gathered, Questions, and other details.
Set the button to either Learn more or Sign Up.
>> For this option, a button (CTA) can be added right under the post. Set the following:
Select one of the available options.
Input the URL to direct the audiences to.
>> This option is not currently applicable based on internal processes.
Note: post boosts must be scheduled at least 1 day before the set date.