Home
Standard Operating Procedures
Sales Dept. - Business Development
SOPs
Confirming a New Registration
Starting a New Registration
Starting a New Registration
| 3 minutesAs Registration Deposit has been received and new Distributor onboarding process/existing Distributor process has been completed, BD Salesperson can start the new Registration process internally. Note that this steps A few important points are to be completed to start a new registration:
CHANGING THE PROJECT STATUS & FILLING IN ORDER MILESTONES
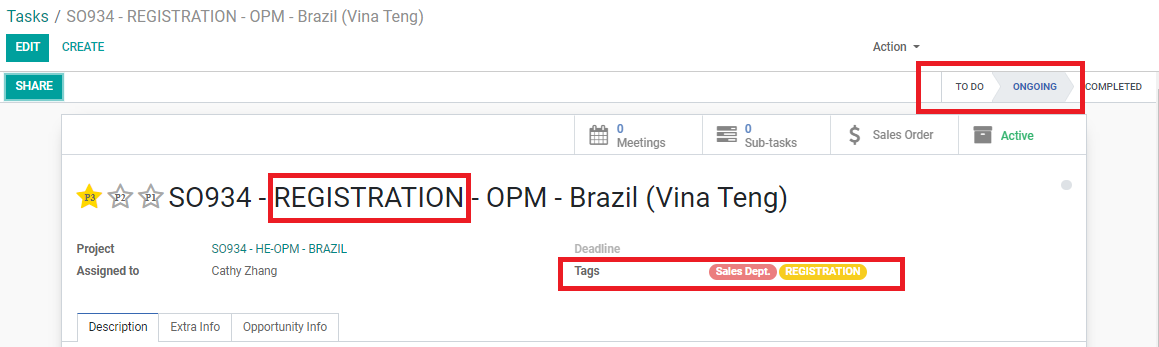
1. Open the Project of the SO.
2. Click “EDIT”.
3. Change the following points:
• Project Name: manually type and change “RFQ” to “REGISTRATION”
• Tags: remove the “RFQ” tag and add the “REGISTRATION” tag
• Pipeline: change the pipeline status from “TO DO” to “ONGOING”
4. Click on the “Opportunity Info” tab, scroll down to the “ORDER MILESTONES” part.
5. Click “Add Multiple Milestones” and select all applicable milestones. For example, if Samples are not required for this registration and no payments are needed to be made to the Vendors, skip REG: 4, REG: 8, REG: 9 and REG: 10.
• REG: 1. Communication Initiated with Customer.
• REG: 2. Payment Request Sent to Customer.
• REG: 3. Customer Deposit Received.
• REG: 4. Payments to Manufacturers Completed.
• REG: 5. Documents Preparation Started/Vendor Registration Agreement Signed.
• REG: 6. Customer Confirms Packaging.
• REG: 7. Manufacturer Confirms Packaging.
• REG: 8. Samples Production Started.
• REG: 9. Samples Production Completed.
• REG: 10. Samples Received by Customer.
• REG: 11. Documents Completed.
• REG: 12. Documents Provided to Customer.
• REG: 13. Documents Submitted by Customer.
• REG: 14. Document Revisions Completed.
• REG: 15. Registration Certificates Received.
• REG: 16. Registration Closed.
Note: more details on how to fill in the Registration Milestones can be found under the
reference SOP - Estimated Dates in Registration Milestones
.
6. Fill in the milestones REG: 1 to REG: 3:
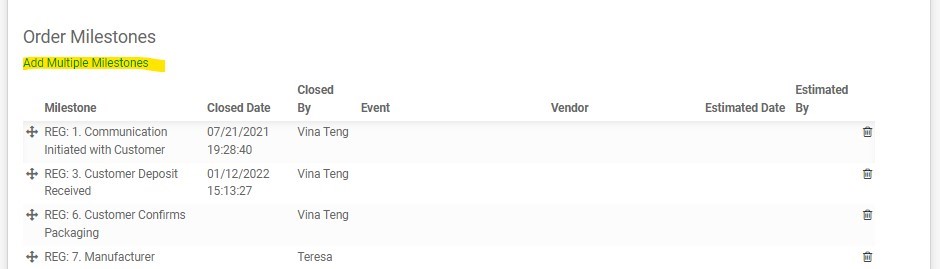
• REG: 1. Communication Initiated with Customer.
Closed Date: date of when communication was started; and Closed By: BD Salesperson
• REG: 2. Payment Request Sent to Customer.
Closed Date: date of when Payment request was sent; and Closed By: BD Salesperson
• REG: 3. Customer Deposit Received.
Closed Date: date of when Accounting sent payment receipt; and Closed By: BD Salesperson
7. Click “SAVE”.
CONFIRMING SELECTED VENDOR(S) FOR REGISTRATION
1. Make sure that the Registration Parent SO and PA are updated with the final product list, quotations, and vendor selection for registration.
2. On the registration Project, send a task to Purchasing Dept. Manager informing them that registration deposits have been received and that products under the SO will be registered with selected Vendors. Other information may be provided (such as if inspection is required).

3. Purchasing Dept. Manager will review the product list, Vendor and registration requirements and provide approval to proceed if everything is in order.
4. Purchasing Dept. Manager will reply via task either to confirm to proceed with registration, or provide suggestion for other Vendors to register with instead. If an alternate Vendor is suggested, send a task to Purchasing person to confirm again all points regarding the registration from the Vendor side based on the “Points to Verify in a New Registration” SOP.
5. After approval, BD Salesperson can start to create the Registration Agreements (RA) in the ERP system which steps will be explained in the next part of this SOP.
CONFIRMING PACKAGING REQUIREMENTS WITH THE CUSTOMER
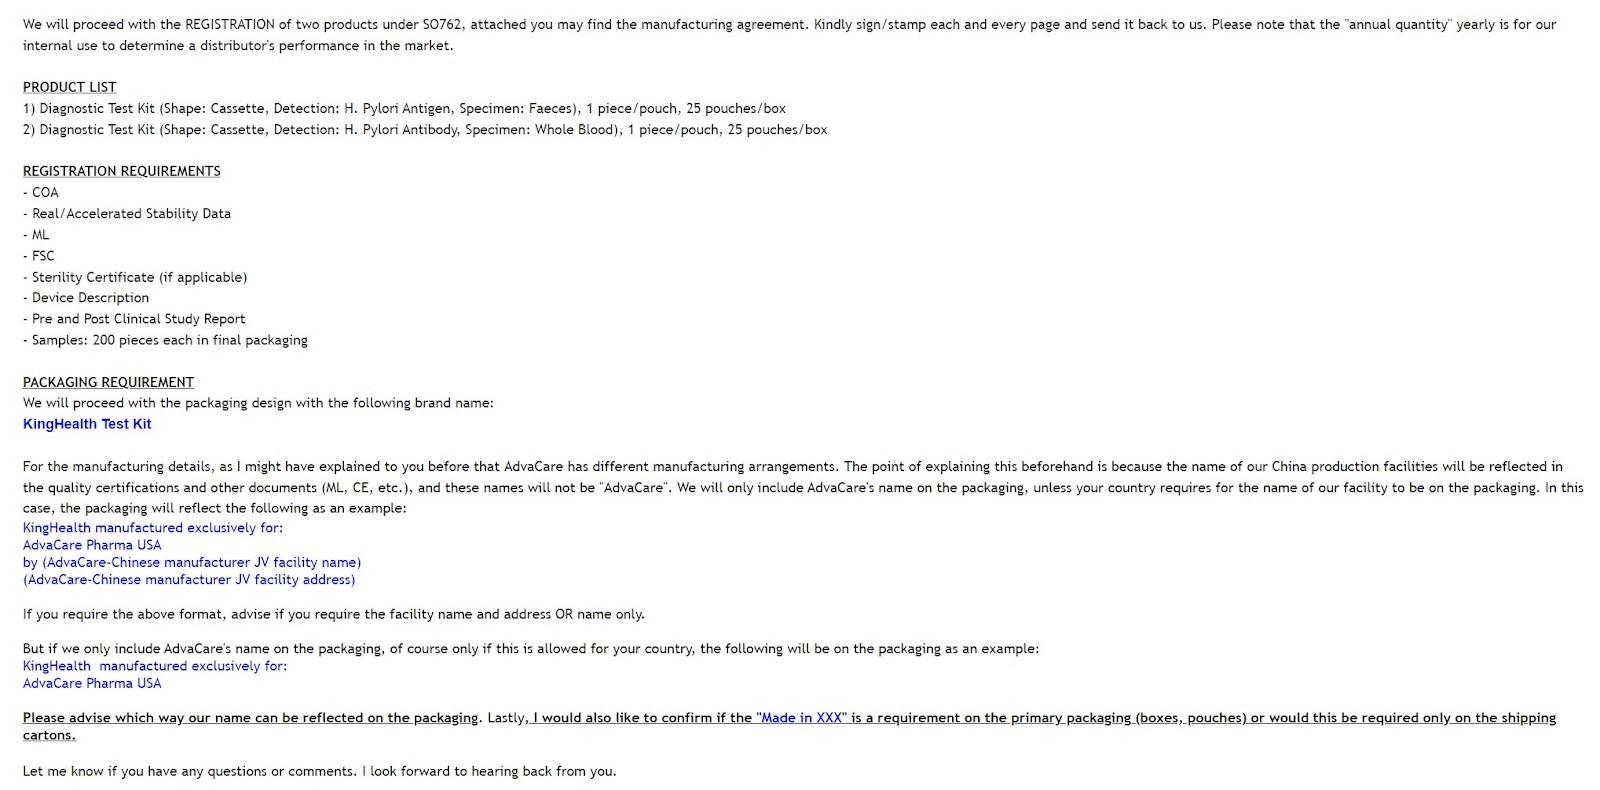
1. When sending the MA over email, list the documents required for registration to reconfirm with the Customer.
2. List the sample requirements (if applicable), with the quantities and packaging requirements.
3. Confirm the required packaging information to be reflected on the packaging (whether to include Vendor name and address and Made in XXX). Refer to the example below:
Did this article help you?
0
0