Site Documents Received from the Vendor

| 4 minutes

When a Site Document is received from the Vendor, it is important that the documents are saved in the Server and also updated in the System. There are a few purposes in this process:

RA Dept. can easily access these documents for other registrations
Sales Dept. can access these documents directly when needed without asking RA Dept.
A comprehensive database of all Vendor certificates is there to ease Vendor selection by all related departments in a new registration

Saving the Site Documents in the Server Folders

Once a copy of a Site Document is received, RA Specialist must check this document, and if relevant to the registration must save it in the Registration Folder - Documents from Factory. If translations will be required, it is important to make sure the translated copy is attached together with the original copy before saving it in the Registration Folder - Final folder.

After that, they must also be saved in the Manufacturer folder - Certificates.

China Manufacturer Folder: Z:\Shared drives\AdvaCare Cloud Server\Manufacturers\Manufacturers\[Manufacturer Name]
India Manufacturer Folder: Z:\Shared drives\AdvaCare Purchase India Control\AdvaCare Purchasing\Manufacturers\Manufacturers\[Manufacturer Name]

Vendor site documents should have been saved under the folder “Certificates” and JV Declaration should be saved under “AdvaCare Declaration of Joint Venture Partner”.

Note: Make sure to rename the file with the correct document name. If a same but expired certificate exists in the Manufacturer Folder, move them to an “Old” folder.

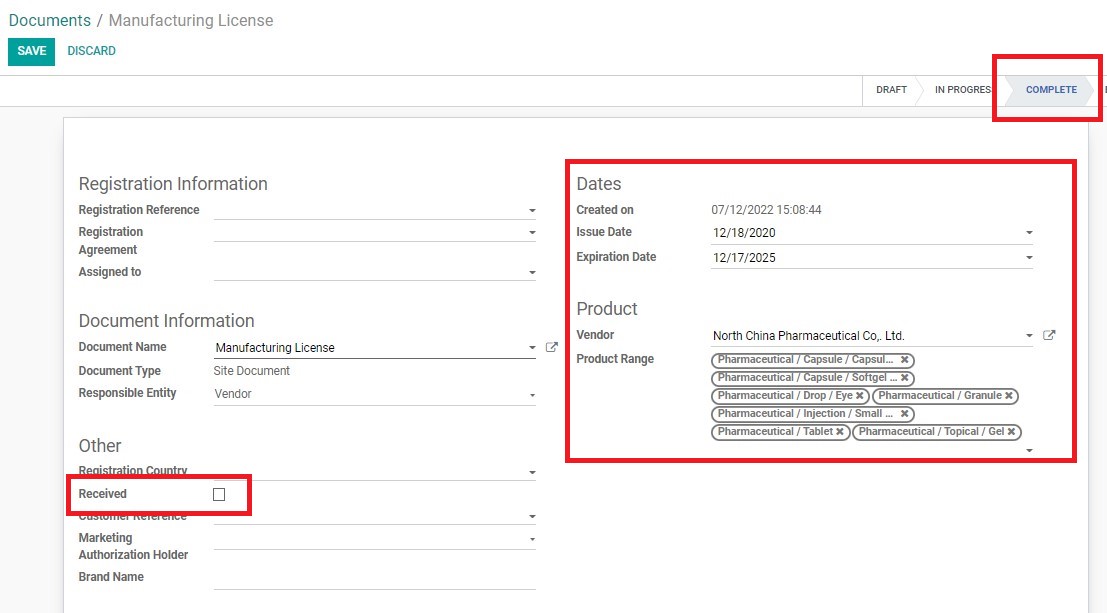
Updating “Received” Status in the System

For documents that are newly received, but has already been previously inputted in the System without the “Received” tickmark, RA Specialist must update the status of the documents in the System following this process:

2. Search for the site document already in the system, use the search bar. Type the document name and press enter. Type again the vendor name and select the “Vendor Name” quick search option. The document will be shown in the table.

3. Click on the document.
4. Click “EDIT”.
5. Click on the checkbox next to “Received” and input other information from the certificate such as Issue Date, Expiration Date, Product Range, etc.
6. On the pipeline row above, click on the status “Complete”.

7. Click “SAVE”. This document should now show as “Received” on the RA page - Site Documents.

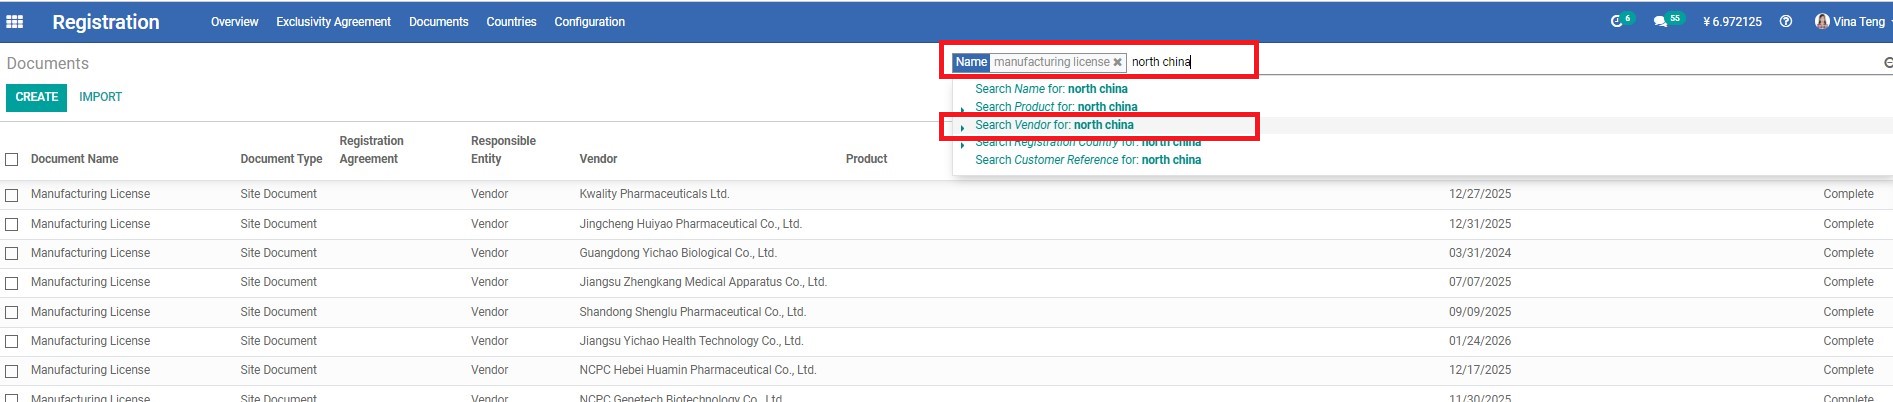
Creating a new Vendor Site Document in the System

2. Click “CREATE” on top of the screen.
3. Fill out the following fields:
a. Document Name - start typing the name of the document and choose the right option from the dropdown.
Note: Choose existing document from the dropdown, NEVER create a new document name. All the documents are pre-created. If the required Document Name is not showing in the dropdown, make sure the name of the document you are typing is correct. If it is correct but the document is not showing, ask BD Manager to create the required document.
b. Vendor - start typing the name of the Vendor and choose the right option from the dropdown.
Note: Choose existing Vendor from the dropdown, NEVER create a new Vendor. If the required Vendor is not showing in the dropdown, ask Purchasing Dept. Manager to create the Vendor.
c. Product Range - search and choose the correct ranges from the dropdown. Range has to be as detailed as possible. For example, if Vendor has China GMP for tablets/capsules, choose two ranges: “Pharmaceutical / Tablet” and “Pharmaceutical / Capsule”. Every certificate has this information. If Vendor has several GMP certificates for different dosage forms, each certificate has to have a separate Document created in the System.
Note: If there is no certificate copy in the file server, fill out generic product range, for example "Pharmaceutical". However, the Product Range has to be filled out as detailed as possible.
d. Registration Country - this field refers to any certificate issued by another country FDA or MOH. For example, if Vendor has GMP from Nigeria, Nigeria has to be filled out in this field.
Note: 'Registration Country' field only applies to other countries, not the country of origin. There is no need to feel out China/India for local GMP.
e. Issue Date – the date has to be chosen according to the issue date of the actual certificate.
f. Expiration Date – the date of expiration of the actual certificate.
Note: If the certificate copy/expiration date is not available, leave this field blank.
g. Received tickbox - as the actual certificate copy is available in the file server, mark the checkbox “Received”.
Note: This field is used by Registration/Purchasing Dept. to know which documents are available in the file server, so that Registration/Purchasing Dept. does not have to ask the Vendor to send it again.
4. Click “SAVE”.
5. Check all the information in the created Site Document. If any changes are required, click “EDIT ” again and change the information. If everything is correct, click “VALIDATE”.

Did this article help you?
 0
 0