HANDLING QUALITY COMPLAINTS
| 6 minutesHelpdesk module is used to record and track any quality complaints from Customers. Helpdesk module allows to connect Customer with the product that has quality defect, Sales Order it came from, and coordinate with Procurement Dept. on finding the solution.
This SOP will explain what a QC Ticket is, how to use it and how to create it.
Getting started with QC Ticket
After Customer complaint is received, Salesperson will create QC Ticket, fill out the information, and assign it to Procurement Dept. Procurement Dept. will assess the complaint, check the information, and communicate with Vendor to resolve the issue.
- QC Ticket is the main document used to handle quality issues with products.
- QC Ticket displays the defected products, product specifications and affected quantities.
- QC Tickets can be viewed from any contact page (Customer or Vendor) to see previous or current quality issues and rank the Vendor.
- QC Ticket is used to record the details of the quality issue, track the progress of each complaint and record the solution for future reference.
QC Ticket Stages
- New: Initial stage at which Tickets are created. This stage is used by Salesperson to fill out the details of the complaint.
- In Progress: Salesperson will move Tickets to this stage after all the details are filled out, and the Ticket is ready to be passed to Procurement Dept.
- Solved: Salesperson will move Tickets to this stage after they are resolved from both Sales and Procurement side.
- Cancelled: Salesperson will move Tickets to this stage when document is not required anymore (e.g Ticket was created by mistake, etc.).
QC Ticket Types
- Product: Any quality complaint or question related to the product, product quality, product specification, etc. This Ticket Type allows user to choose the products from related Sales Order and set the defected quantity, record the dates of each step of the process, and record the final solution from Customer and Vendor side.
- Internal: Any quality complaint, issue or question not related to any specific product (can be related to Vendor in general, Vendor range, Vendor production time, etc.).
- Billing: Tickets related to billing issues and are not attributed to any Products.
How to handle Quality Complaints
Each Quality Complaint has a Ticket created by Account Manager. Account Manager collects the information and fills out the Ticket, then assigns to Procurement Dept. Manager. Procurement Dept. Manager then assigns it to Purchaser.
- Once Ticket is assigned, check the information:
- Customer Code;
- Description;
- SO number in ‘Sales Orders’ tab;
- Product specifications and quantities in ‘Products’ tab;
- Vendor and PO number.
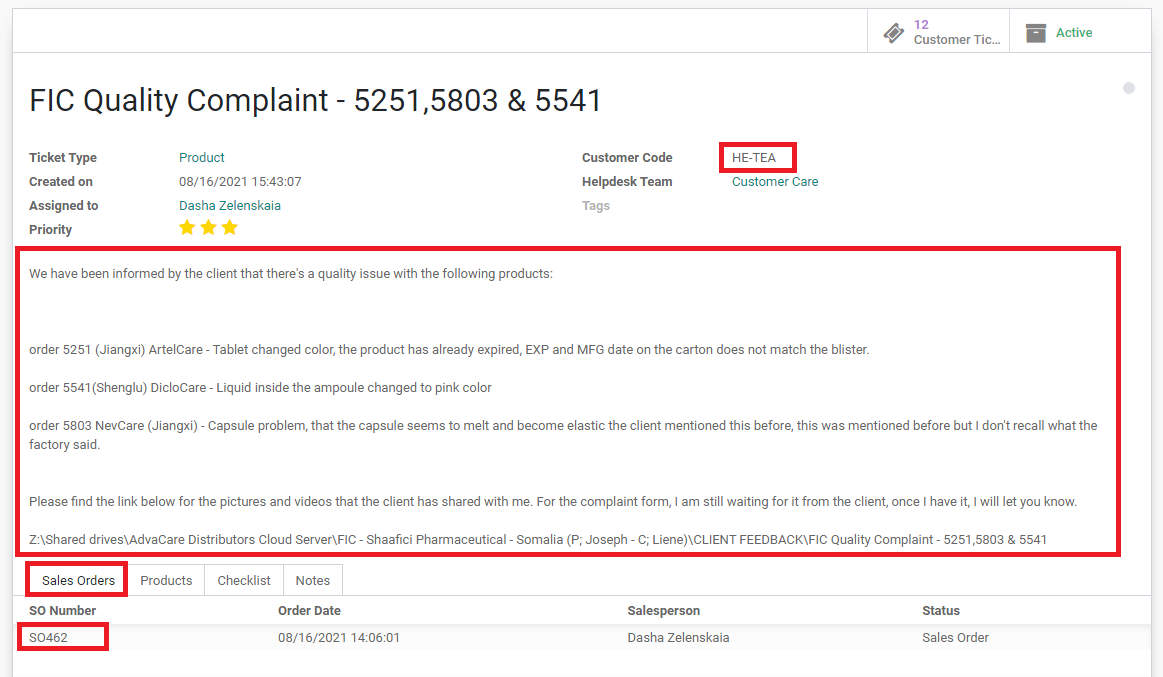

- Check the pictures of defected products based on the link is provided in ‘Description’. Make sure there is enough evidence provided by Account Manager that proves the defect and supports the possible claims for reproduction/refund. The evidence considered sufficient includes the following:
- Images and videos of the goods at the Customer warehouse (the overview of cartons of full quantity/quantity claimed to be defected);
- Images and videos of the random cartons being opened in the warehouse demonstrating the quality issue;
- Proof of storage conditions in the warehouse where the goods are being stored (images and videos);
- Proof of transportation conditions from the Port to the warehouse;
- Official report or notice from the local authorities stating the issue with the product (if available);
- Official test report from the 3rd party lab (if testing was conducted).
- If no sufficient evidence was provided, send a task to Account Manager to request the missing evidence. Make sure the missing evidence is provided before moving forward with the process.
- Fill out COMPLAINT OF PRODUCT QUALITY document that represents the formal complaint from the company. The template can be found in ‘Templates' folder in the file server. Once Purchasing Dept. Manager confirmed it, print and stamp, then save the scanned document in the QC Drive of the file server.
- Send COMPLAINT OF PRODUCT QUALITY together with the product pictures to the Vendor and ask what caused the defect.
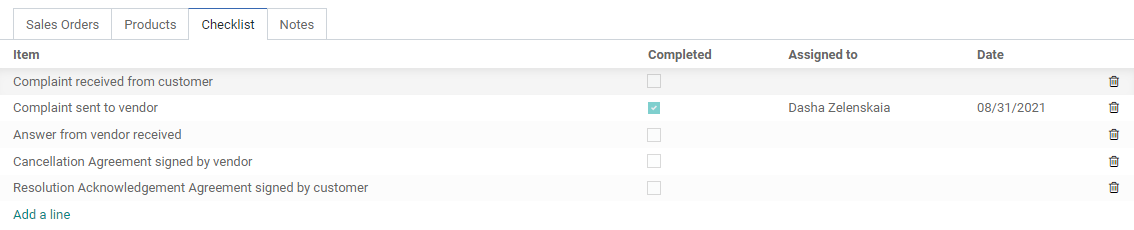
- Complete ‘Complaint sent to vendor’ milestone in ‘Checklist’ tab by filling out the following fields:
- Completed (checkbox);
- Assigned to (Name);
- Date (date when the answer is received).
- Once the answer from Vendor is received, send a comment in the Ticket to explain to Account Manager the reason of the quality defect.
- Record the date of the ‘Answer from vendor received’ milestone in ‘Checklist’ tab.
- If Account Manager requests to get a refund or for Vendor to reproduce the product, negotiate the terms with the Vendor.
- Once the terms are final and confirmed with Account Manager, prepare Cancellation Agreement and send to Vendor to sign. The Agreement must include all the negotiated terms.
- When Agreement is signed, fill out the ‘Cancellation Agreement signed by vendor’ milestone in ‘Checklist’ tab.
- Once the Quality Complaint is resolved, fill out ‘Purchasing’ section in the ‘Notes’ tab:
- Factory Refund Offered – fill the checkbox if there was a refund granted by Vendor;
- Vendor Change – fill the checkbox if there was a change of Vendor to re-produce the product for Customer;
- Product Replacement – fill the checkbox if defected product is going to be (or was) reproduced;
- Purchasing Notes – write any additional information related to resolution of Quality Complaint.
- Send a comment in the Ticket to Account Manager to notify that ‘Notes’ tab has been filled out.
Managing past Tickets
Sometimes it is important to check the previous tickets related to specific product or Vendor. There are several ways to access the information in the System, checking this information before handling a new Ticket can provide context to the situation, or deter Procurement Dept. from placing orders of certain products with certain Vendors. Procurement Dept. is responsible to check the information and make a decision that will help to avoid the same quality defects as experienced in the past.
There are several ways to check the past tickets information.
Product Issues
Product Issues page gives an overview on all the products that had quality defects in the past.
- Open Helpdesk module.
- Click ‘Reporting’ in the top menu bar and choose ‘Product Issues’ from the dropdown.
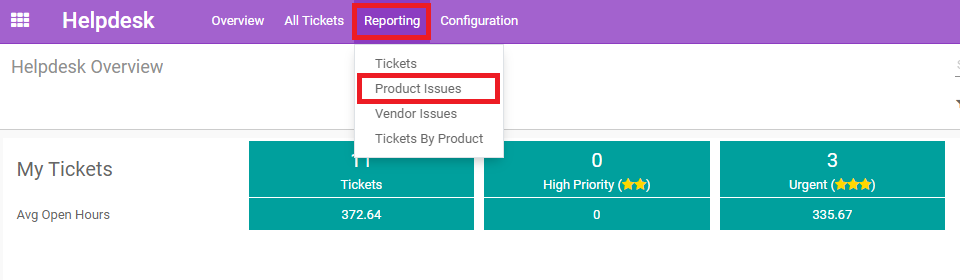
- Choose the time period of requested data and click ‘OPEN ISSUES’.
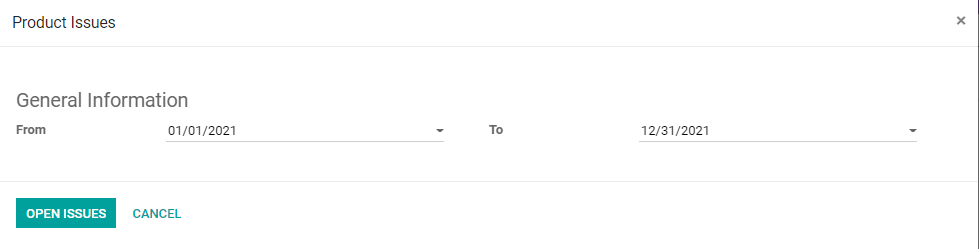
- Evaluate the results. This view shows Total Sales of each product and Total Defects of each product that has a corresponding ticket, and calculates Error Rate (50%) of each product using the formula: Total Defects/Total Sales*100.

Vendor Issues
Vendor Issues page gives an overview on all tickets per Vendor.
- Open Helpdesk module.
- Click ‘Reporting’ in the top menu bar and choose ‘Vendor Issues’ from the dropdown.
- Choose the time period of requested data and click ‘OPEN ISSUES’.
- Evaluate the results. This view shows:
- Total Number of Tickets (Vendor) – count of all the tickets issued per Vendor;
- % Total – number of total Tickets issued divided by total number of Tickets issued for specific Vendor;
- Total Number of Unique Products;
- Error Rate (%) – Total Number of Unique Products divided by total number of Tickets issued for specific Vendor.
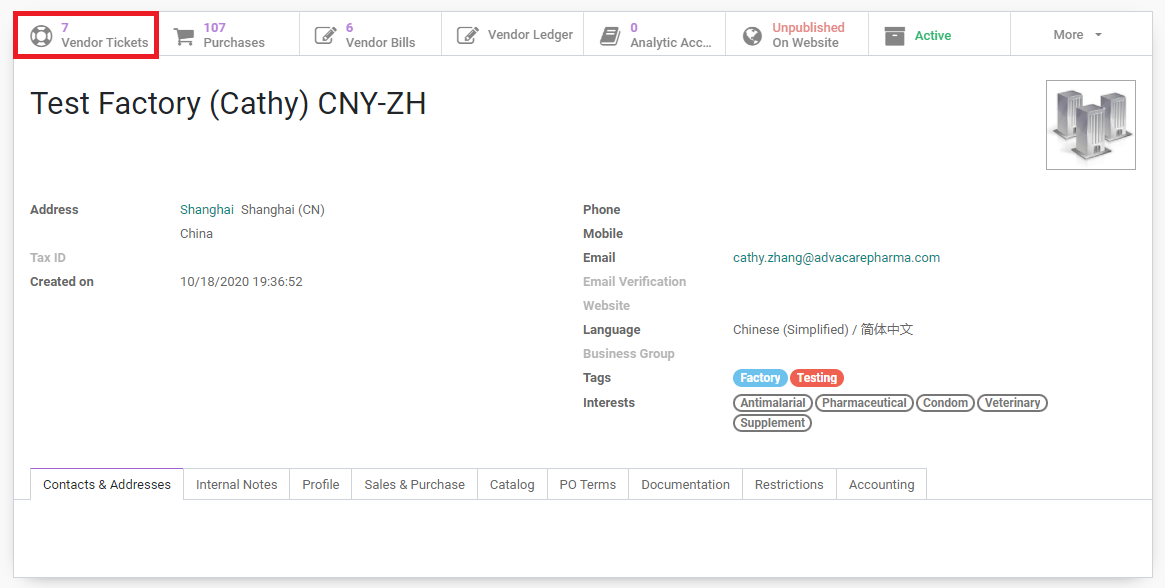
Another way to see all tickets issued for a specific Vendor is the smart button on each Vendor page:
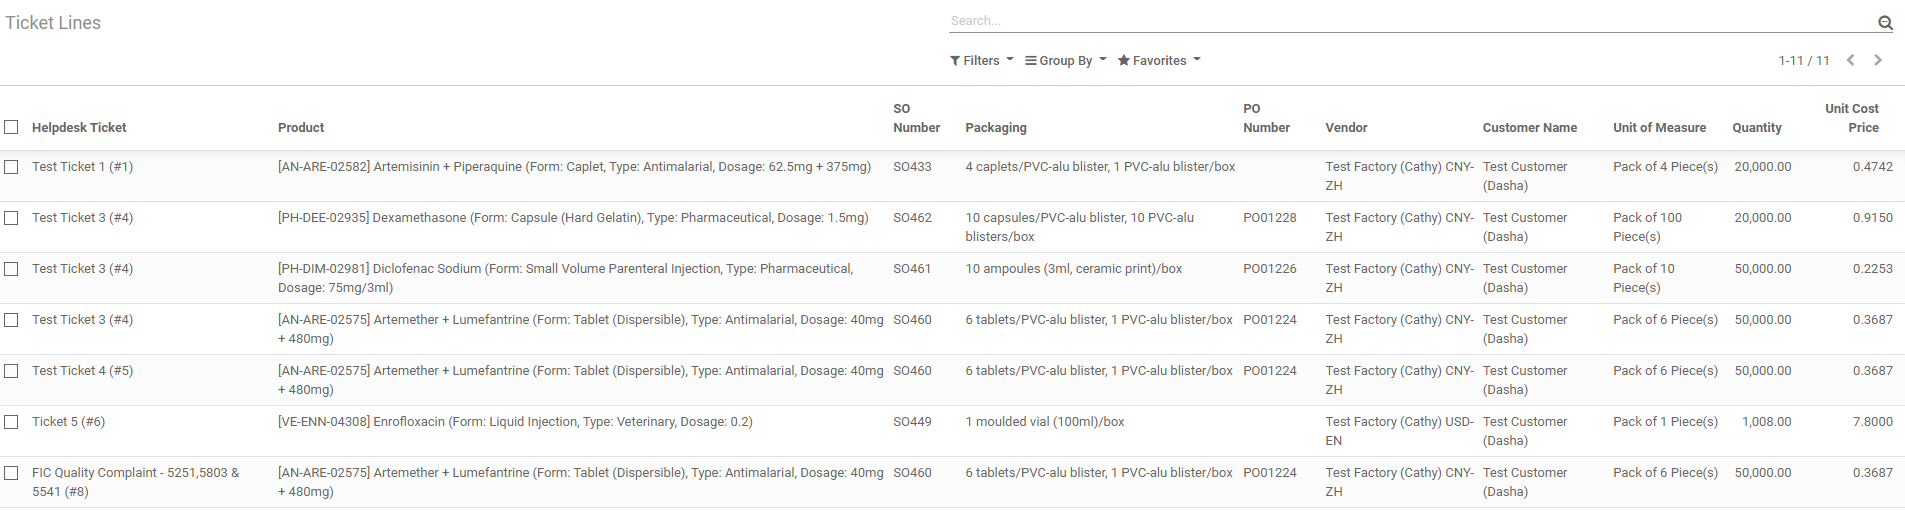
Tickets by Product
Tickets by Product view shows a simple table with the data of each product that was added to Quality Complaint Tickets.
- Open Helpdesk module.
- Click ‘Reporting’ in the top menu bar and choose ‘Tickets by Product’ from the dropdown.
- Evaluate the results. This view shows:
- Helpdesk Ticket number;
- Product specification;
- SO number;
- Packaging details;
- PO number;
- Customer Code;
- Unit of Measure;
- Quantity;
- Unit Cost Price.