The Projects Module (in Odoo ERP) allows members to manage a project together with the whole team, and to communicate with any member for each project and task. It works with projects containing tasks following customizable stages. Also, in AdvaCare, it’s common to use the Agile Methodology, for instance on software development projects but in general perfectly applied in any other required project.
Remembering some definitions from the foundations of Project Management:
Project: A unique endeavor which usually includes a set of unique deliverables; a series of tasks that need to be completed to reach a desired outcome.
Task: An assignment (activity) that needs to be accomplished within a set period of time by the project manager, the project team, or the stakeholder.
In simple words, a project can be internal or customer-oriented. A task is something to perform as part of a project.
And Project Management Methodology:
Agile: it’s a methodology, being understood more as a mindset than a series of steps (e.g Product customers having an idea what they want but not a concrete picture in mind, they have set a quality for the result but not concerned yet what it will look like, projects with high uncertainty and risk involved). In Agile, project phases overlap and tasks are completed in iterations, which in SCRUM (a form of Agile) are called sprints. Sprints are short chunks of time (usually 1~4 weeks). Being able to move quickly and easily, willing to change and adapt, done in pieces, iterative approach, as a response for faster delivery of products (mainly software applications).
How to do Agile with Odoo Projects
Step 1: Creating an Agile Project
To create a new Project in Odoo ERP follow the process described below.
2. From the main dashboard, locate and click the "Projects" Module icon or menu option. This action will open the Projects dashboard.
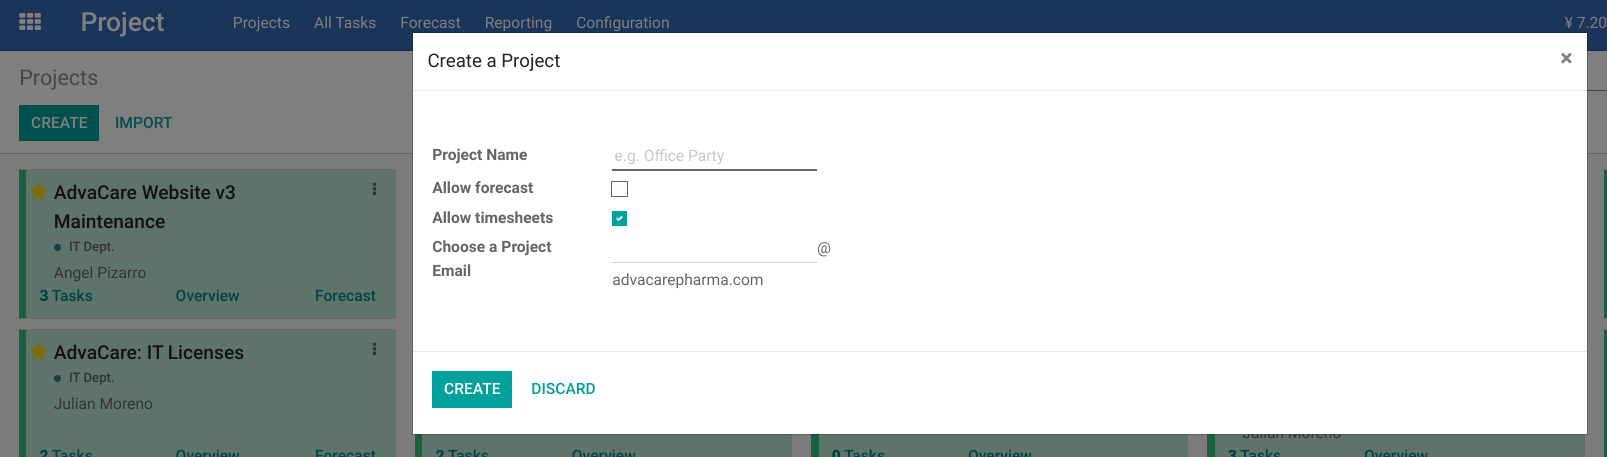
3. In the Projects dashboard, click the "Create" button to start a new project.
Next step is to set a Project Name and other optional values for the project. If the team works independently or if Project Manager wants to control their own working processes and practices in a self-contained space, consider including forecasts and timesheets in the initial configuration of the project.
4. In the pop-up form, fill in the necessary project details:
a. Project Name: It’s a mandatory value, give the new project a meaningful name.
Note: the Project Name must be clear and concise and follow the directions described in the below section of this SOP.
b. Allow forecast: It’s an optional value, useful for forecasting completion dates, deadlines, assigned people, and more in the project.
c. Allow timesheets: It’s an optional value, useful for handling and recording sheets of time spent in a specific task and overview across the project.
d. Choose a Project Email: It’s an optional value, add relevant tags to categorize the project. This option is not being used in AdvaCare.
5. Click the “Create” button.
Requirements for naming the Projects
The names of newly created projects must follow certain directions:
● Clear and Descriptive: The project name must be clear and descriptive, giving an immediate understanding of what the project involves.
● Concise: Keep the project name concise and to the point. Avoid overly long names that may become unwieldy and hard to read.
For example, the project name should not contain a full sentence.
● Specificity: Be specific in the project name to avoid confusion.
● Format: Each word in the project name should be capitalized.
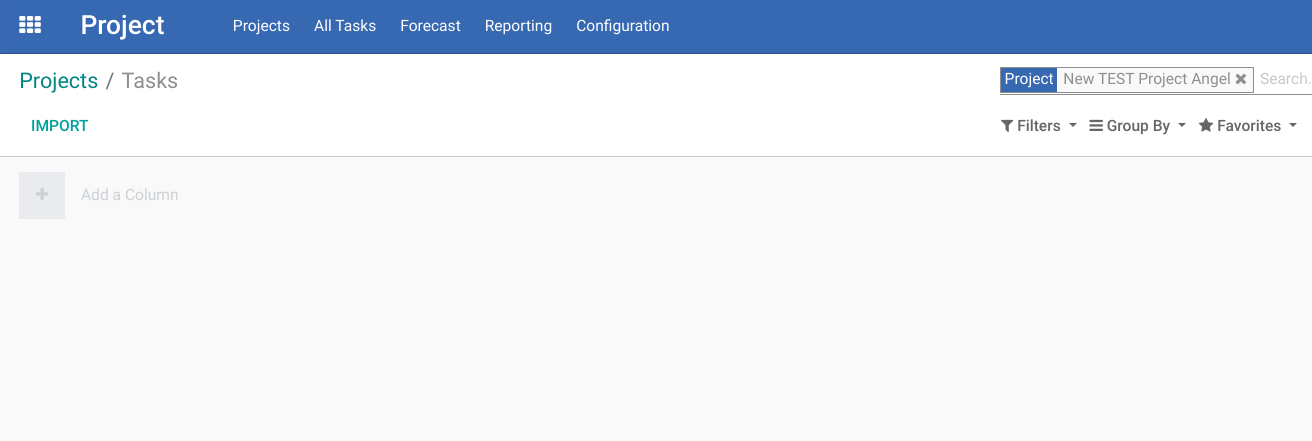
Once the project is created, the next window will display the empty project (new project without stages or tasks, sometimes referred to as empty backlog). The empty backlog (or product backlog) will contain the list of future tasks once they are created, allocated between project stages that will reflect the status of each task. The next steps of the new project creation process are adjusting the project settings, adding the project stages, and creating project tasks and subtasks.
Step 2: Set Project settings
Return to the Projects page (by clicking the “Projects” option in the top menu bar) with the overview of all Projects in the ERP and locate the newly created Project.
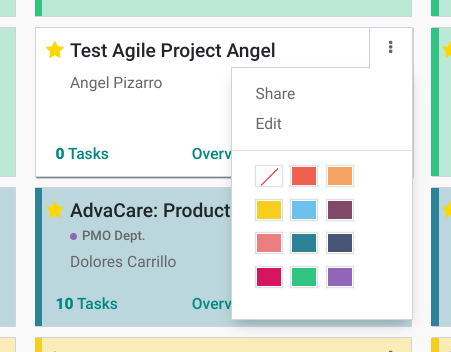
Set a color for the new project by clicking on the 3-dots option and choosing one of the available colors displayed in the palette.
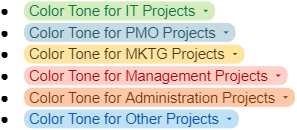
Follow the below list of defined project colors based on the Department or Organization Unit nature:
Note: setting a project color does not impact the color of its tasks and subtasks. Colors of the tasks need to be set separately as described in below sections of this SOP.
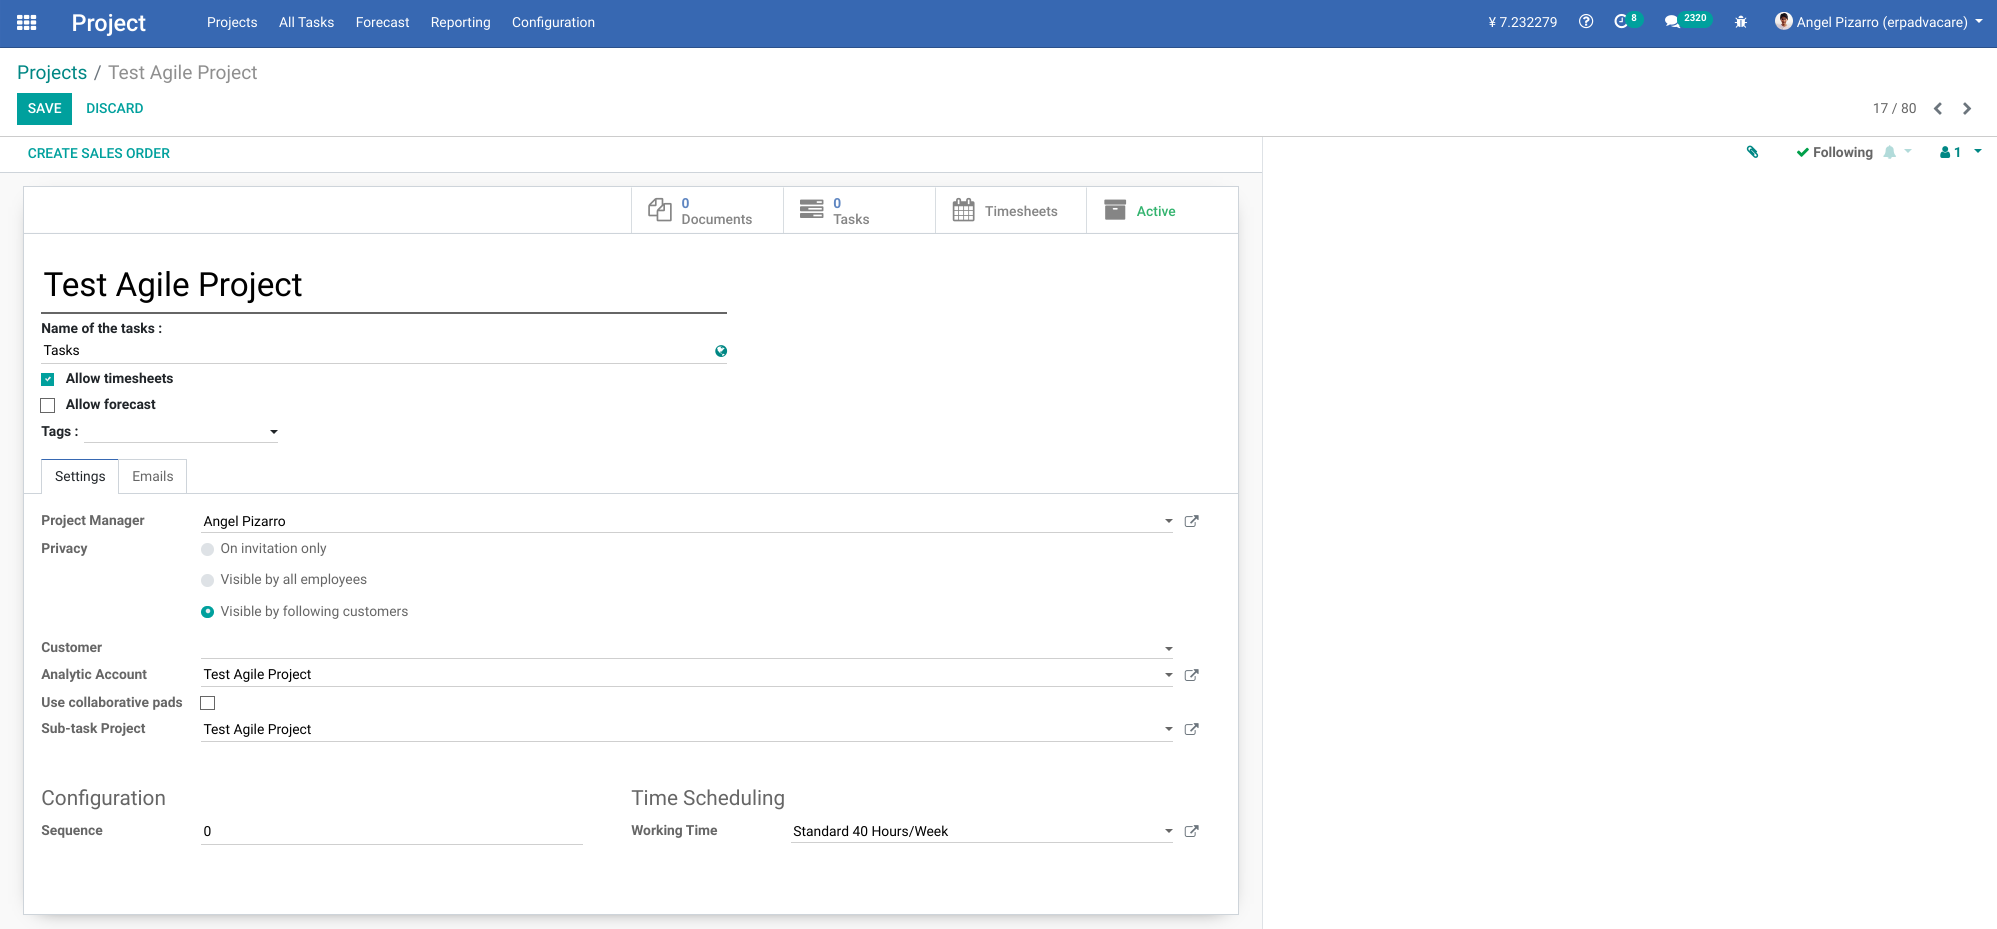
To edit the project settings, click on the 3-dots option one more time and select the ”Edit” option.
The following window will allow to set main followers and privacy configuration of the project. From this window, the Manager can specify the project manager and other information (privacy, tags, etc.).
1. In the window, fill in the necessary project details:
a. Project Manager: the creator of the new project is filled out in this field by default. Change the name of the Project Manager if required.
b. Privacy: Locate it under the “Settings” tab. It’s a mandatory value, give your project a desired access restriction:
Note: in Odoo ERP system there are 3 user types: internal users (currently used for AdvaCare employees), portal and public (usually refer to Customers but these user types are not being used currently).
i. On Invitation only: the corresponding project, tasks, and issues can be viewed only by the internal users who are kept as the followers of that project.
ii. Visible by all employees: the project, tasks, and issues can be viewed by all the employees, no matter whether they are the followers or not.
iii. Visible by following customers: the project, corresponding tasks, and issues can be viewed by all the employees and customers.
c. Followers: Locate it on the right upper corner of the chatter. The followers of a project are the people who will be automatically added as followers in all future tasks created under this project, independently of the assignment. Add the project followers if required.
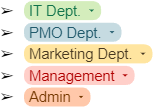
d. Tag: It’s an optional but very necessary value, useful for labeling the project in a certain way. Possible further searching and filtering actions for all your managed projects. The tag of the corresponding Department must always be added to any newly created projects.
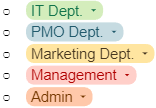
Consider to use and follow the below list of defined project tag colors based on the Department or Organization Unit nature:
Step 3: Link Project stages
Any new Project must be linked to the existing stages. Reusing existing stages provides the possibility to see all tasks from different projects in one pipeline, which simplifies task tracking and time management. There are stages that are mandatory to use in every new project, and stages that are optional.
List of stages for Agile Projects
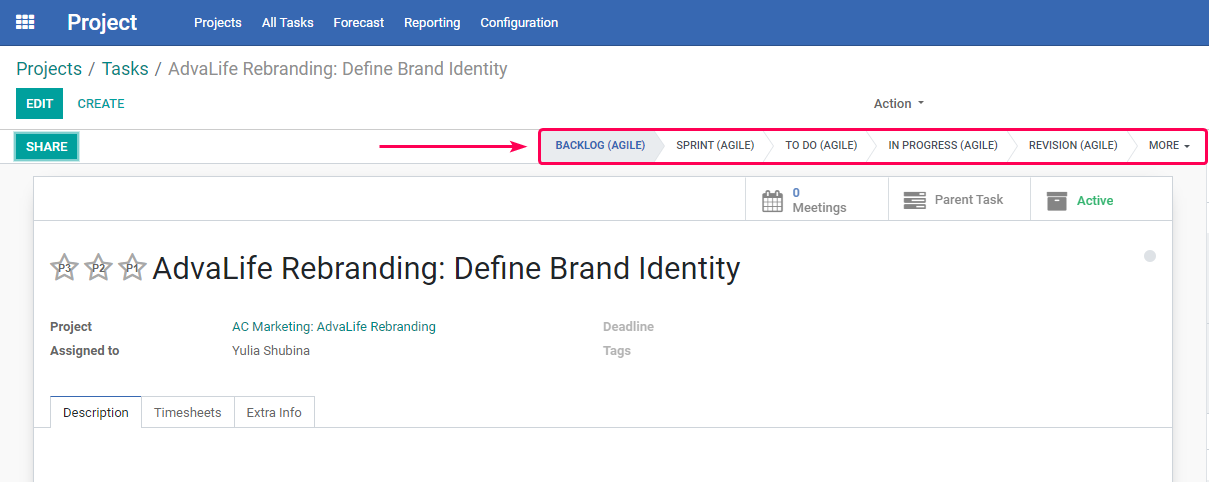
■Mandatory stages for all Agile projects in AdvaCare:
● Backlog (Agile): used to keep tasks and subtasks that are not currently being worked on, but need to be worked on in the future. The tasks/subtasks in this stage are checked and moved to the Sprint stage during Backlog Grooming Session.
● Sprint (Agile): used to contain tasks that will be addressed during upcoming Sprint Iteration.
● To Do (Agile): tasks are moved to this stage during the Sprint Planning Session.
● In Progress (Agile): used to track tasks that are being worked on.
● Revision (Agile): used when tasks are being reviewed during the approval process.
● Done (Agile): used to move completed tasks.
■Optional stages commonly used in IT Agile projects in AdvaCare:
● Code Review (Agile)
● Testing in Dev (Agile)
● Ready to Deploy to Prod (Agile)
● Testing in Prod (Agile)
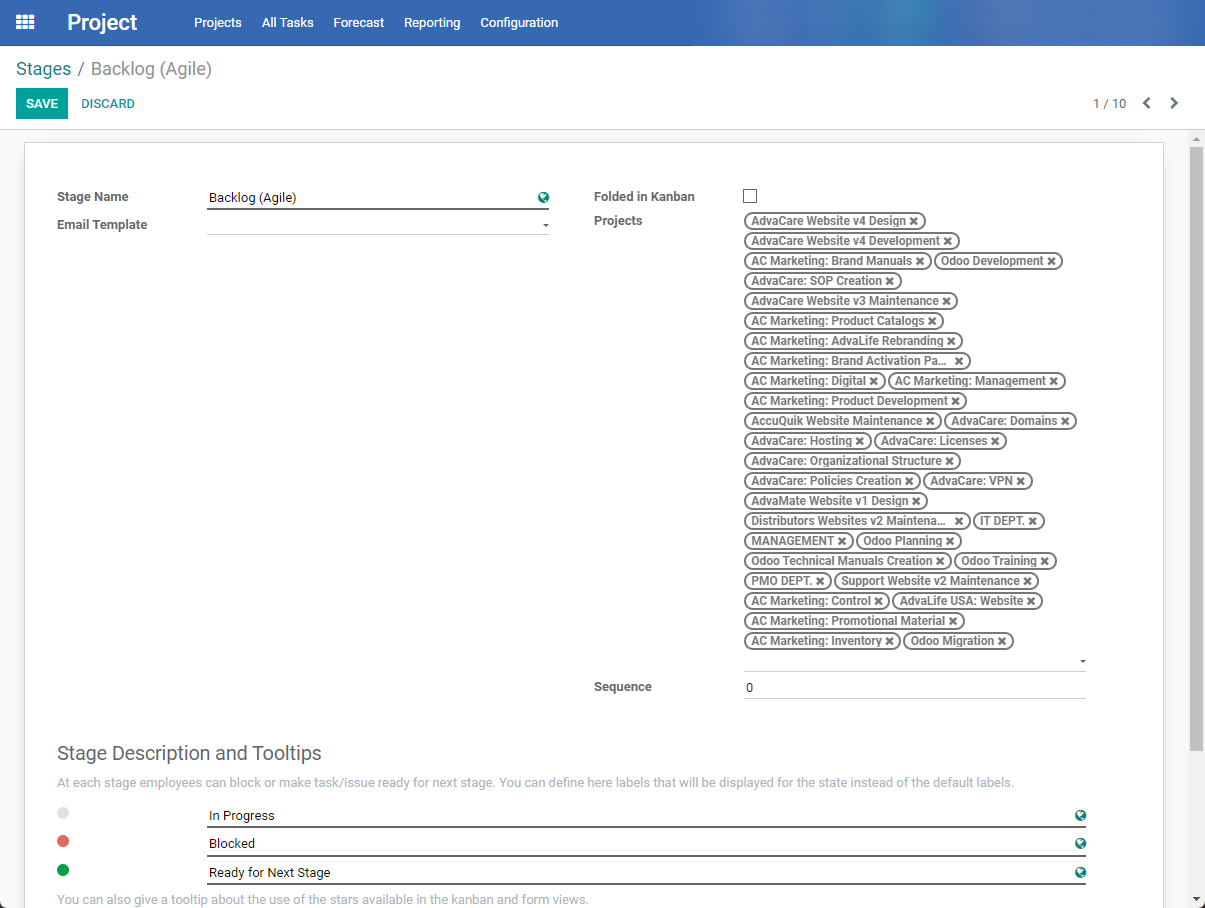
Following the steps below link the existing mandatory stages to the new project:
1. Go to the Stages sectionin Odoo Project module. The overview of stages is displayed.
2. Select a specific stage and click the "Edit" button.
3. In the "Projects" field, type the desired project name. Once the project name has been displayed (in the search result dropdown), select it.
4. Click on the "Save" button. Now the project is connected to an existing stage.
Note: to return to the overview of stages, click on the "Stages” breadcrumb.
5. Repeat the process from point 2 to 4, until all the required stages are linked to the new project.
Step 4: Creating tasks/subtasks in the backlog
In Odoo Projects, a task is a specific unit of work or activity that needs to be accomplished as part of a broader process or project.
However, it’s important to know that “task” is a general term that could be categorized into 4 types from the perspective of the work scope of the assignment:
● Epic (similar definition to milestone, it could handle a bigger scope than a story)
● Story (usually used when the scope is bigger than a normal task)
● Task (or standard assignment, reference unit of measure for any assignment)
● Bug (optionally, also known as issues)
Note: from the technical perspective any assignment in Odoo system is a task element or a subtask component, independently its related work scope.
Labeling tasks/subtasks of a project with the correct tags helps to organize the project assignments and track tasks progress.
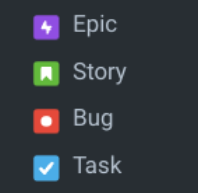
Based on the task types, it is mandatory to add one and only one of the following tags to a newly created task under the new project:
● Epic: the tag used to label the tasks that have huge scope. This tag is not commonly used at AdvaCare.
● Story: the tag used to label the tasks which have big scope, the main task of a project which contains project overview, or tasks which are ongoing and will never be moved through the pipeline of a project.
● Task: the tag used to label tasks which refer to a specific unit of work, or represent a separate assignment under the project.
● Bug: the tag used to label the tasks created to report issues with software or hardware. This tag is used mostly for IT projects.
4.1 Creating Tasks in the backlog
Follow the steps below to create tasks in the ERP.
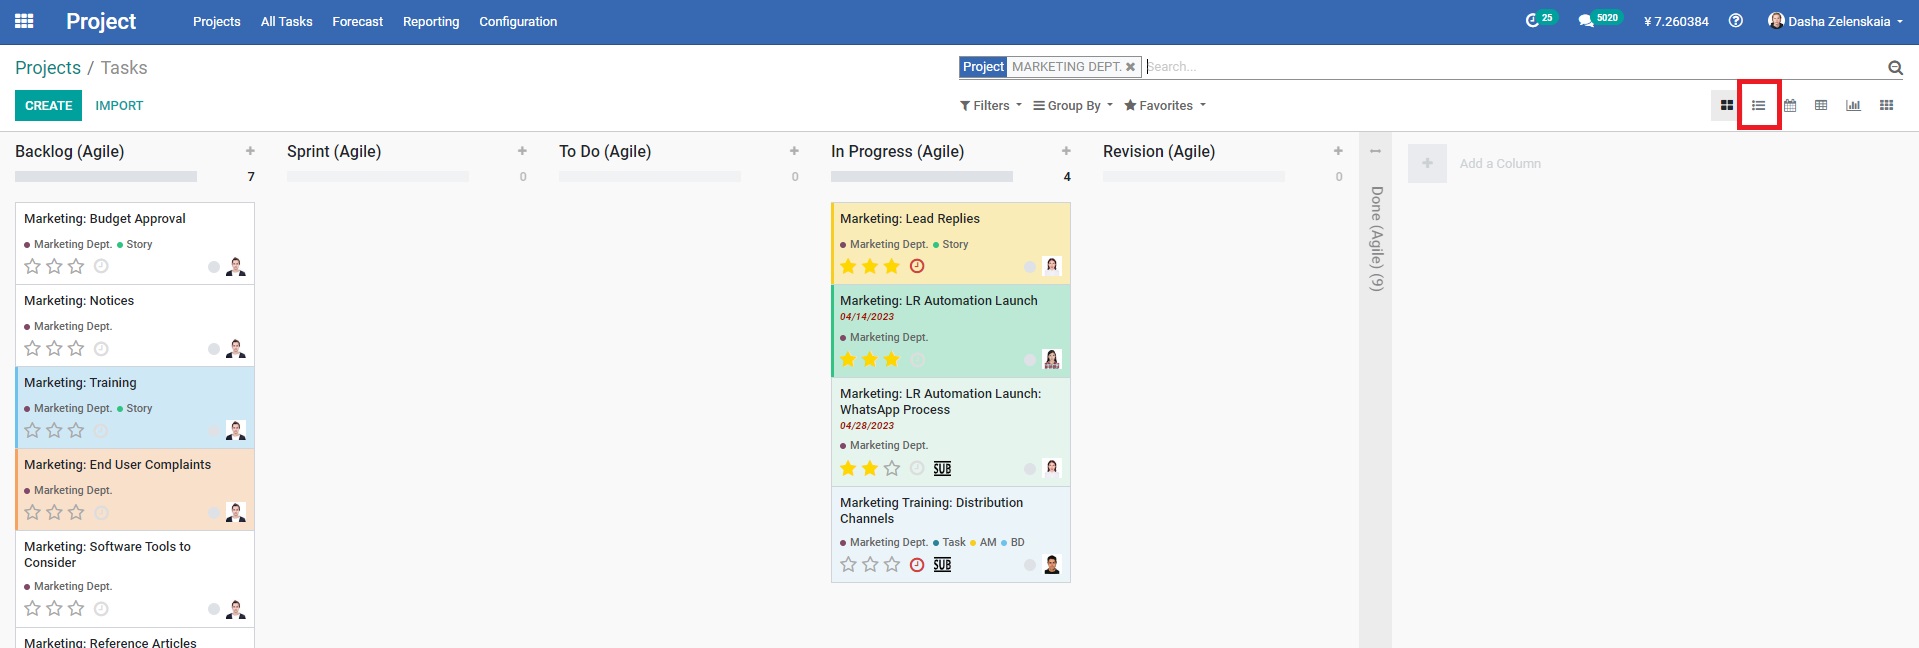
1. Navigate to the relevant Project.
2. Switch to the “List” view in the top right of the screen.
3. Click the "Create" button to add a new task.
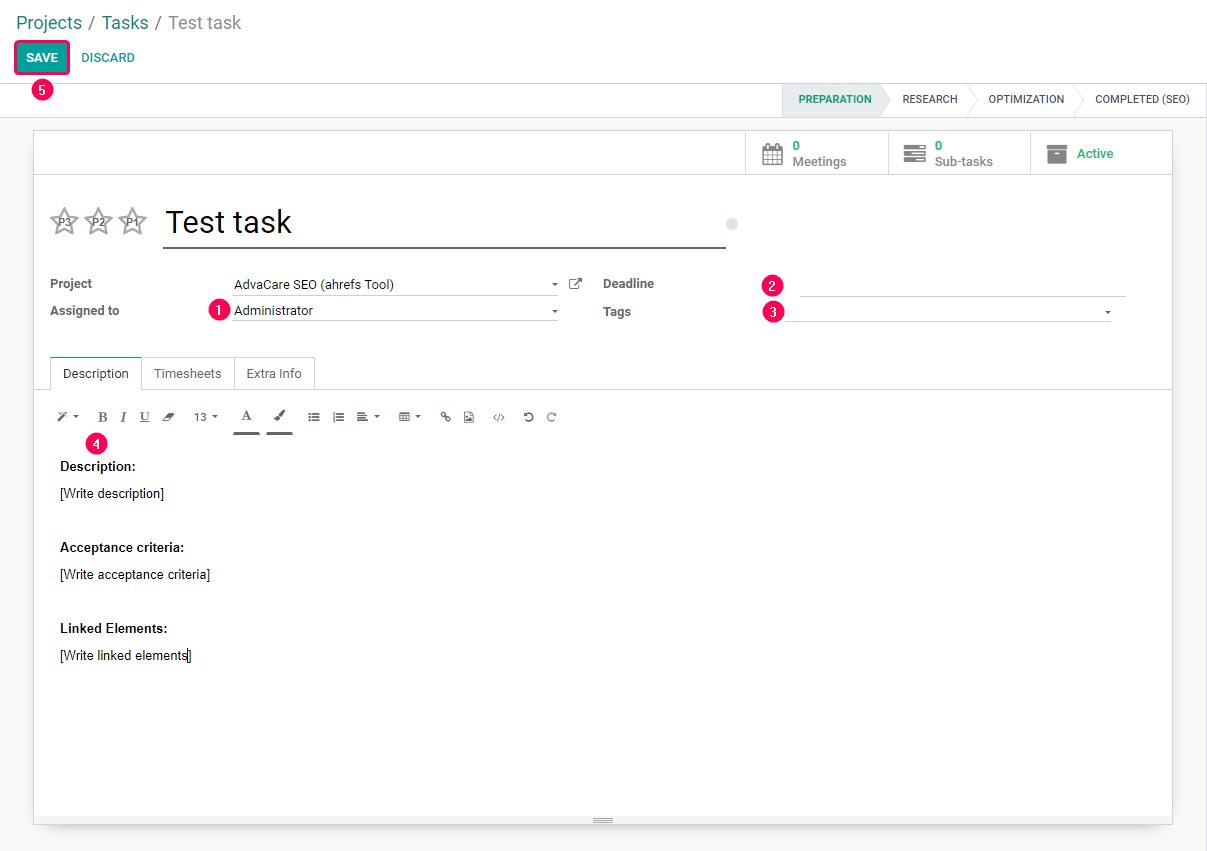
In the task window the following task details must be filled out: task name, assigned to, tags, deadline, task description.
4. Fill out the Task Name.
The names of Tasks/Subtasks must be clear and concise. Follow the directions for naming Tasks/Subtasks:
● Clear and Descriptive: The task name must be clear and descriptive, giving an immediate understanding of what the task involves.
● Concise: Keep the task name concise and to the point. Avoid overly long names that may become unwieldy and hard to read.
For example, Task names should not contain a full sentence.
● Action-Oriented: Use action verbs to indicate what needs to be done.
For example, "Process Customer Orders" or "Review Monthly Reports"
● Specificity: Be specific in the task name to avoid confusion.
For example, instead of "Update Records", use "Update Customer Contact Information".
● Hierarchy: If tasks are organized hierarchically, use a structure that clearly indicates the relationship between tasks and subtasks.
For example, when naming a Subtask use the structure "Task Name > Subtask Name".
● Format: Each word in the task name must be capitalized.
For example, instead of “Main campaign > Southeast asia”, use “Main Campaign > Southeast Asia”.
5. Fill out “Assigned to:” with the name of a specific team member or stakeholder. Keep the task assigned to yourself if it is not ready to be assigned at the moment and will be kept in the Backlog stage.
6. Fill out the “Deadline” field: set the task's due date.
7. Add Tags: label the task with the tag that indicates the task type, and the tag of the relevant Department (e.g. IT Dept. Marketing Dept. etc.). Every newly created subtask musthave at least 2 tags: the tag indicating the task type,
and the tag of the relevant Department.
8. Fill out Task Description by adding detailed information about the task following the basic task description format.
● Description: a detailed explanation of what needs to be done and how to do it.
● Acceptance Criteria: list the requirements for the deliverables (if any) and criteria that will be used to evaluate the results. The requirements for the deliverables need to be as detailed as possible.
● Linked Elements: add any documents/folders needed to work on the task.
Note: every newly created task in AdvaCare must follow the above description structure.
9. Indicate Priority of the task by choosing one or several stars on the left from the Task Name:
● P1 (3 stars): high priority task
● P2 (2 stars): moderate priority task
● P3 (1 star): low priority task
After the information relevant to the task has been entered, click the "Save" button.
Once all the new tasks have been created (with the proper task type tags set), return to the kanban view of the project and start to prioritize the tasks in the backlog. In Odoo Projects, it is possible to rank or prioritize tasks or stories by dragging and dropping them in the order that they should be worked on.
Note: in the kanban view of the project, Odoo usually displays the tasks with highest priority at the top and similarly low priorities assignments at the bottom, by default.
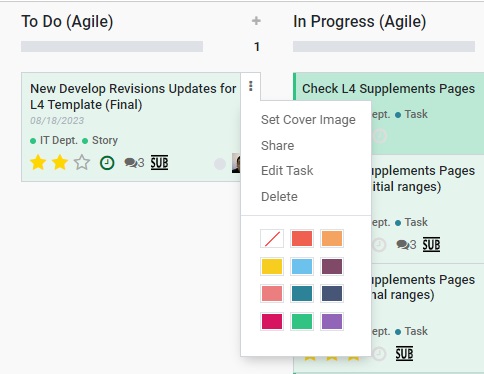
While in kanban view, set the colors of newly created tasks. The color of a task can be set by clicking on the 3-dots option in the top right corner of the task card and selecting the suitable task color. The colors of all the tasks can be the same and follow the Project color, or each task can have a different color, depending on the Project Manager preferences.
Note: the color of subtasks created in future will automatically follow the color set for the parent task, but lighter shade.
Continue to create stories and tasks during the project's lifetime when required, as Agile Methodology involves continuous learning and adapting.
4.2: Creating Subtasks in the backlog
Project tasks sometimes cover a big work scope which makes it difficult to track the completion of the assignment (or at least part of it). In Odoo Projects subtasks are used for splitting the big work scope into smaller pieces of work.
The process of creating subtasks is the same as creating tasks initially (following the related steps) with one additional step of linking a parent task value to the child task.
1. Navigate to the relevant Project.
2. Switch to “List” view in the top right of the screen.
3. Click the "Create" button to add a new task.
In the task window the following task details must be filled out: task name, assigned to, tags, deadline, task description.
4. Fill out the Task Name.
The names of Tasks/Subtasks must be clear and concise.
Follow the directions for naming Tasks/Subtasks:
● Clear and Descriptive: The task name must be clear and descriptive, giving an immediate understanding of what the task involves.
● Concise: Keep the task name concise and to the point. Avoid overly long names that may become unwieldy and hard to read.
For example, Task names should not contain a full sentence.
● Action-Oriented: Use action verbs to indicate what needs to be done.
For example, "Process Customer Orders" or "Review Monthly Reports"
● Specificity: Be specific in the task name to avoid confusion.
For example, instead of "Update Records", use "Update Customer Contact Information".
● Hierarchy: If tasks are organized hierarchically, use a structure that clearly indicates the relationship between tasks and subtasks.
For example, when naming a Subtask use the structure "Task Name > Subtask Name".
● Format: Each word in the task name must be capitalized.
For example, instead of “Main campaign > Southeast asia”, use “Main Campaign > Southeast Asia”.
5. Fill out “Assigned to:” with the name of a specific team member or stakeholder. Keep the task assigned to yourself if it is not ready to be assigned at the moment and will be kept in the Backlog stage.
6. Fill out the “Deadline” field: set the task's due date.
7. Add Tags: label the task with the tag that indicates the task type, and the tag of the relevant Department (e.g. IT Dept. Marketing Dept. etc.). Every newly created subtask musthave at least 2 tags: the tag indicating the task type,
Note: the “Epic” and “Bug” labels should not be used for subtasks since conceptually, there is no bigger work scope than an Epic (so no existing parent task) and bugs are efficiently managed just as simple tasks.
and the tag of the relevant Department.
8. Fill out Task Description by adding detailed information about the task following the basic task description format.
● Description: a detailed explanation of what needs to be done and how to do it.
● Acceptance Criteria: list the requirements for the deliverables (if any) and criteria that will be used to evaluate the results. The requirements for the deliverables need to be as detailed as possible.
● Linked Elements: add any documents/folders needed to work on the task.
Note: every newly created task in AdvaCare must follow the above description structure.
9. Indicate Priority of the task by choosing one or several stars on the left from the Task Name:
● P1 (3 stars): high priority task
● P2 (2 stars): moderate priority task
● P3 (1 star): low priority task
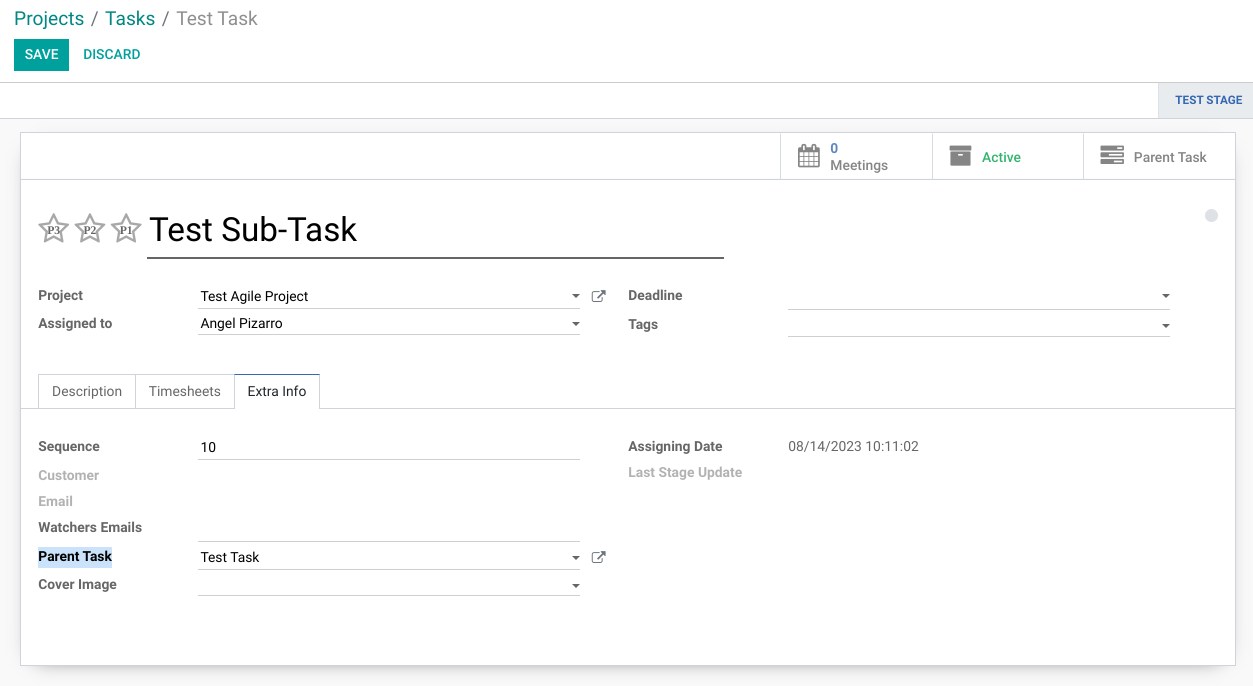
10. Finally, and the most important part for adding a subtask, switch to the “Extra Info” tab, and fill out “Parent Task” by typing the relevant parent task name and choosing it from the dropdown.
After the information relevant to the task has been entered, click the "Save " button.
Step 5: Tracking Progress
As team members work on tasks, they must move the tasks into the relevant stages, for example "In Progress", “Revision” or "Done" based on their progress.
The overall project progress can be tracked by checking the completion status of individual tasks.
Kanban View
AdvaCare employees can have an overview of the different tasks thanks to the multiple views available with Odoo. Three main views will help to plan and follow up on employees’ tasks:
1. The kanban view: the view of tasks displayed in columns allocated to project stages, which is mainly useful for Agile projects. This view is often referred to as Pipeline.
2. The list view: tasks are displayed in a list (using timesheets).
3. The calendar view: tasks are displayed in the calendar based on their Deadlines (uncommonly used).
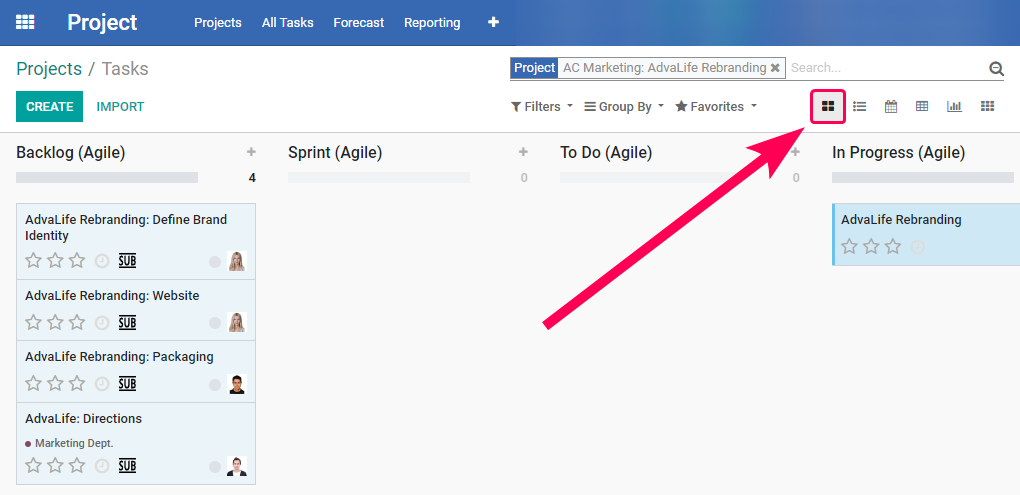
The Kanban view is the default view when accessing a project, but if the AdvaCare employee is in another view, it’s possible to go back to it any time by clicking the kanban view logo in the upper right corner.
Kanban Stages
The Kanban view is a post-it like view, divided in different stages. It enables the AdvaCare employee to have a clear picture of the stages where the tasks are in, higher priorities, assigned people, among other valuable information.
In simple words, the stages in kanban view is the progress status of a specific assignment in the project.
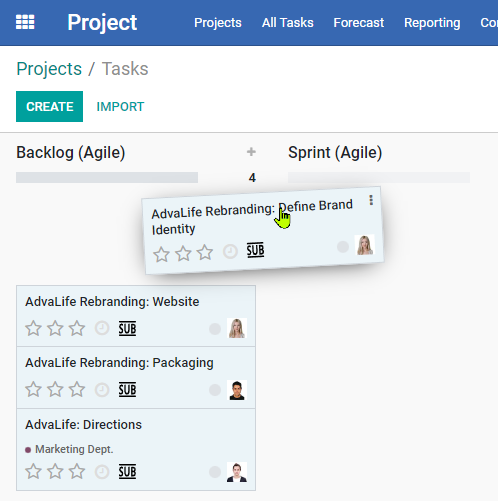
The stage of a task can be changed in 2 ways:
● From the Kanban view, this can be done by dragging the task to the column corresponding to the desired stage.
● Or once inside the task, click on the desired stage.
Note: according to the defined stages set for the project, enforce the team to constantly update the progress status of the tasks by updating the stage of where a task is located. Doing it will properly reflect the status of a task and help all the team members to see the progress of the work.
Step 6: Communication and Collaboration
Utilize the built-in communication tools:
● Chatter: Each task has a "Chatter" feature, a communication section (left-side panel inside the task) where team members must leave comments and communicate.
● Attachments: Share relevant files and documents related to the project or task.
Note: while it is possible to add attachments to any task message, any document related to the task mustbe saved in the relevant folder in Shared Drives.
● Private Channel: Opening a dedicated group chat in the Odoo Discuss module would help to involve your project team and gather quick communication with stakeholders.
Step 7: Reporting and Analysis
Go to the "Reports" section to access various reports related to your projects, such as task progress, project completion status, and more.
Utilize the graphical representations and data to assess project performance.
Launching & Landing a project
Step 8: Closing a Project
Once all tasks within a project are marked as "Done," the project can be considered completed.
Archive the completed projects to keep the workspace organized.
Note: archiving a project is only recommendable when all the tasks of a project have been properly marked as “Done”. Archiving a project will automatically archive all the inner opened tasks.
To archive a project, navigate to the project settings by clicking on the 3-dots option (one more time) and select ”Edit” option.
Click the green “Active” smart button at the right upper corner of the form (green “Active” smart button will turn into red “Archive” button on hover). The text inside the button will turn into “Archived” and the color will change to red. This indicates that the project is now archived.
Step 9: Maintenance and Updates
● Regularly review and update projects’ status, task assignments, and deadlines.
● Make necessary adjustments as the project progresses or requirements change.
● Enforce project team members to update the progress of their tasks assignments updating the task and the stage where it is located.
● More updates in detail can be done on related agile meetings (e.g. Sprint planning, Backlog grooming, etc) with the project team members.
Step 10: Training and Support
● Provide training and support to team members who are new to using the Projects Module in Odoo ERP.
● Address any questions or issues team members might have during the process.
● Enforce the main concepts of Agile with the Project team every time is required.