Lead Reply refers to the process where a Marketing Person goes through each inbound inquiry from a Lead (potential customer) that shows interest in AdvaCare brands and products. In the process, Marketing Person will analyze and vet the inquiry before proceeding to either:
● escalate the Lead as an Opportunity to a Business Development (BD) Salesperson, or
● to process other ways if Lead is deemed unqualified yet.
LR (Lead Reply) Module is created on the ERP system in order to automate the lead reply process handled by Marketing Dept. The module allows for a semi-automated processing of lead replies, with features of labeling, scheduling a reply, assigning and converting the Leads within the module.
All Leads in the LR Module are incoming emails on the
sales@advacarepharma.com
gmail account.
Note: There may be a time delay (minutes) between an incoming email to the gmail account and a Lead to be shown on the LR Module.
Note: Do
NOT
open a new incoming email on sales@ inbox before the Lead shows up on the LR Module. This may cause the inquiry to not show up as a Lead on the LR Module. If this happens, proceed to Troubleshooting Mistakes/Bugs on the LR Module SOP
Leads Sources
Primarily, Leads come from:
5. Advacare Pharma Social Media Accounts (Facebook & LinkedIn)
Brand Leads come from one of the following Brand Websites contact forms or direct emails of the website (info@):
In the LR Module, each Lead will have labels to identify where it comes from. These labels are called “Inquiry Source”. Some of these labels are generated automatically, while some need to be added/revised manually. Following are the different Inquiry Sources that are in the System, as well as information of the actual source:
Automated Labels:
|
Name
|
Source
|
|
advacarepharma.com
|
AdvaCare Pharma Website Forms |
|
Tawk.to
|
Inquiries through chat on AdvaCare Pharma Website |
|
accupointinjectioninstruments.com
|
AccuPoint Website Forms |
|
accuquiktestkits.com
|
AccuQuik Website Forms |
|
staydryincontinenceproducts.com
|
StayDry Website Forms |
|
stayguardwoundcare.com
|
StayGuard Website Forms |
|
staysafe-condoms.com
|
StaySafe Condoms Website Forms |
|
staysafemedicalclothing.com
|
StaySafe Medical Clothing Website Forms |
|
Direct Email to AdvaCare Pharma
|
Direct email to AdvaCare (info@) |
|
Direct Email to Accupoint
|
Direct email to Accupoint (info@) |
|
Direct Email to AccuQuick
|
Direct email to AccuQuik (info@) |
|
Direct Email to StayDry
|
Direct email to StayDry (info@) |
|
Direct Email to StayGuard
|
Direct email to StayGuard (info@) |
|
Direct Email to StaySafe Condoms
|
Direct email to StaySafe Condoms (info@) |
|
Direct Email to StaySafe Medical Clothing
|
Direct email to StaySafe Medical Clothing (info@) |
|
Newsletter Reply
|
Reply to Newsletter via email (not including website UTMs) |
|
AFR Website
|
Inquiries to AFR client: admin@africahealthcarepharma.com |
|
BIO Website
|
Inquiries to BIO client: admin@bioticpharmacy.com |
Other Labels that may be used by Marketing Dept.
| Name |
Source |
| Direct Email |
Emails directed to sales@ / BD Salesperson |
| Facebook |
Inquiries to AdvaCare Pharma Facebook account |
| LinkedIn |
Inquiries to AdvaCare Pharma LinkedIn account |
Other Labels (not applicable to Marketing Dept. at the moment):
| Name |
Source |
| WhatsApp |
Inquiries to AdvaCare main WhatsApp account |
| Phone System |
Phone calls |
| Distributor Portal |
AdvaCare Distributor Portal (launch date TBD) |
| Twitter |
Inquiries to AdvaCare Pharma Twitter account |
| Google Plus |
Inquiries to AdvaCare Pharma Google Plus account |
Lead Reply Email “Senders”
Different email templates for different Lead Replies are present in the module and can be selected accordingly for each Lead Reply. When a Lead Reply is sent out by a Marketing Person, the System sends the email on behalf of one of these 3 accounts to the Lead:
● International Sales Department,
● Henry Mitchell (Sales Specialist)
● Vina Teng (Business Development Dept. Manager)
The signature of each account is already implemented in the email templates, no actions required. All outgoing emails from the System can also be found on the “Sent” folder of the
sales@advacarepharma.com
gmail.
Lead Reply Working Environments
Other than the LR Module, there are other working environments that a Marketing Person will need to access in the normal process of handling LRs. All working environments when handling Lead Replies include the following:
1. LR Module
a. Leads Overview
b. Lead page
c. Opportunities (Sales - My Pipeline)
2. Gmail Inboxes
b. Business Development Dept. Salespersons’ inboxes. These email addresses are delegated to and can be accessed from the sales@ gmail account.
3. System Database
Before starting with the daily Lead Reply processes, Marketing Person may want to first open all these work environments on separate tabs.
Note: At the official launch of LR automation, Marketing Dept. is required to cross-check the
sales@advacarepharma.com
Gmail account with the Module consistently. The detailed requirements are stated in the LR Module Inbound Leads Quality Control SOP.
Locating the LR Module
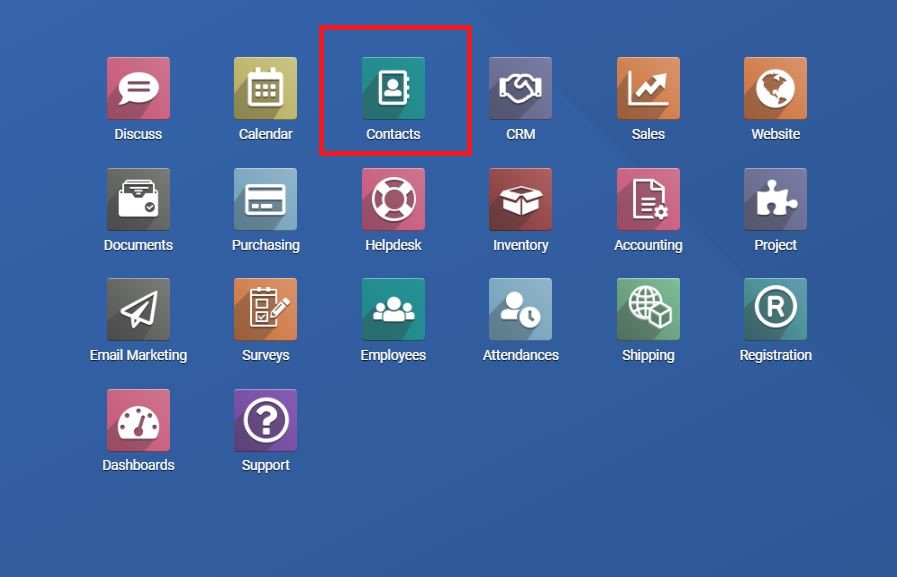
1. On the Odoo home page, click on the “CRM” module.
3. All inbound Leads will be shown on the table under this page, reflecting the Leads received on the
sales@advacarepharma.com
Inbox.
LR Module Overview
1. The Leads table will show a row of Leads in the order of time from most recently received on the top, to the oldest in the bottom.
2. Unopened Leads will be displayed with bold text, while Leads that have been opened and read will be displayed with normal text as the System recognizes it as “Read”.
Note: When a Lead is “Read ”, “Unread ”, “Archived ”, and/or “Unarchived ”, the Lead will automatically move to the top of the row regardless of the order of time when it is created. Regardless, the correct “Created On” order sequence can be filtered again by clicking on the “Created On” column title.
3. Each column of the table shows the following information:
● Created on: shows the date and time the Lead was received.
● Lead: title of the Lead which can be the email title or the name of the website form the Lead comes from.
● Contact Name: name of the contact person of the Lead that is automatically pulled from the forms. It may be empty if the System fails to recognize the name field.
● Country: country name filled in by the Customer from the website form. It may be empty if not specified in the correct field.
● Email: email address of the Lead.
● Salesperson: this field will show the BD Salesperson assigned to the account if Lead is from an existing Customer already in the System. In case it is a new Lead, the column will remain empty.
● Tags: tags are applied on Leads that have been processed by a Marketing person to identify the type of Lead. The column will remain empty for new Leads.
● Inquiry Source: indicates where the inquiry comes from. It may be empty if a Lead is created from direct emails to the sales@ gmail account and can be applied manually.
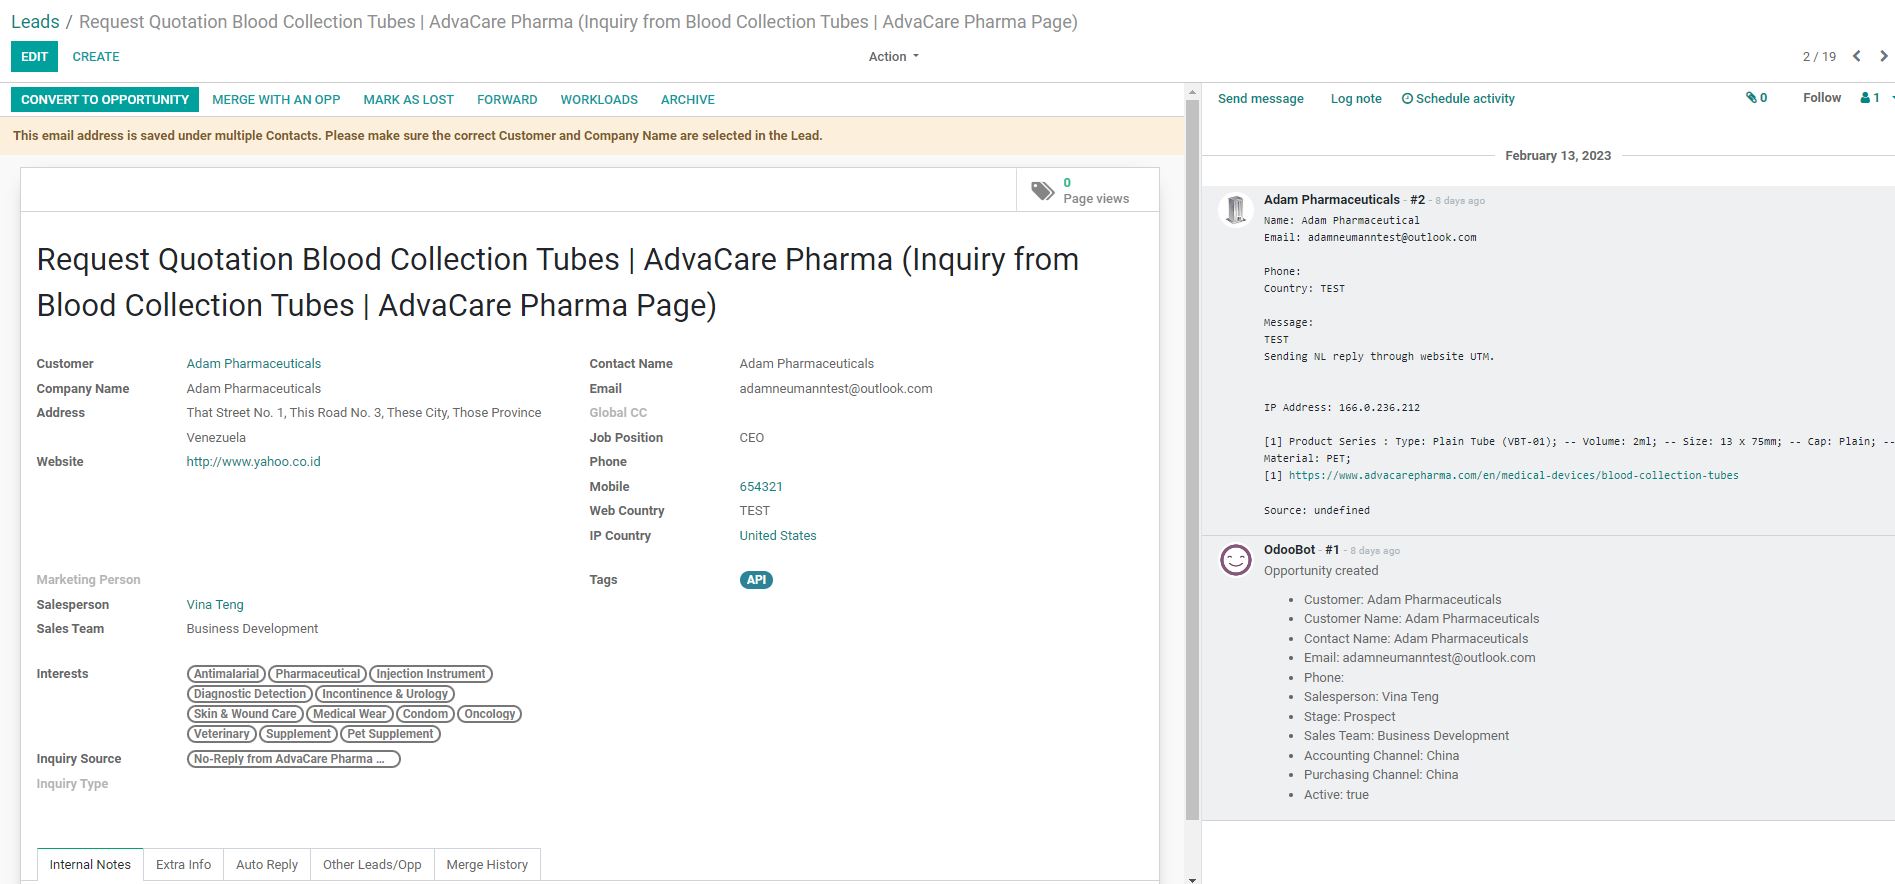
Lead Page
The Lead page is opened when one of the Leads in the Overview table is clicked on. It contains all information of the inquiry as understood by the System. A few important functionality that this page can immediately inform Marketing Person is as follows:
● Whether an inquiry is coming from an existing Customer already in the System.
● Whether a Lead has sent multiple inquiries at the same time.
● Whether a Lead has been mistakenly saved under multiple companies in the System.
● Whether a Lead is coming from a Vendor in our System, rather than a Customer.
The above points are important to know right away, so that Marketing Dept. can process the Lead accordingly as efficiently as possible. Following are the different fields available on every Lead page, whether it is filled in or not based on information already available in our System.
4. Company name: shows the name of the Company if it is already in the System.
5. Address: shows the address of the Company if it is already in the System.
6. Website: shows the name of the Website if it is already in the System.
7. Marketing Person: empty field to be filled in when the Lead will be processed by a Marketing Person.
8. Salesperson: shows the assigned Salesperson of this Customer if it is already in the System.
9. Sales Team: shows the Sales Team of the Salesperson if it is already in the System. It is normally shown as “Business Development” team for Customers that have never placed an order, and will show “Account Manager” for Customers who have placed an order prior.
10. Interests: shows the product ranges that the Customer has previously shown interests in.
11. Inquiry Source: generally auto-filled field that shows the source of where Customer sent their inquiry from either main Advacare website/email, brand websites/emails. Direct emails for sales@ email are not auto-filled.
12. Inquiry Type: field only to be filled in if the Lead is to be processed as Lead Reply, to determine which appropriate LR1 to be sent out.
13. Contact Name: contact name shown from the client’s initial inquiry. It may not auto-fill if it is a part of the content or if the inquiry is submitted from Tawk.to form.
14. Email: email of the Lead that will be the primary contact method.
15. Global CC: shows other emails CC’d from the Customer side.
16. Job Position: only filled in when a contact person of a company already in the System is resending inquiry.
17. Phone: phone number of the Customer’s company
18. Mobile: mobile phone number of the Customer’s company
19. Web Country: manually filled in field from website forms filled in by the Customer.
20. IP Country: auto-generated country that the System recognizes from the sender’s IP address.
21. Tags: tags that are to be applied by Marketing Dept. when handling the Lead, depending on the type of Lead.
BOTTOM TABS
22. Internal Notes: space where if required, can be used to write any information regarding the Lead. It is preferred that all information regarding a Lead can be found on other fields and nothing is to be written here.
23. Extra Info: scoring rules that are not currently applicable when handling lead reply.
24. Auto Reply: field that Marketing Dept. needs to fill in with one of the existing templates of Auto-Reply, which should be a consistent reply to the Customer based on its type of Lead.
25. Other Leads/Opp: shows whether the same sender of the Lead has any other Leads or Opportunities already in the System. This is important as Marketing Person can make sure to first check whether other Leads/Opps are present before handling multiple Leads from a sender accidentally.
SIDE (CHATTER LOG)
On the right side of the main Leads page, a chatter log shows the record of information obtained from the initial inquiry as either an email text body or the filled in website forms.
The chatter log will contain the most important information for a Marketing Person to read and identify the nature of the inquiry, as well as the Customer’s information.
Opportunities (Sales - My Pipeline) Overview
The “Opportunities” module under the CRM is where Leads that have been fully handed over to BD Salesperson will be located in. For Marketing Dept., there will be very little use of this view in the normal handling Lead Reply process. However, it is good to familiarize briefly with this part of this module. Follow these steps to locate the Opportunities overview page:
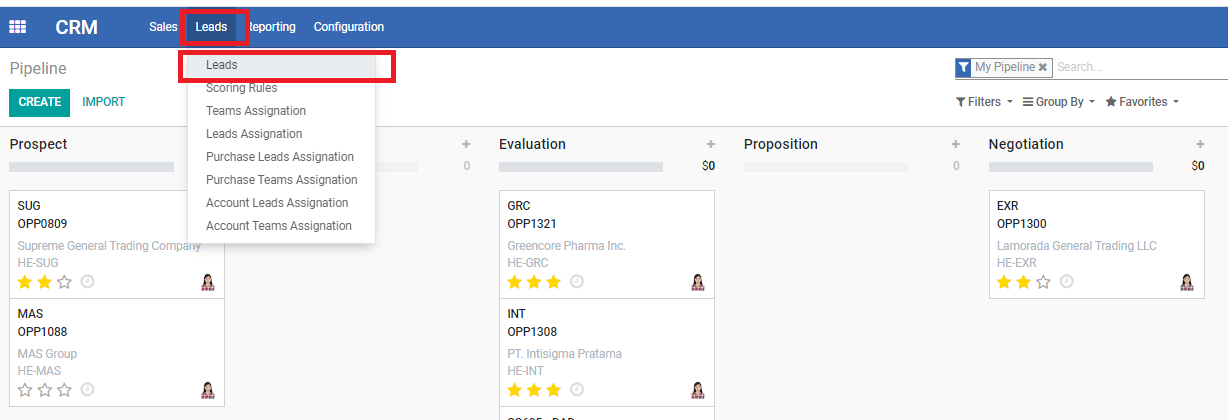
1. Open the “CRM” Module.
2. Click on the “Sales” button on the upper left corner and click again on “My Pipeline” selection from the dropdown.
3. Remove the filter “My Pipeline” from the search bar to see all Opportunities that have been assigned to all BD Salespersons and AM Salespersons.
Once a Lead has been converted to Opportunity, Marketing Person can locate the converted Opportunity here again, by using the different search filters in the search bar. The best way to find an existing Opportunity is by using the Customer’s email address. All newly converted Opportunities will be under the “Prospect” pipeline. The pipeline model of the module will be mostly used by BD Sales Dept., but Marketing Dept. may understand the basis of each stage as follows for further context on each escalated OPPs:
● Prospect: Prospect that is still in initial communications with BD Salesperson.
● Targeted Prospect: When BD deems a Prospect is really qualified and wants to specifically target them.
● Evaluation: BD Salesperson is working on providing Quotations to the Prospect.
● Proposition: First quotation has been sent to the Prospect.
● Negotiation: When payment request has been sent to start with the Order/Registration.
● Won: Once ORDER / REGISTRATION has started (payment received).
● Lost (archived): Quoted Prospects that have failed to be Won from the quotation provided.
Locating the System Database
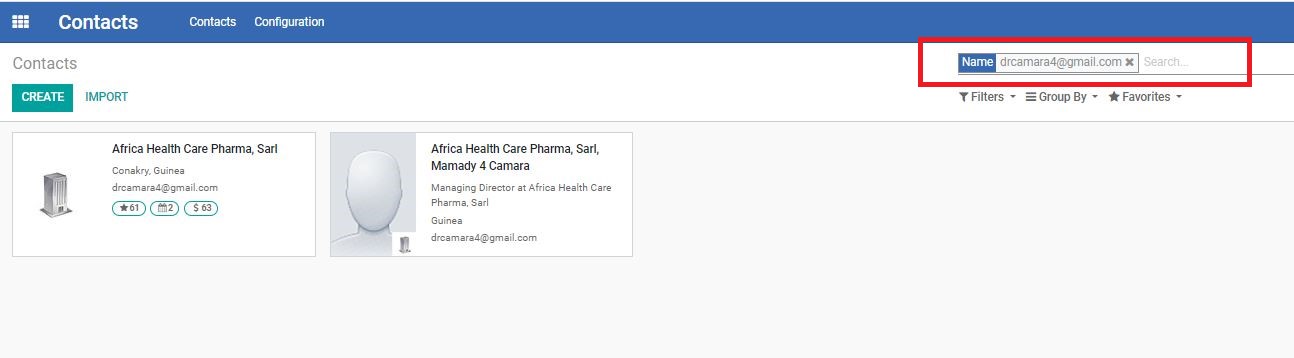
Contacts Module
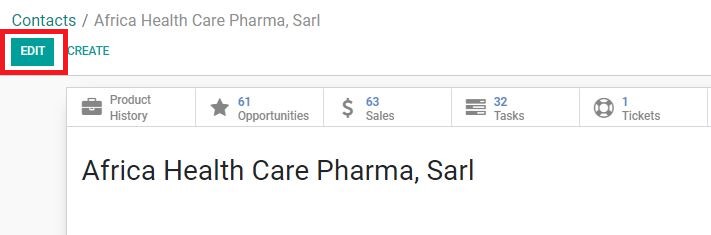
Contact Module is where all Contact Cards created in the System can be found. In the normal Handling Lead Reply process, new Contact Cards are created from the Leads page. However, in cases where a Contact Card requires some editing or adding/removing of Individual Company Contact Persons, Marketing Dept. can more easily make these edits from the Contacts Module. Hence, it is recommended to have the module open when handling lead replies in general. To locate and edit a created contact card, follow these steps:
1. Open the Contacts Module.
Exclusive Distributor List
The Exclusive Distributor list is a G-sheet simplified database that contains the basic information of existing AdvaCare Customer’s with partial or full exclusivity to AdvaCare product range.
G-sheet:
Exclusive Distributors
At the moment, there are no specific actions required from the Marketing side as we do not have a country/region that has full exclusivity of all AdvaCare ranges already (meaning restricted from processing new inquiries).
 03.png)