To handle QC samples Marketing Person needs to attend the following document in the System:
This SOP will explain the QC process and list the steps of how to manage QC documents.
Getting started with QC Receipt
The main purpose of creating QC Receipt document is to keep track of all the samples from orders of Customers that are stored in the office. This way every sample will be recorded and Salesperson and Inventory Dept. can access this information easily, including the order number which the samples belong to, Customer code, MFG and EXP dates, batch number, etc. This information is important to be correct as it is connected to Inventory Module. Inventory is a tool where Salesperson can be taking product samples for Customers.
● QC Receipt is created by Purchasing Person after the QC samples are received in the office.
● Purchasing Person creates QC Receipt document, passes it over to Sales Dept. to check and record in Inventory and Sales Dept. passes it over to Marketing Dept.
● QC Receipt is used to record the information about QC samples in the office.
● QC Receipt is linked only to a PO Procurement Group, and not to a PO Samples or any other type of PO.
QC Receipt stages
As all other documents in the System, QC Receipt document has several stages that depend on the status of the samples.
● DRAFT: Initial stage that is not going to be used for QC Receipt document.
● WAITING: Intermediate stage that is not going to be used for QC Receipt document.
● READY: The stage at which QC Receipt is created, after QC samples are received in the office.
● DONE: The stage that will be used by Sales Dept. that indicates that QC samples have been checked and received by Inventory.
How to attend QC Receipt
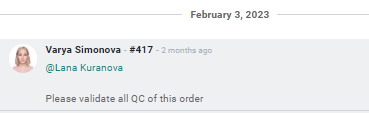
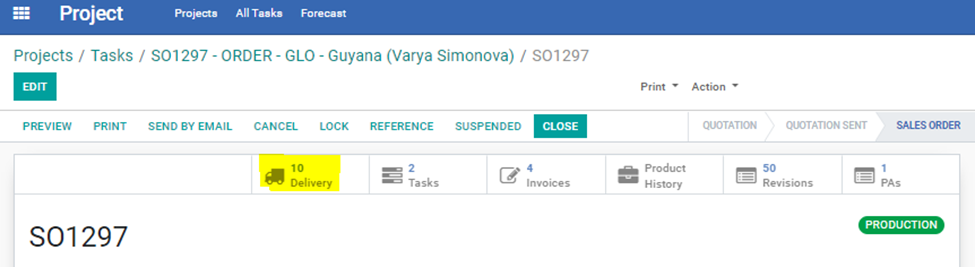
Marketing Person will receive a task from Salesperson to validate QC via SO Chatter with the relevant SO number.
Note: Only WH/IN/XXXXX References are QC Receipts for Marketing Validation
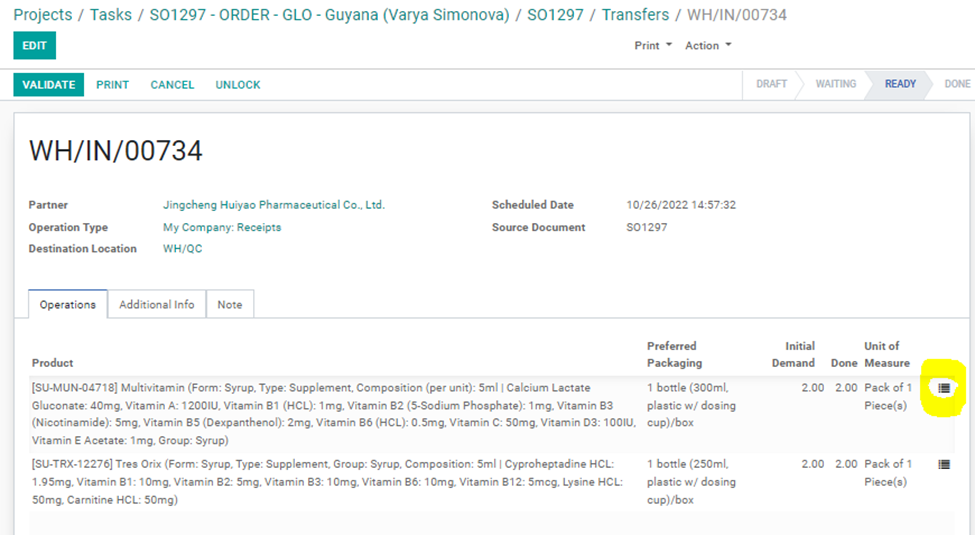
1. Click on the [OPERATIONS] Tab and click on the [REGISTER] icon of a transfer line.
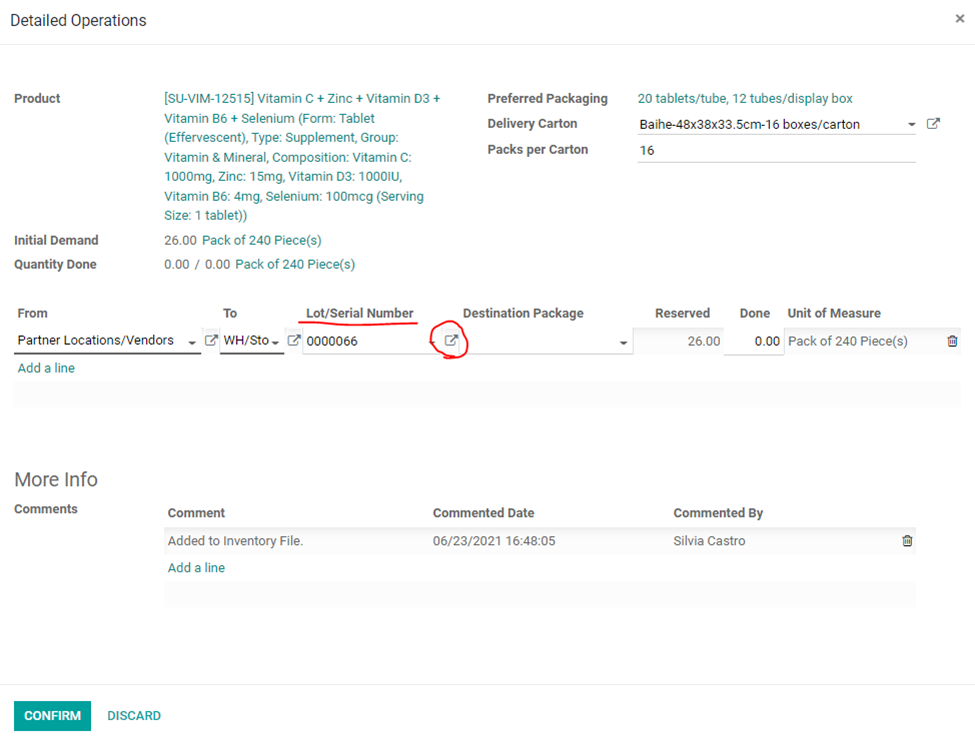
Inside ‘Lot/Serial Number’ document, check the following fields and make sure they are all filled out correctly:
● Batch Number
● MFG Date
● EXP Date
● Factory Info on the Packaging (will be filled out only if Vendor name is printed on the packaging)
● Client Information on the Packaging (the checkbox will be marked only if Customer information is printed on the packaging)
● Source Document (SO number)
● Brand Name
● Commodity Inspection (will be filled out only when commodity inspection is required for the shipment of the product)
● Available (Purchasing Dept. will not fill out this field).
5. Once all the information is checked and revised if necessary, Marketing Person can close all the popups and validate the Receipt.
6. To validate the Receipt click VALIDATE on top left of the Transfer document.
7. Inform Account Manager the QC has been validated via task. Send a message in a chatter “SOXXXX task sent”.