Onboarding: Employee Accounts Set-up
| 32 minutes
Onboarding Employee Accounts Setup
PurposeCollectively streamline the procurement process, minimize potential pitfalls, and make well-informed choices that will positively benefit workflow at AdvaCare. At the same time, providing comprehensive guidance to the members, empowering them with the necessary knowledge and processes to efficiently navigate the procurement of hardware resources. Scope
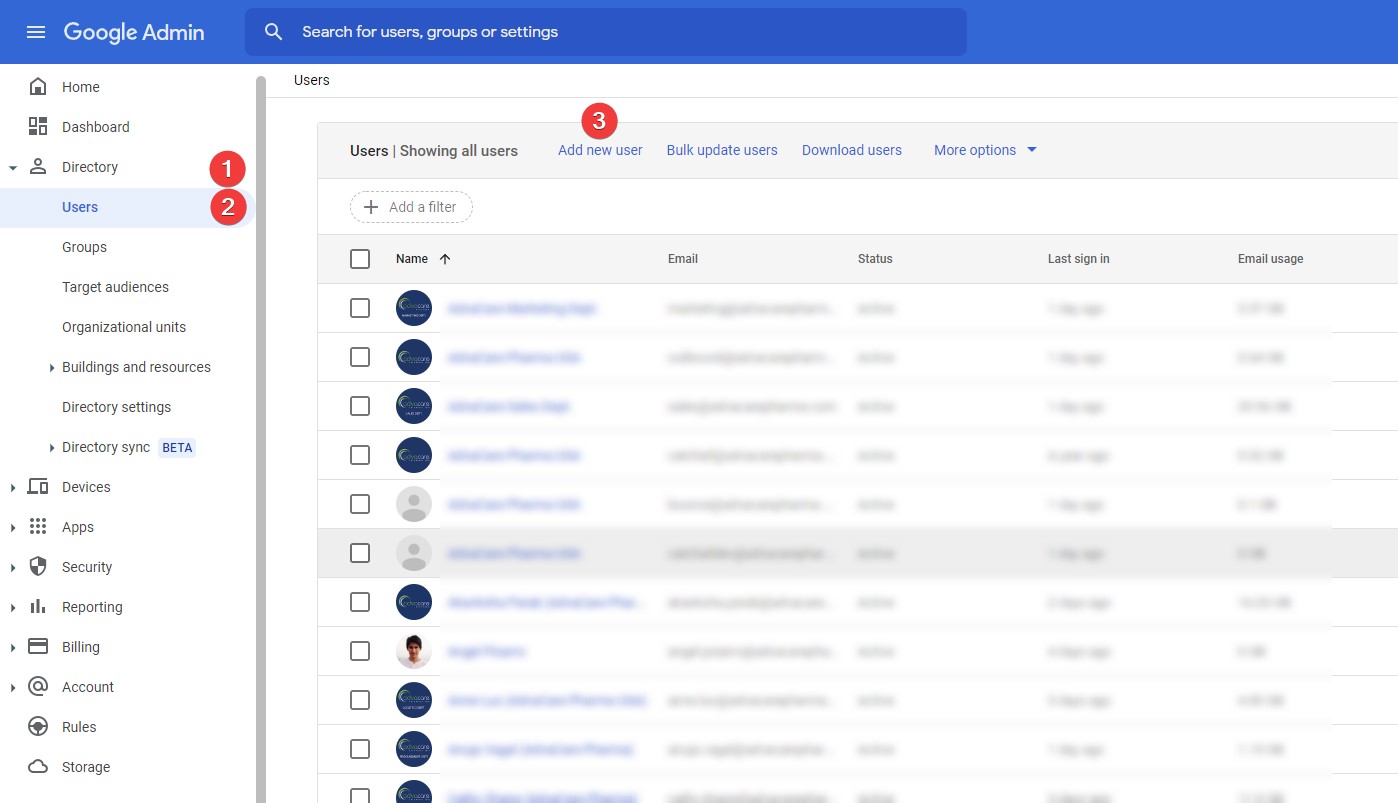
Procedure1. Preparation1. Reception of "Onboarding New Employee" taskTo start the Accounts setup process, a "Onboarding New Employee" task for IT Dept. must have been received and assigned in Odoo. After confirming that the task was received through Odoo with the format requested by the IT department, the IT member can start the process. Otherwise, ask for a revision of the task. Note: IT Dept. must keep the Onboarding task template always updated. 2. Performing accounts setup2. Google Account SetupIn AdvaCare, a Google user is the principal account to access all Company IT services. Additionally, using this google account users would have access to different google tools in the Workspace. Among them are the following: 2.1 Create a Google userTo create a new user, login to the https://admin.google.com/ ". On the side panel of the dashboard, click on: Directory » Users » Add new user
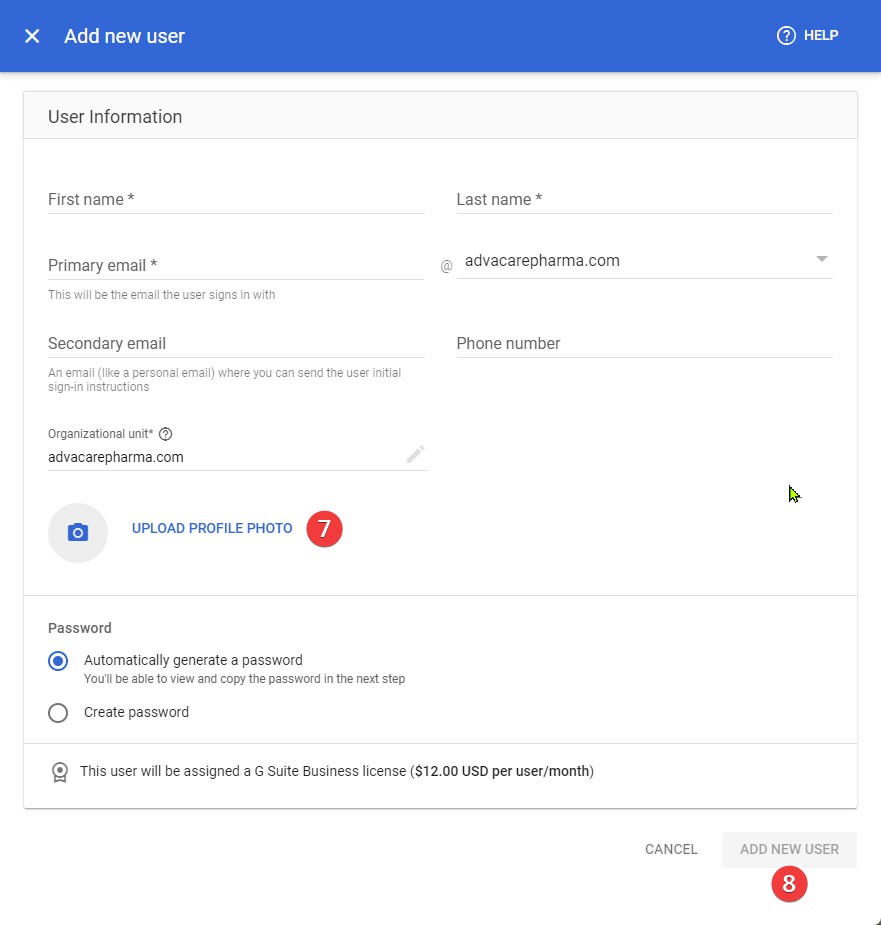
Enter the user's basic information following the format described below:
Note: Keep the domain @advacarepharma.com Additionally, click on Manage user's password, organizational unit, and profile photo, to add the user's picture (usually the Department logo which the Employee will belong):
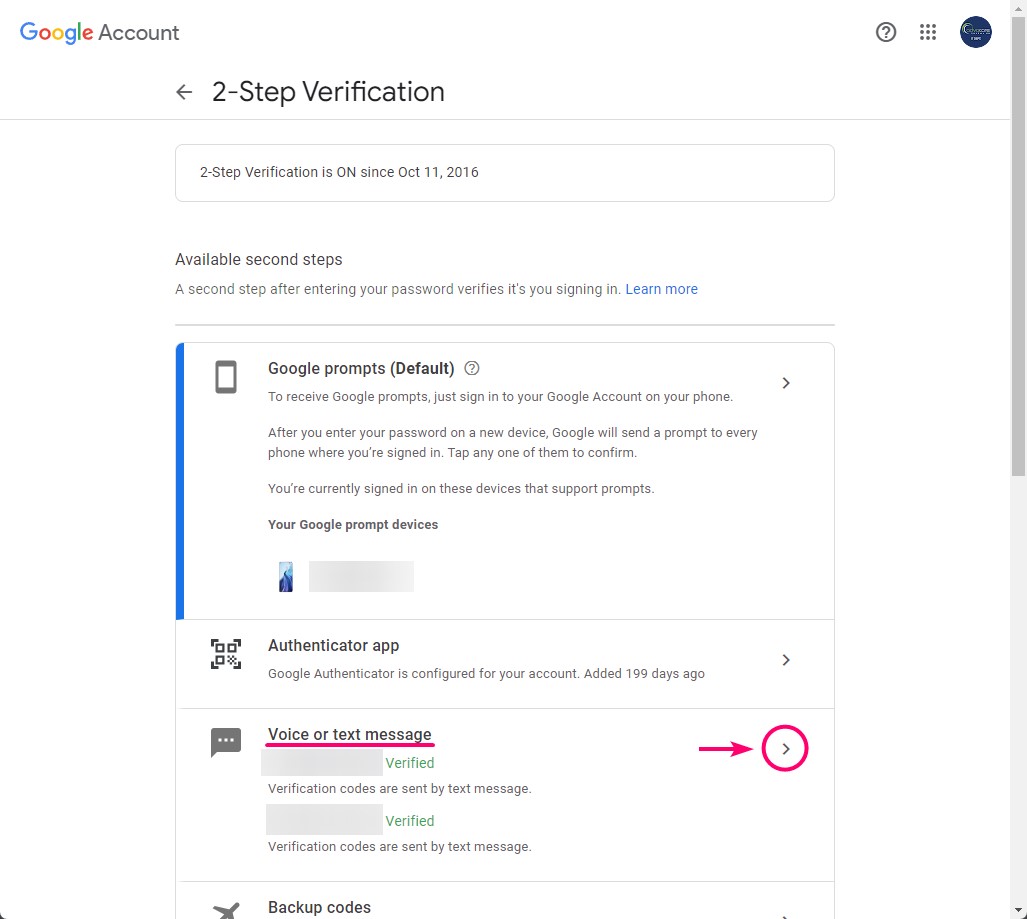
Finally, save all the filled-in user information, clicking on the "ADD NEW USER" button. Reference: Add an account for a new user Now, record the new information in the Excel file AdvaCare IT Assets » Gmail Access sheet » Columns A, C and D. 2.2 2-Step VerificationOpen the file containing the Google Accounts 2-Step Authentication Logic . The above logic should match the 2-step authentication record for Google accounts . To set up 2-step verification, follow the steps below:
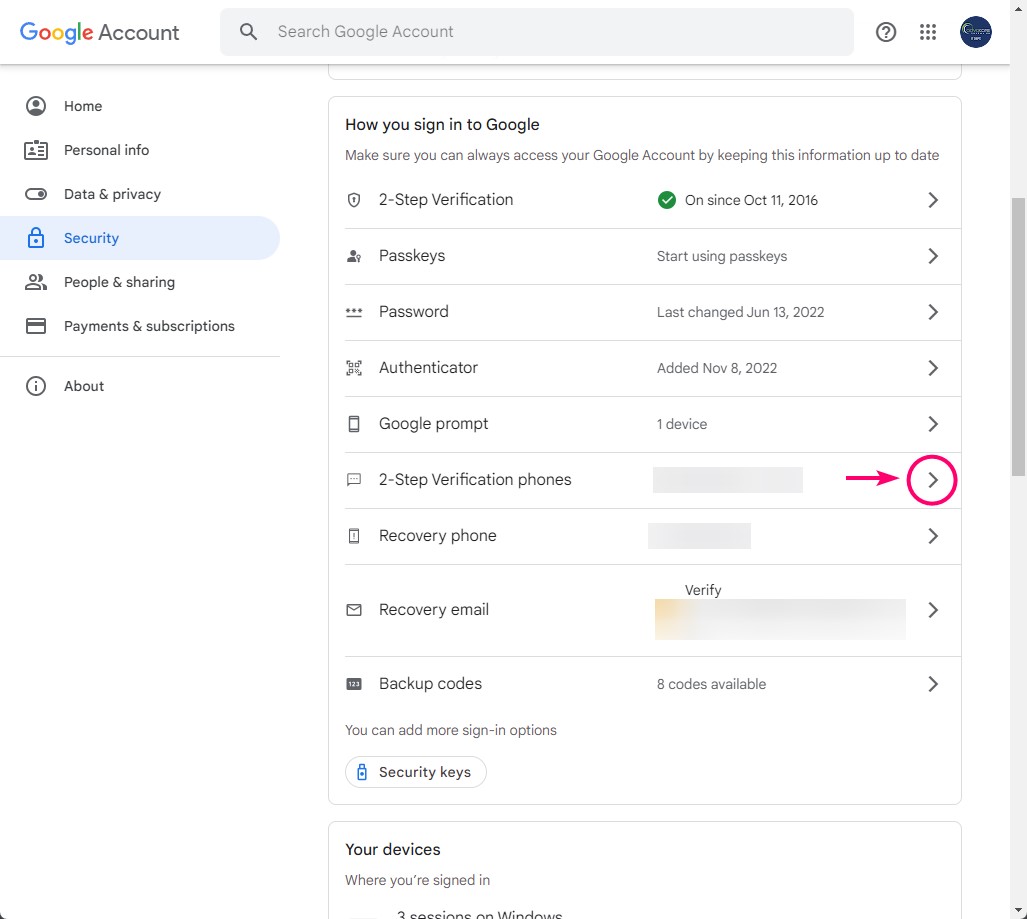
The availability to verify each phone number will depend on the availability of each of them (employee's manager and Managing Director) to receive the SMS code and send it to the IT member. This information should be recorded in the file "AdvaCare IT Assets", sheet "AdvaCare Pharma Google Access", column E. 2.3 2-Step Verification phonesTo add the verification phones in 2 steps, follow the steps below: Add the phone numbers of:
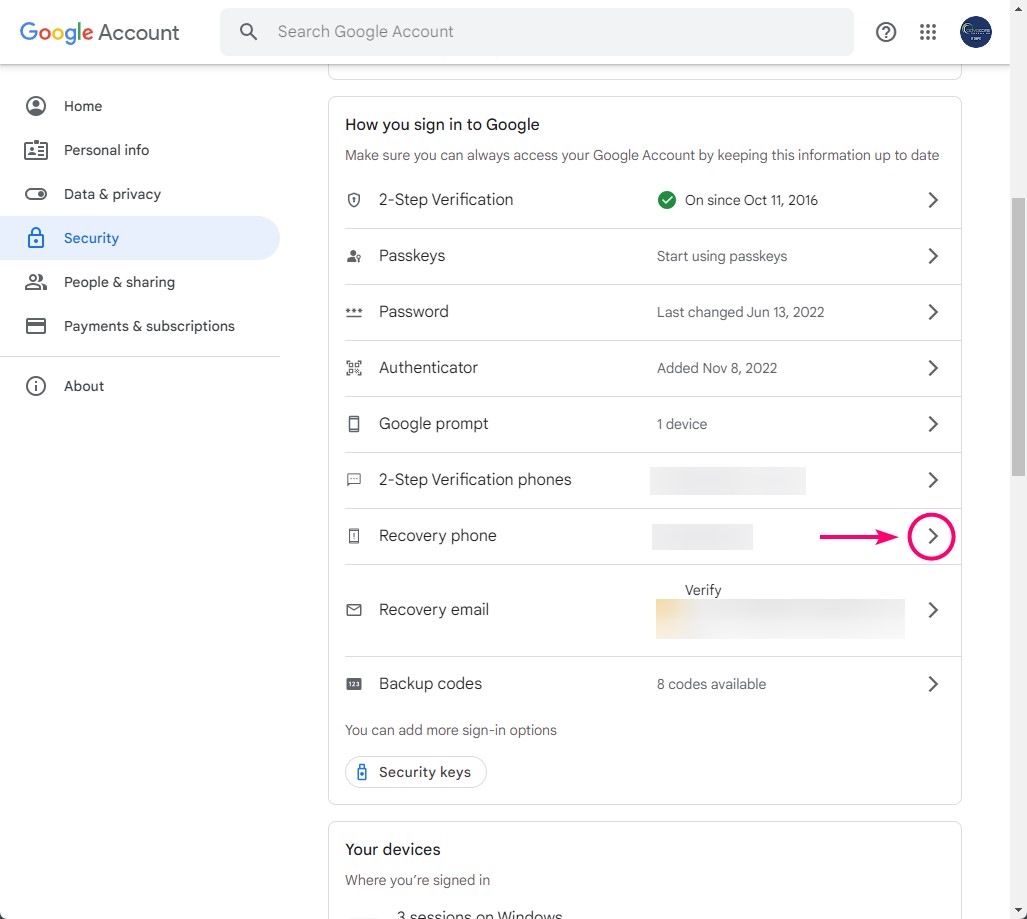
The availability to verify each phone number will depend on the availability of the Managing Director to receive the SMS code and send it to the IT member. 2.4 Recovery phoneTo add the recovery phone add the IT Member's phone number and verify the number by receiving the SMS code and sending it to the system.
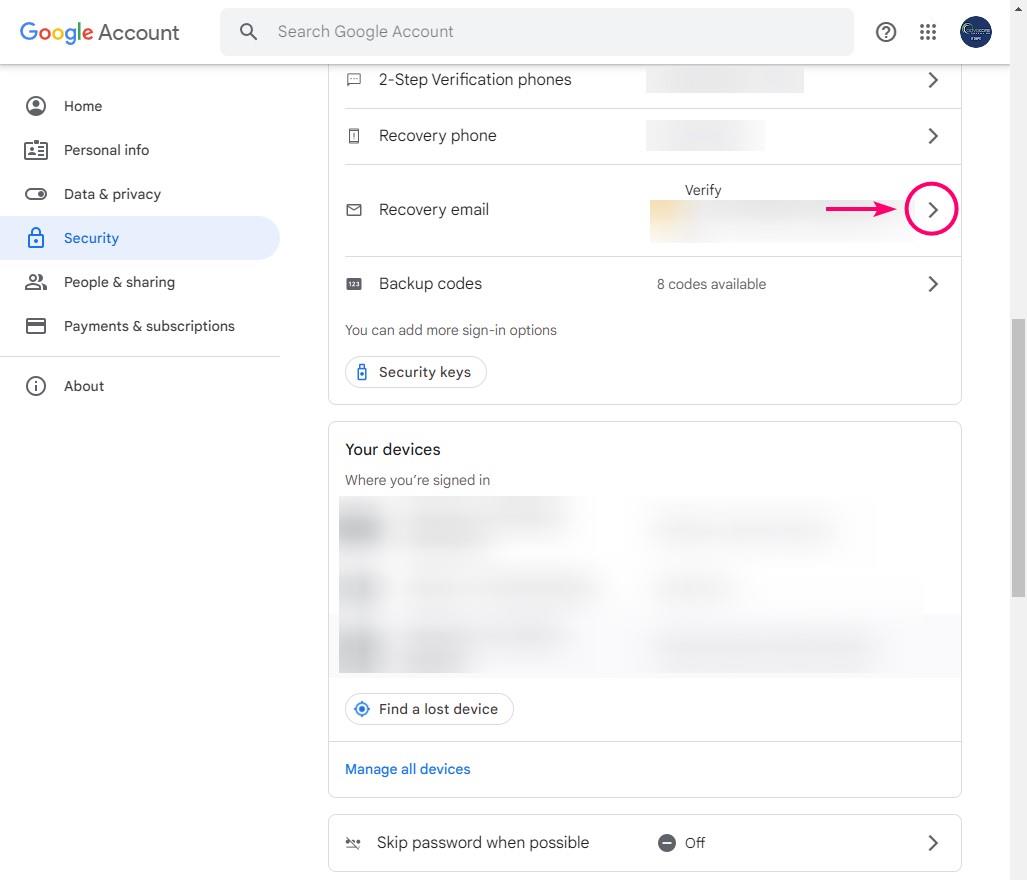
2.5 Recovery emailTo add the recovery email add the IT Member's email and verify the number by receiving the email code and sending it to the system.
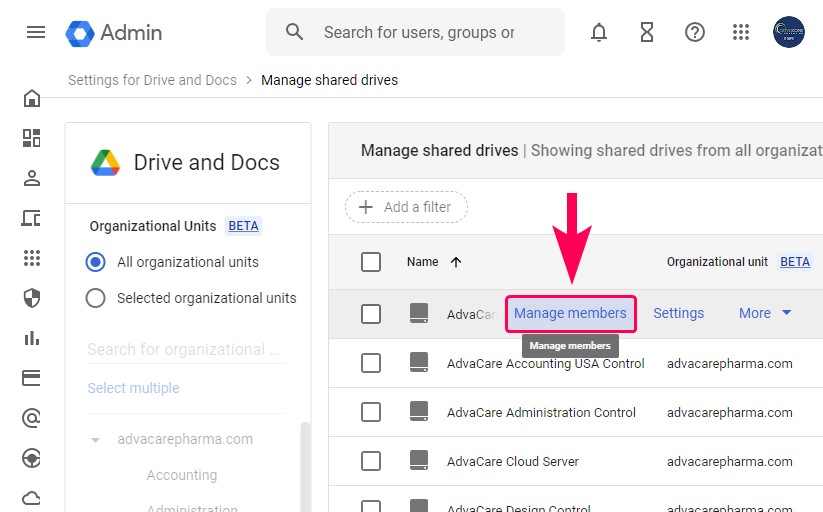
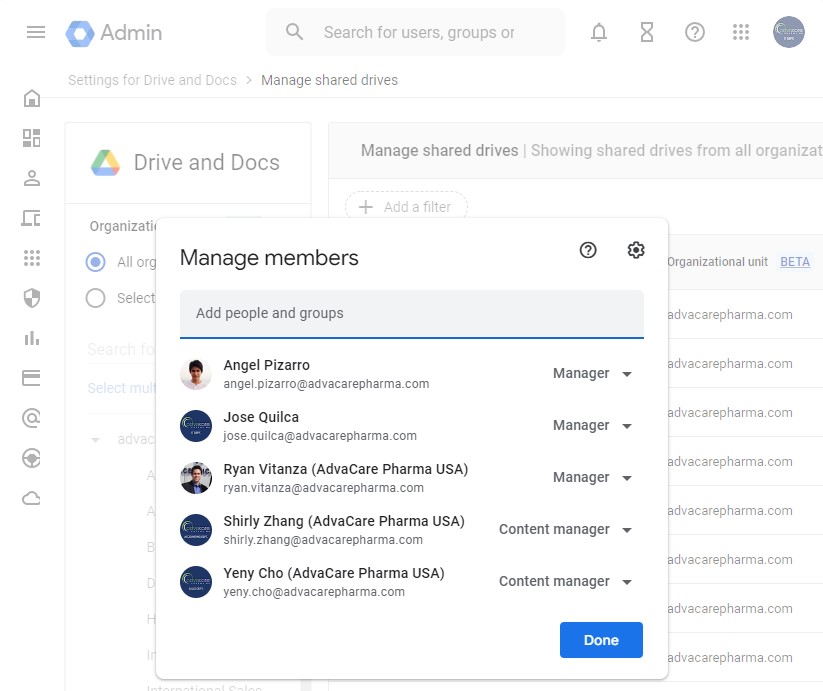
The 2-step authentication phone numbers, the recovery phone number and the recovery email should be recorded in the " Google Accounts 2nd-Step Authentication " Gsheet. 2.6 Manage shared drives for a userTo configure the new user's access to shared drives, do the following:
Note: Repeat the process from 3 to 5 for each of the shared drives where the new employee requires access.
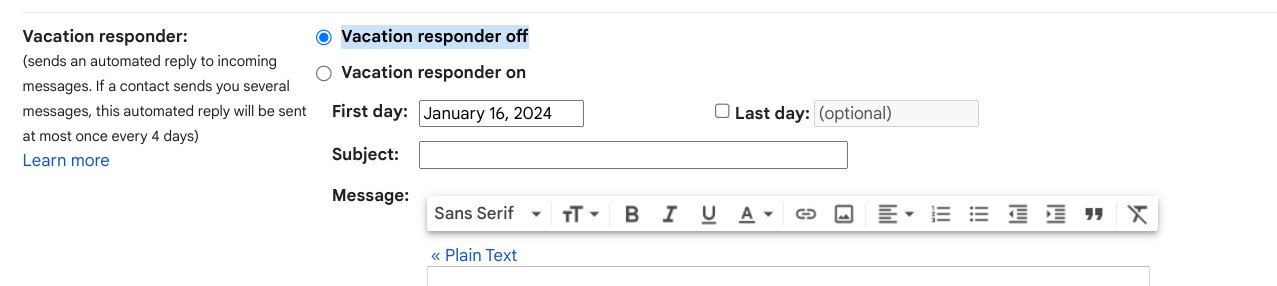
Reference: https://support.google.com/a/answer/7662202?hl=en https://support.google.com/a/users/answer/9310249?hl=en 2.7 Configure the new employee's Gmail signatureTo configure an employee's signatures, follow the instructions in the " Create or Edit Gmail Signatures " SOP. If this is a sales employee, the Skype link should be removed and applied to the signature. 2.8 Configure the Vacations settingsMake sure that the value Vacation responder off is selected for the account holidays information. It’s possible that this configuration is still reflecting the old member holidays settings.
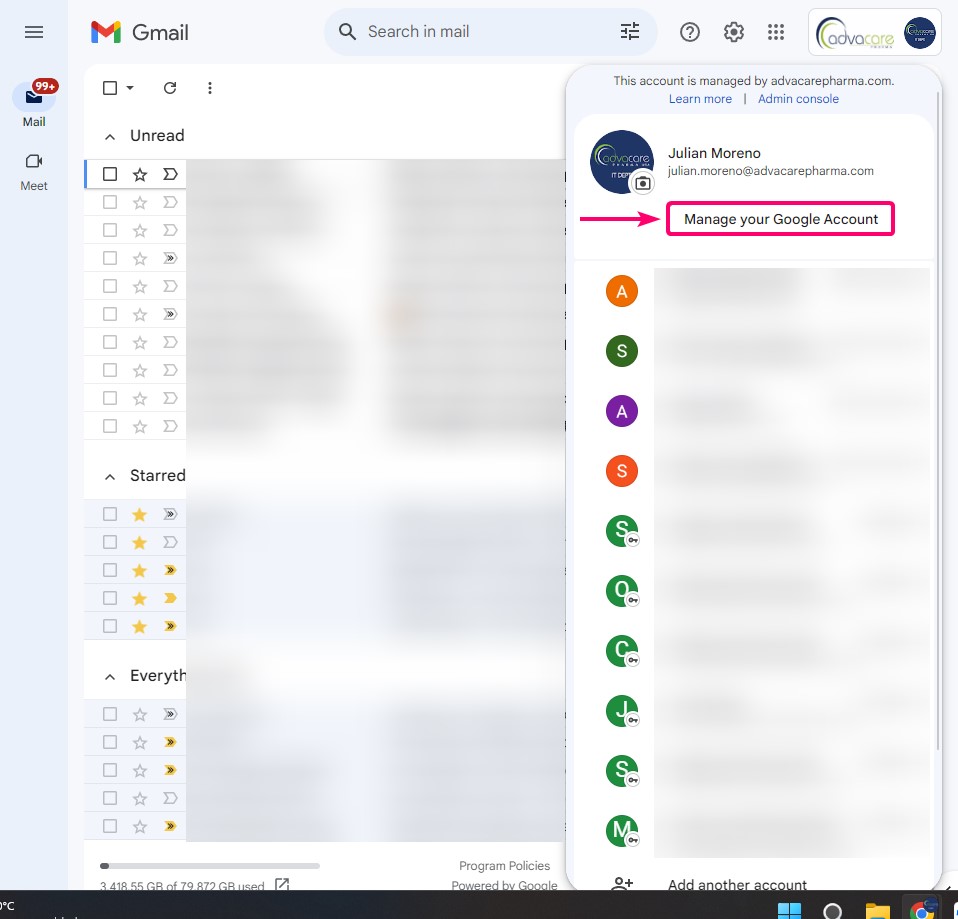
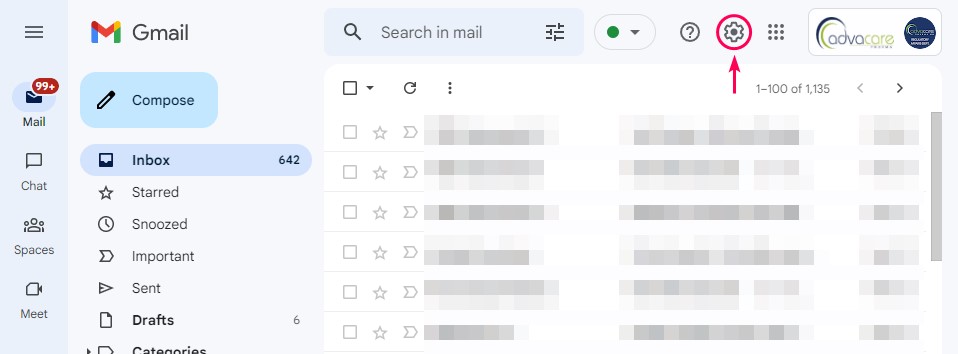
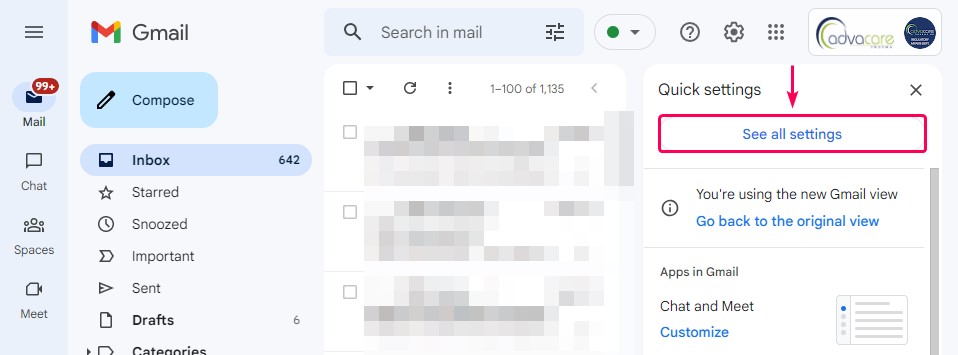
2.9 Manage Gmail delegations for a userTo configure delegated access, follow the steps below: Normally Directors and Managers are the people who have access to their subordinates, however there are some exceptions which are shown in the " Email Delegation Access for a Google User " document. After the IT member has identified which users have delegated access to the subordinate employee's email, provided in the document mentioned above, log in to the subordinate employee's Gmail account and click on the nut to open the configuration panel.
Click on the See all settings button.
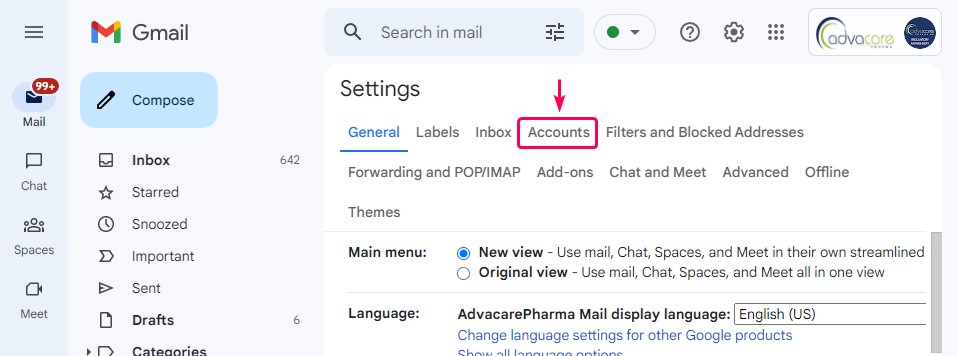
Click on the Accounts tab.
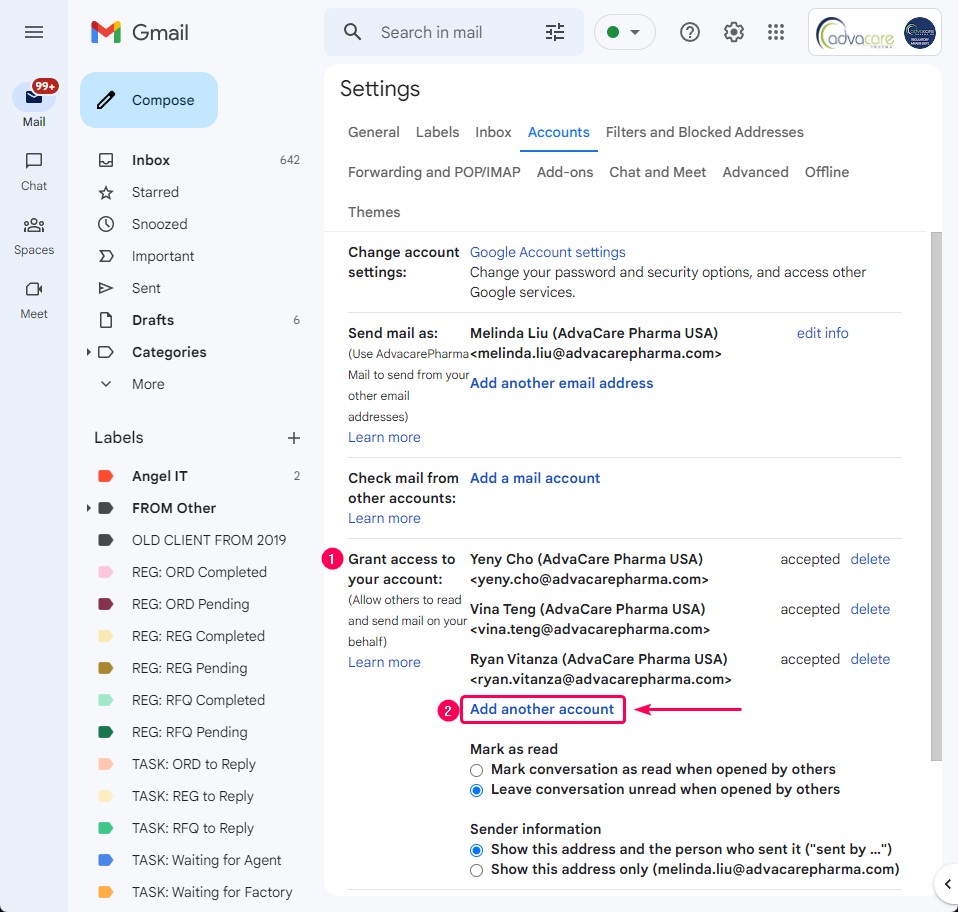
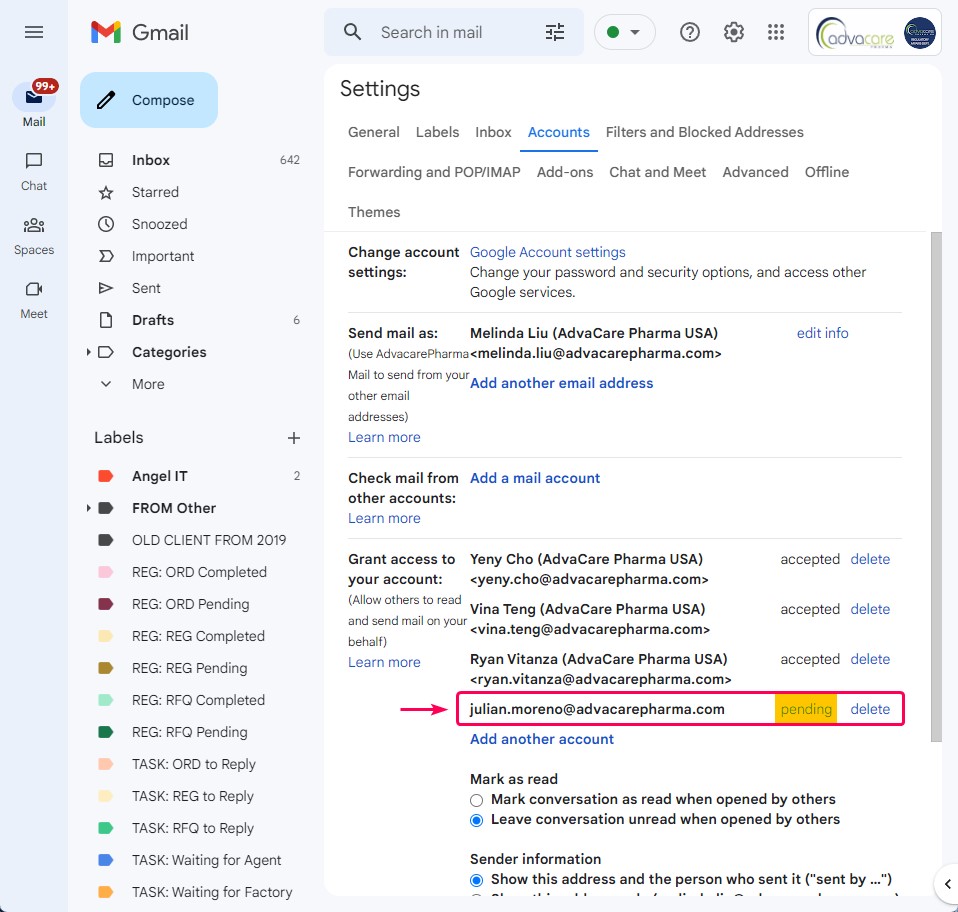
Identify where the Grant access to your account section is located (point 1) and click on the Add another account link (point 2).
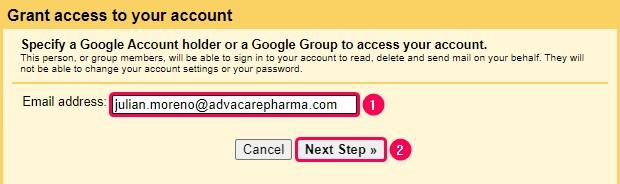
In the Email address field, type the email address of the director or manager (point 1) and click on the Next step button (point 2).
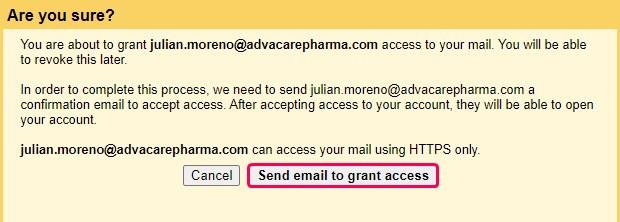
Click on the Send email to grant access button.
Close the window.
The IT member will see that there is a new record with the director's or manager's email in Pending status.
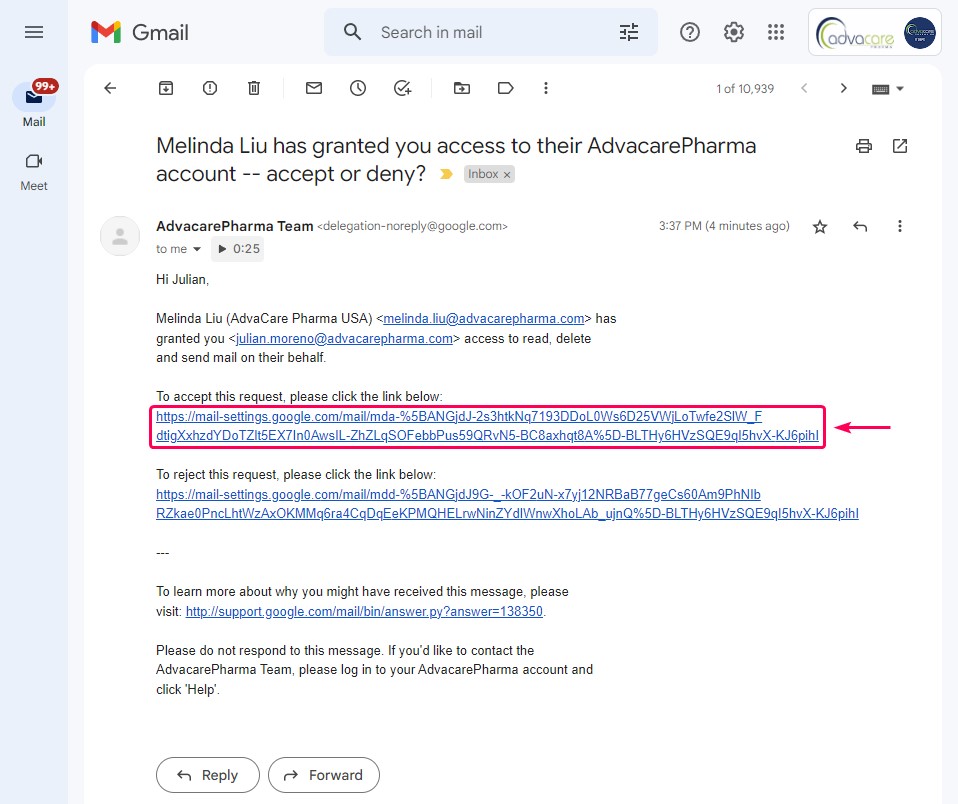
Log in to the director's or manager's Gmail account. The IT member will see an email notifying them that the subordinate employee has been granted access to their mailbox.
Within the email, click on the link to accept the request.
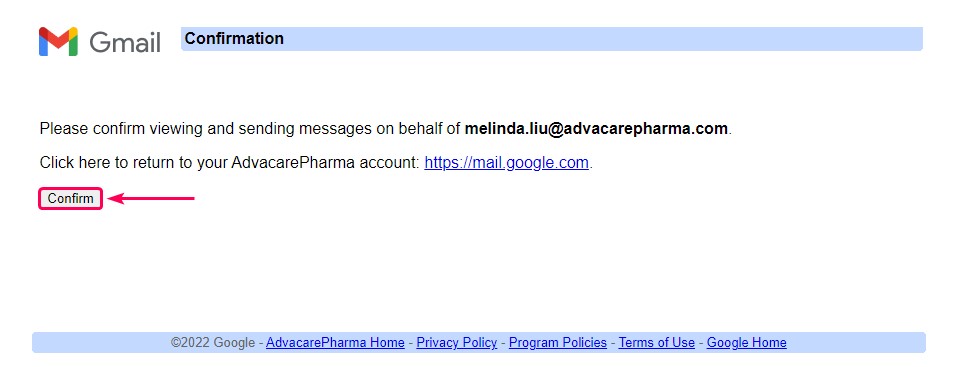
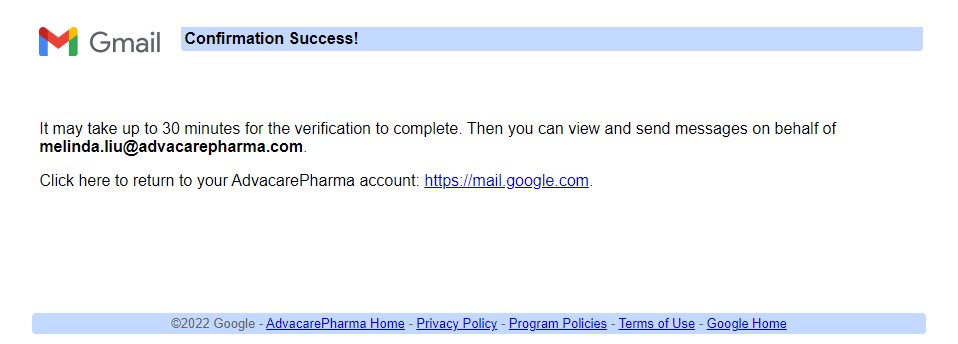
Click on the Confirm button.
The IT member will see the successful confirmation and will be able to close that window.
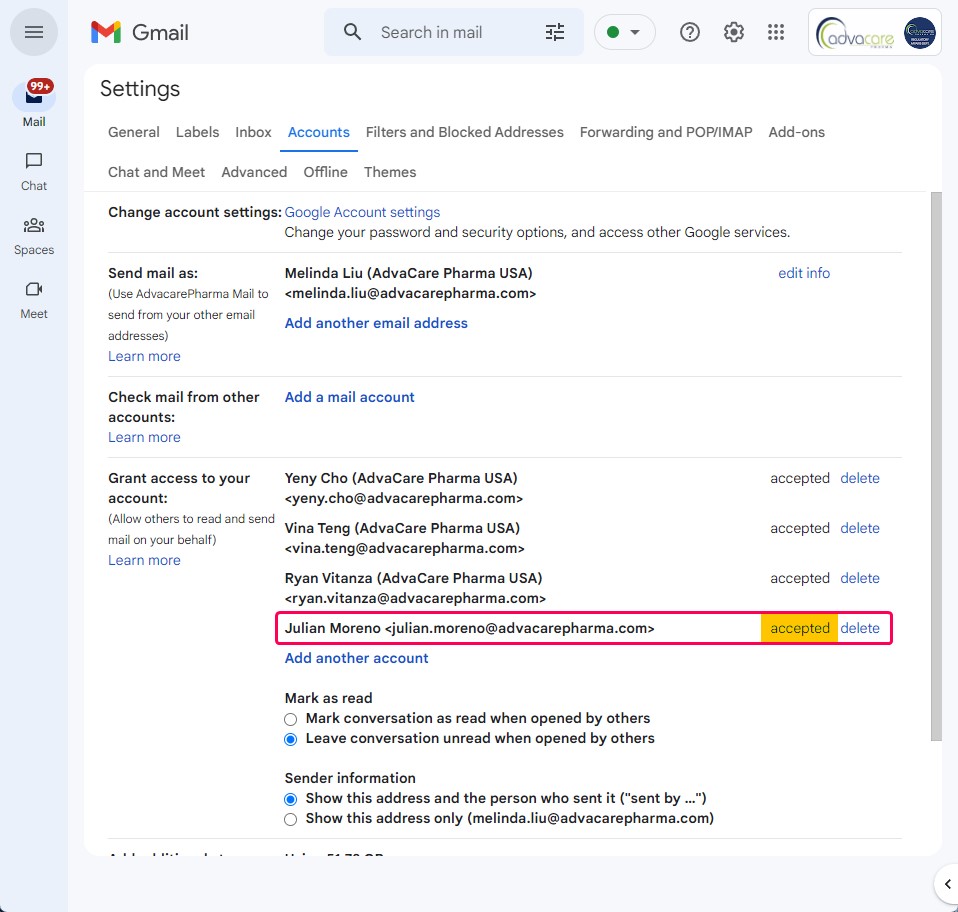
Back in the subordinate employee's email, in the Accounts tab, Grant access to your account section, the IT member will see the director or manager's email in accepted status.
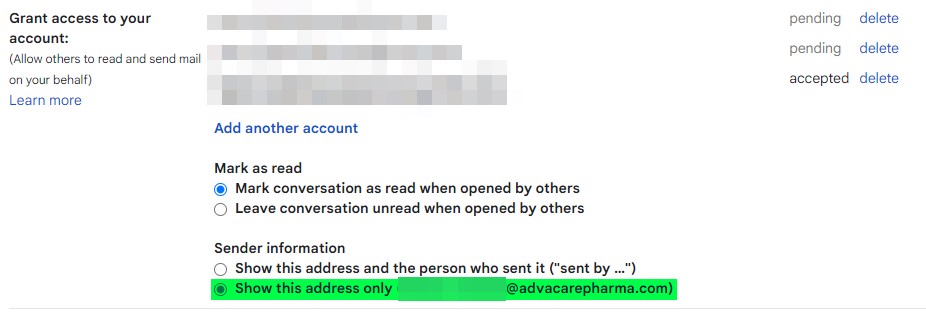
2.9.1 Update sender information sectionMake sure that the value Show this address only (***@advacarepharma.com) is selected for the account at the same time of doing the delegation configuration.
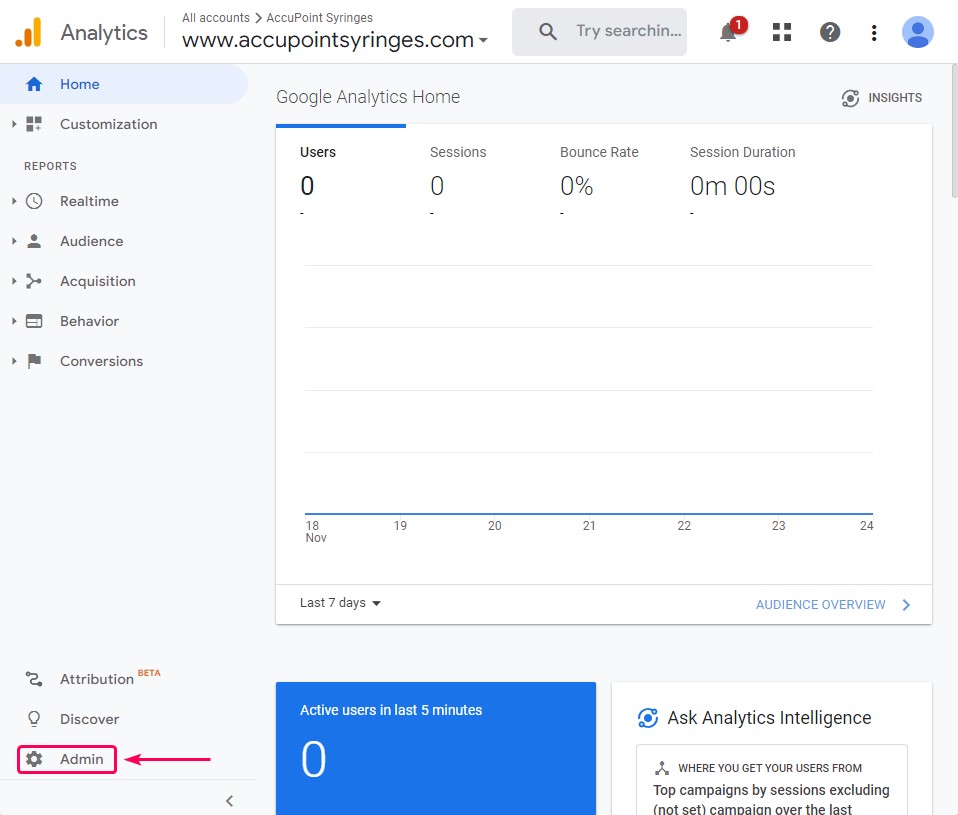
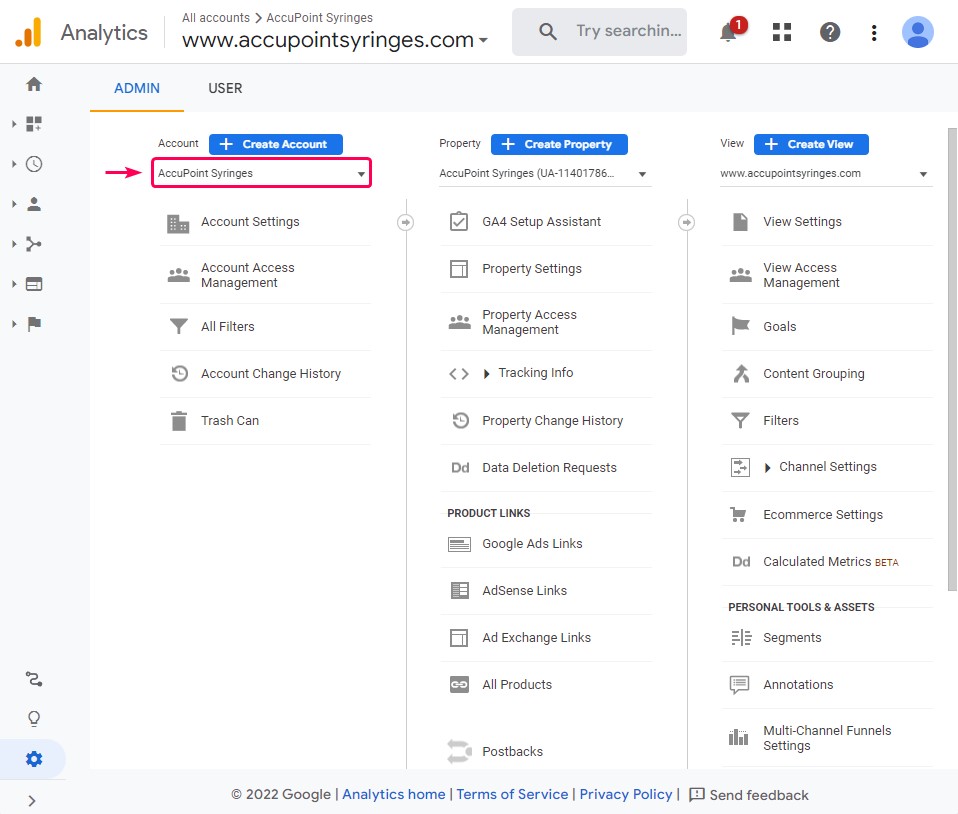
2.10 Update Analytics and Tag Manager in Google (only for Marketing users)2.10.1 Add new user to Google Analytics accountTo add a new user to a Google Analytics account, follow the steps below: Open the Google Analytics page: Click on the Admin menu, represented by a nut, located at the bottom left of the screen.
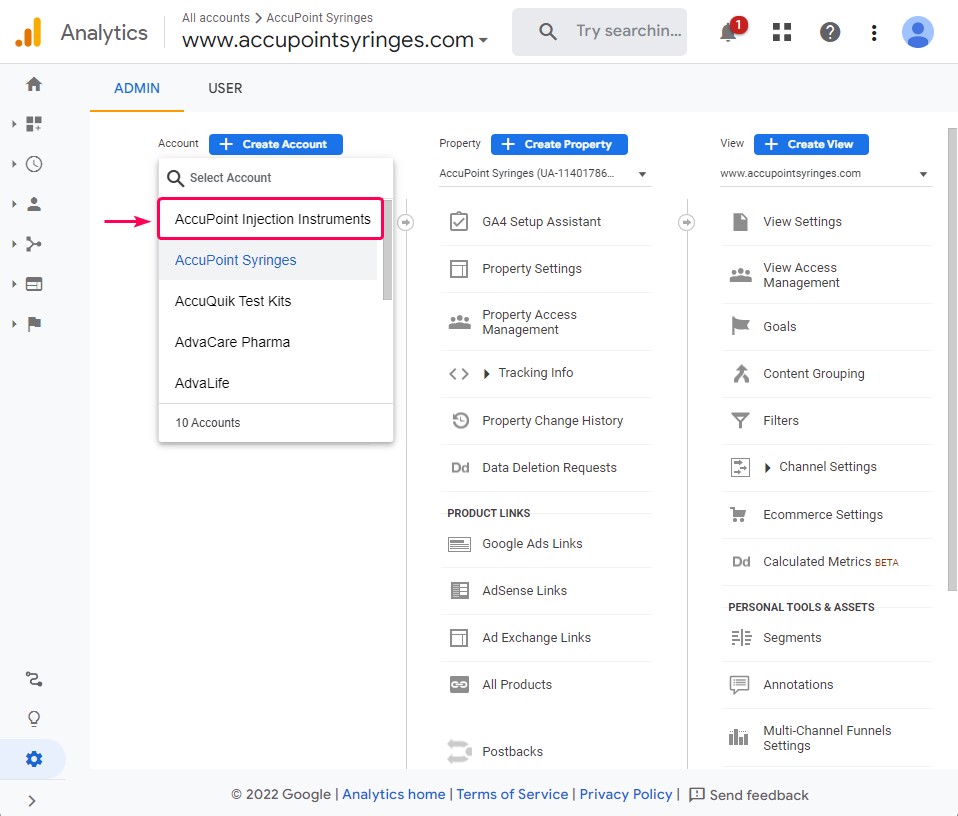
Click on the drop-down field to choose the accounts.
Choose the first account (repeat the process from here to finish with the other accounts).
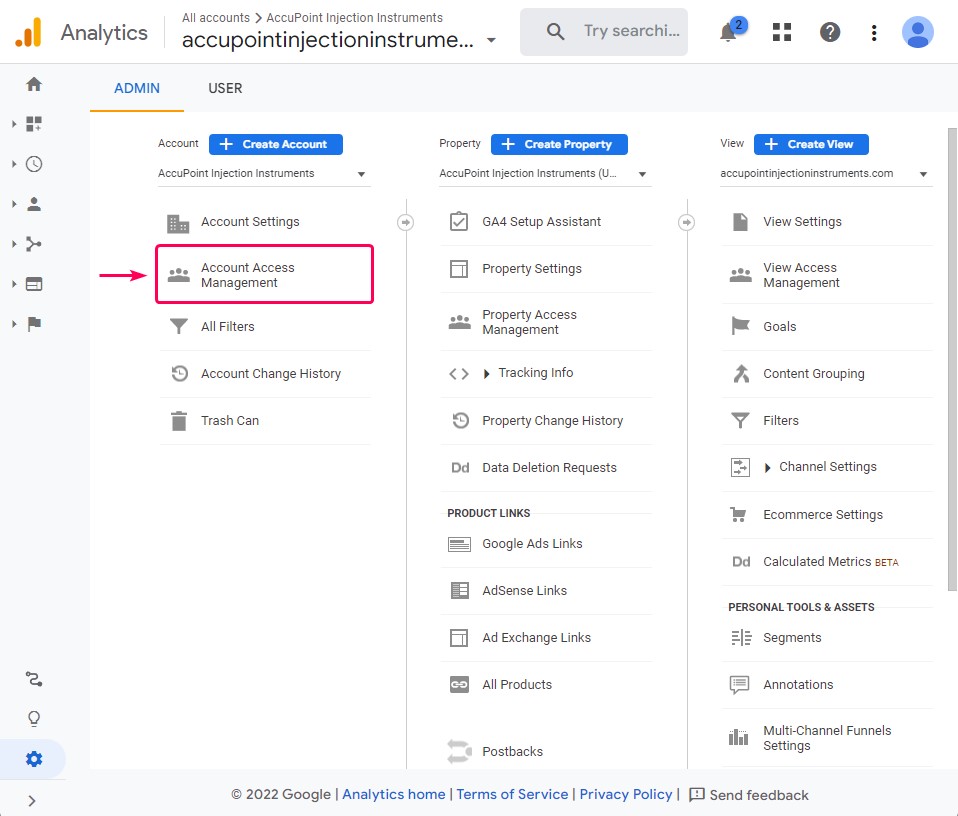
Click on the Account Access Management item.
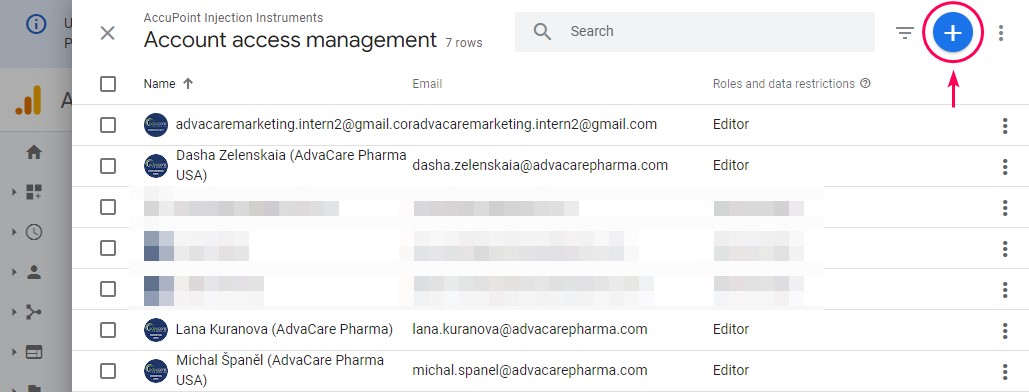
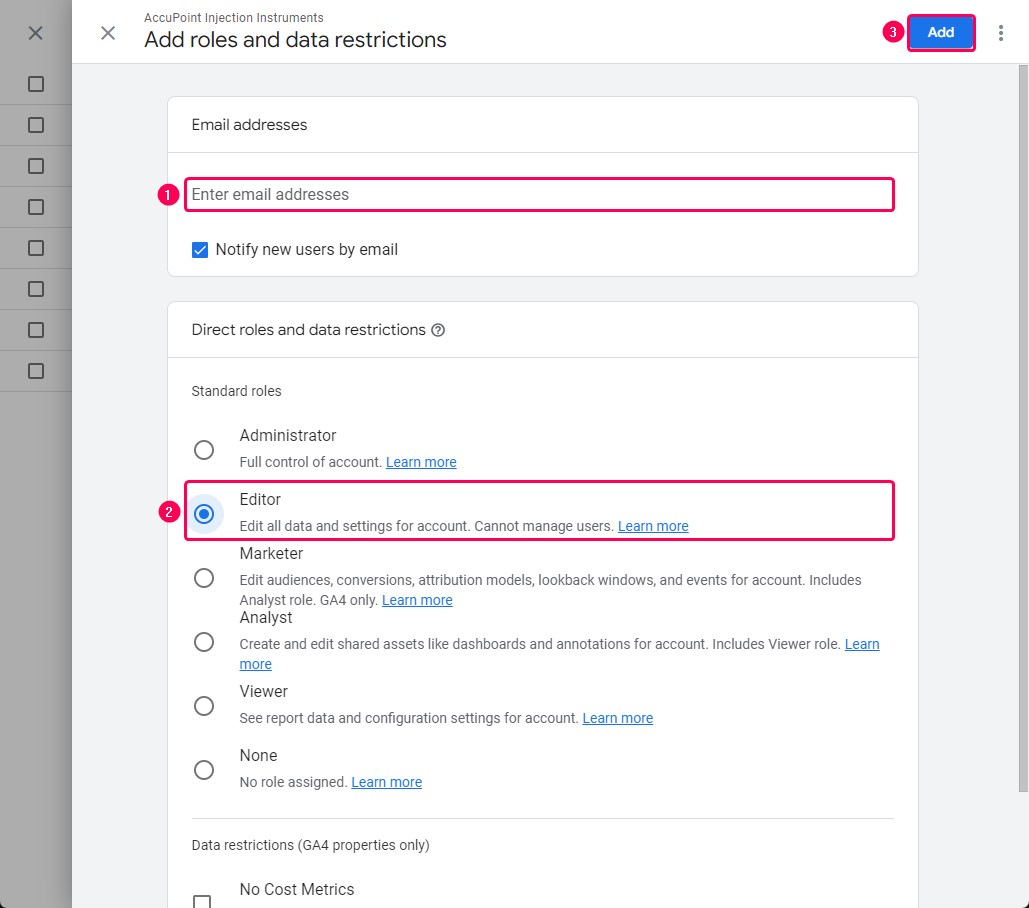
Click on the round button (+) with a blue background.
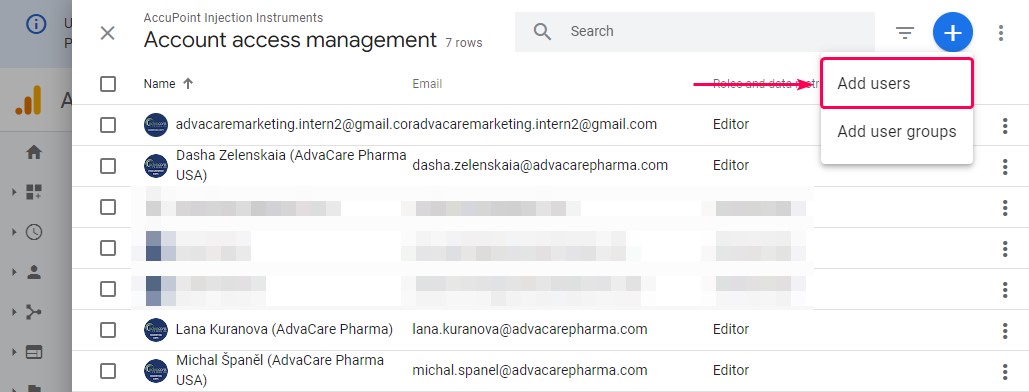
Click on the Add users item.
The new record should be displayed in the Account access management list.
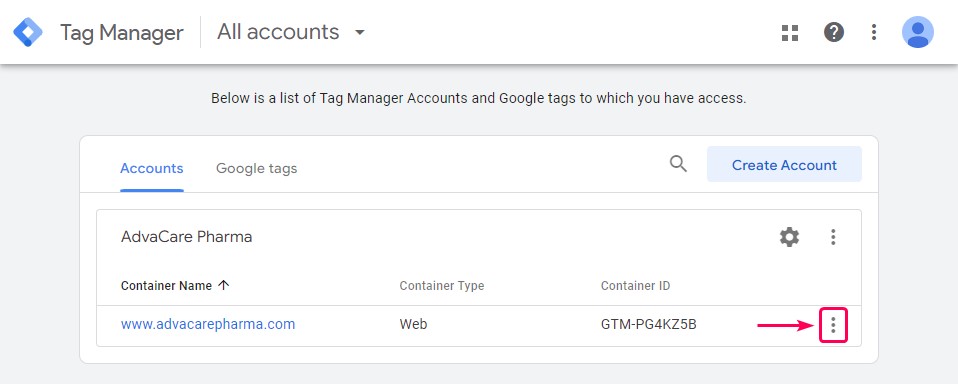
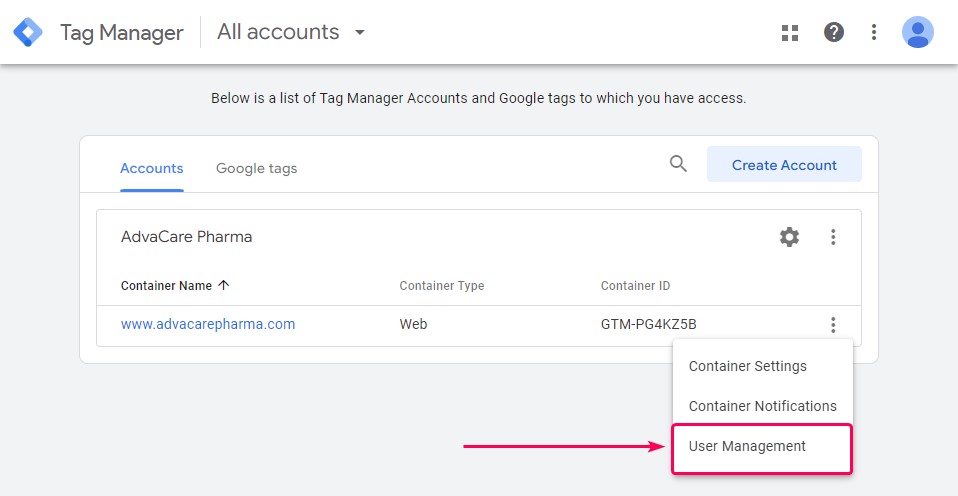
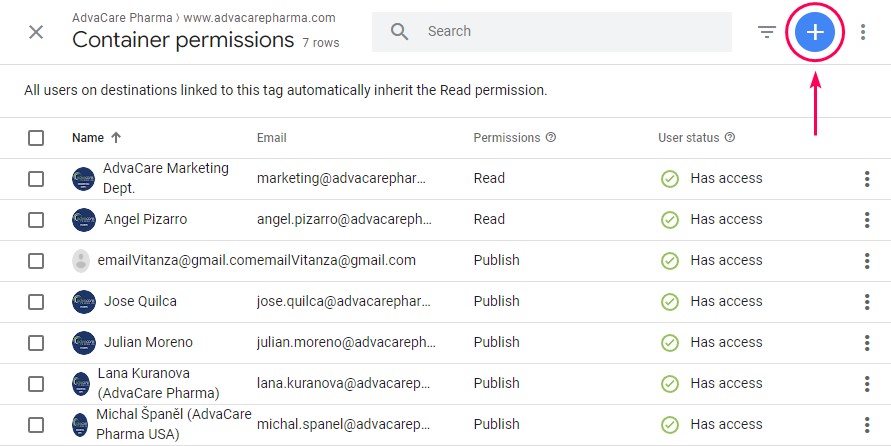
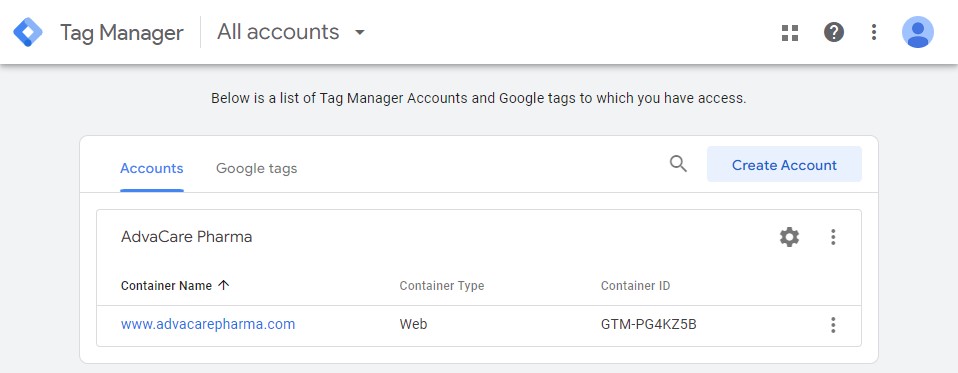
2.10.2 Add new user to Google Tag Manager accountOpen the Google Tag manager page by clicking on the following link: https://tagmanager.google.com/#/home Click on the three vertical dots to display the options.
Choose the User Management option.
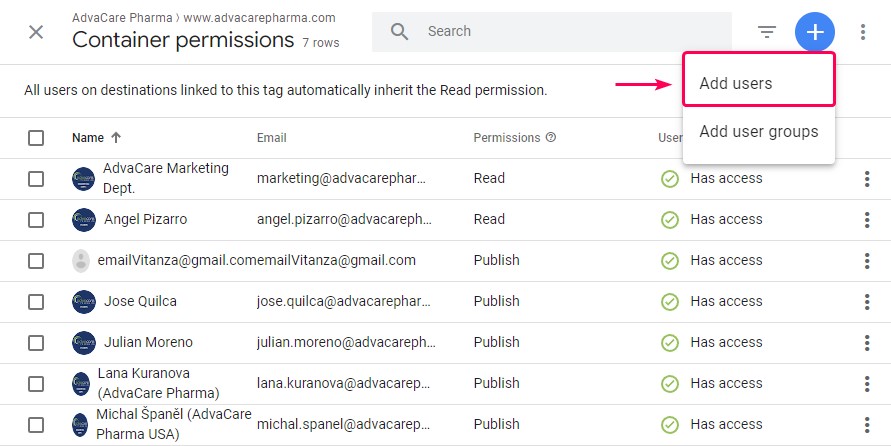
Click on the plus (+) button with blue background, located at the top right of the screen to display options.
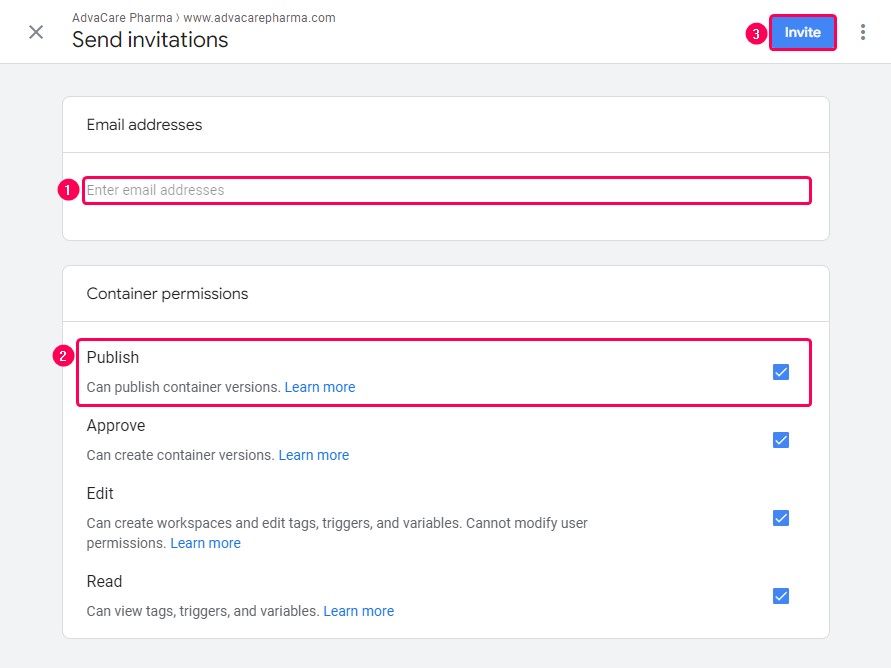
Choose the Add users option.
Then the record created with Invitation pending status will be displayed on the screen.
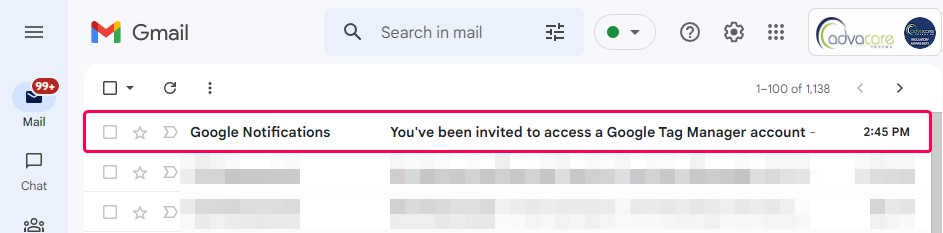
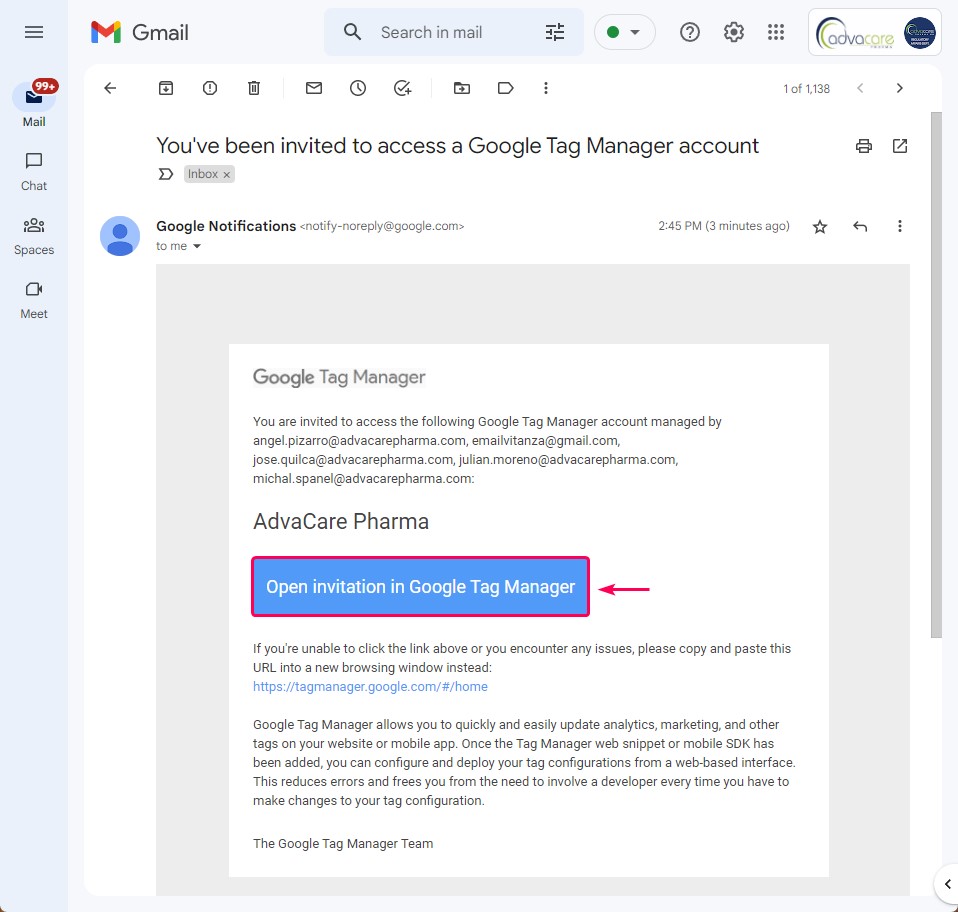
In the email of the user that the IT member wants to add, it will be shown that an email arrived with the subject shown in the image below. Open this message.
Click on the Open invitation in Google Tag Manager button.
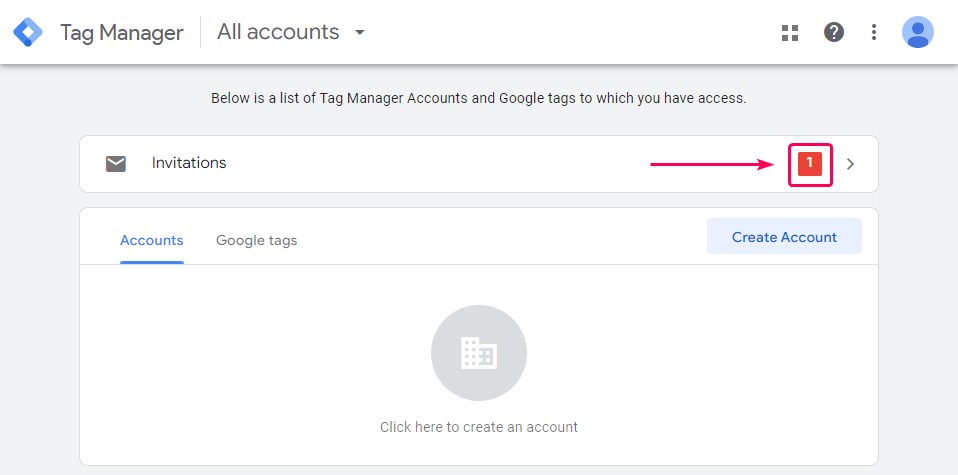
In the following screen the IT member will see a number 1 with a red background indicating that there is a pending invitation. Click on the number 1 or on the right arrow.
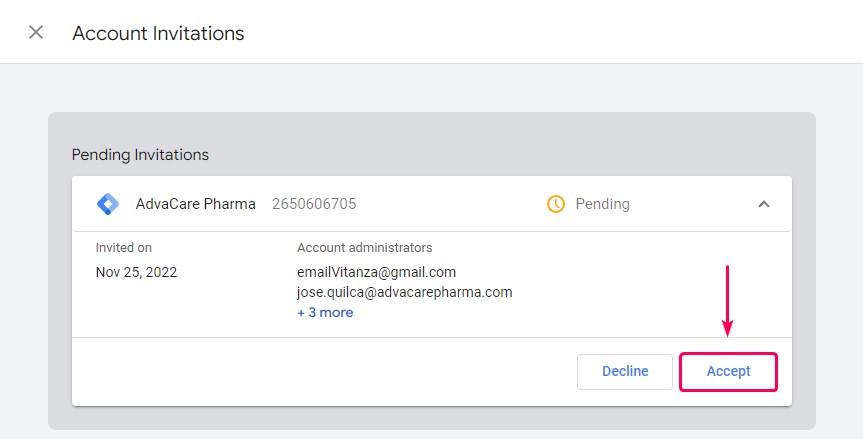
Click on the Accept button.
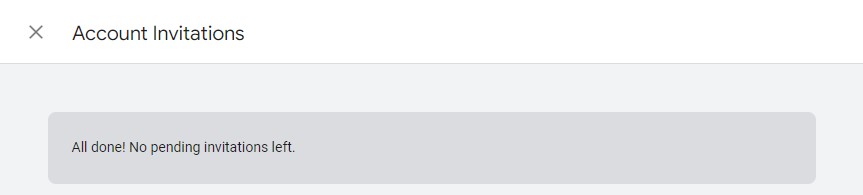
It is shown that there are no pending invitations.
The user is then shown to have access to the AdvaCare Pharma account.
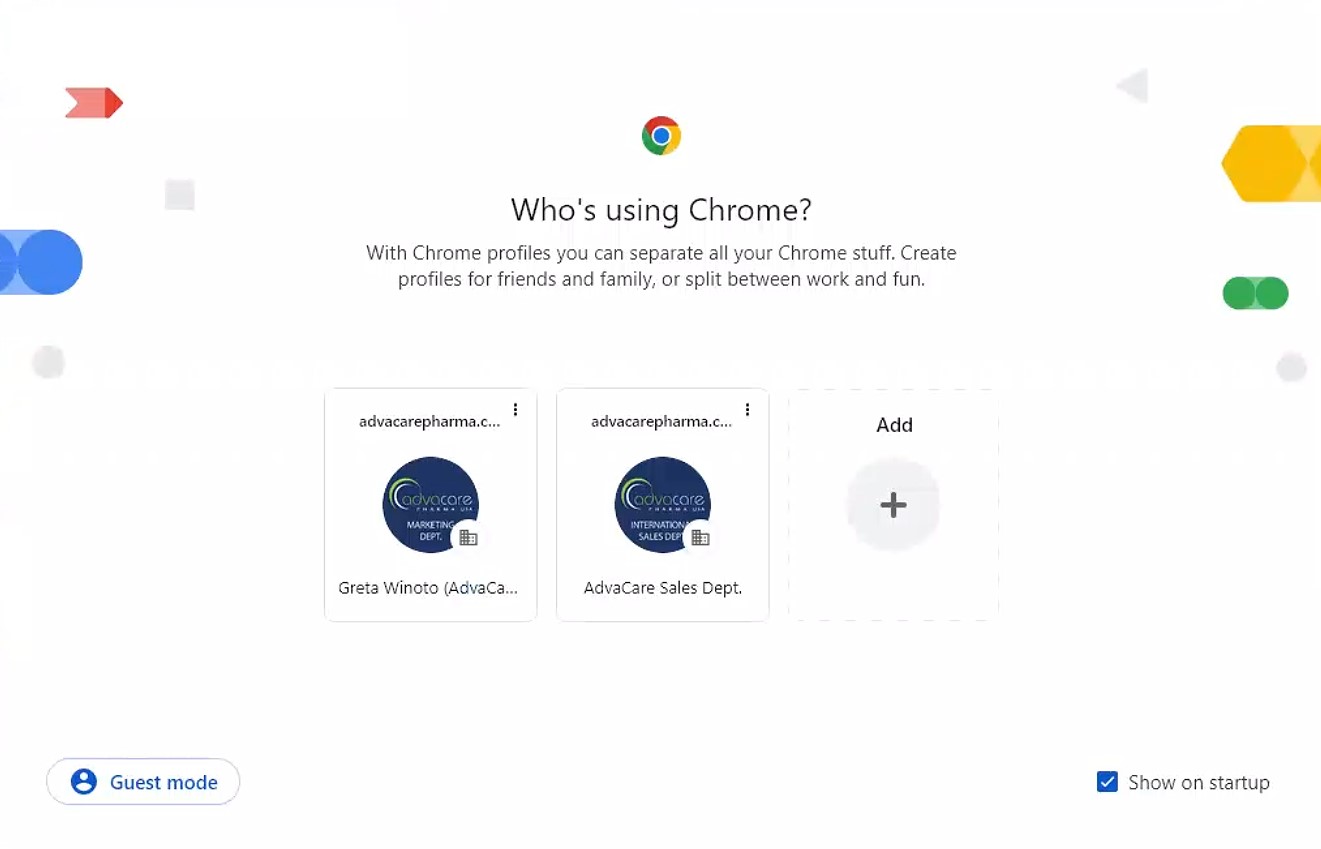
2.11 LinkedIn Access for Campaign Marketing SpecialistIf the new employee will be filling the position of Campaign Marketing Specialist, Ryan's LinkedIn account login credentials information must be provided. This information is on the "AdvaCare IT Assets" Gsheet, "Social Media Accounts" sheet, cells C8 and D8. 2.12 Google Chrome profile settings of the Sales userIf the new user will belong to the Marketing department, a Google Chrome profile of the Sales user must be created. Note: since the marketing member might also need to access the sales BD gmail inbox, the login of the Sales google account in the marketing member workstation is required.
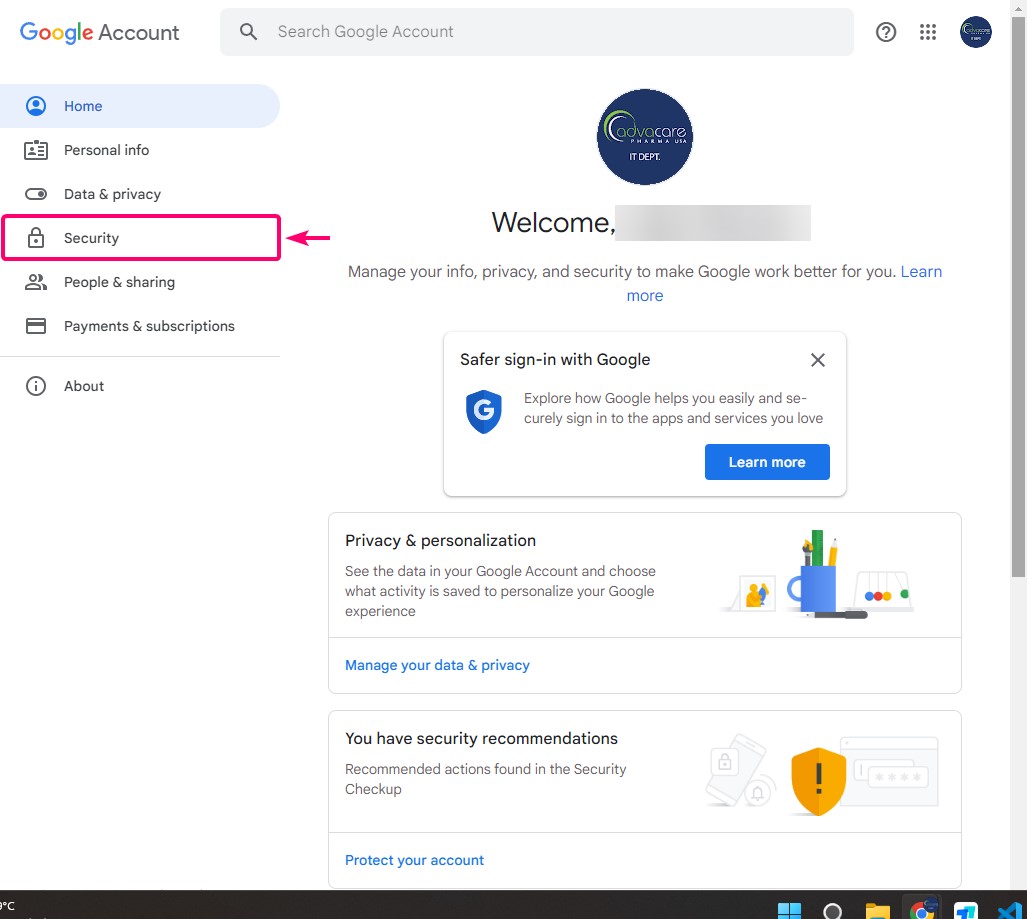
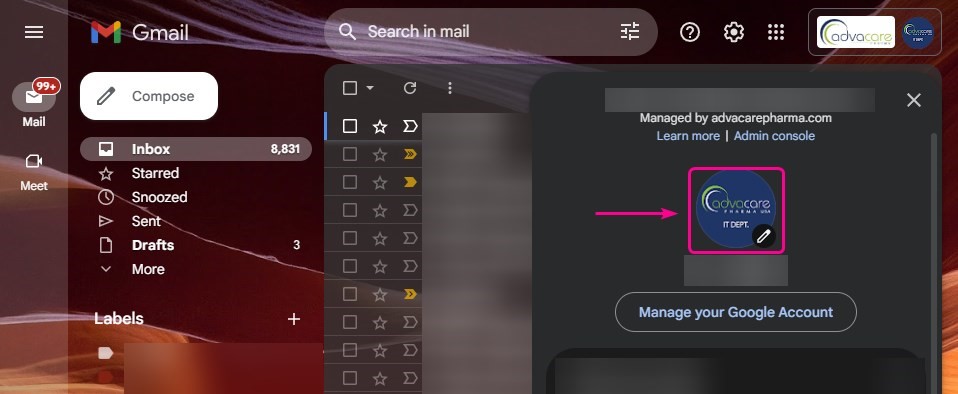
2.13 Set profile picture visible to everyoneClick on the profile image located at the top right of the web page.
Click on the image.
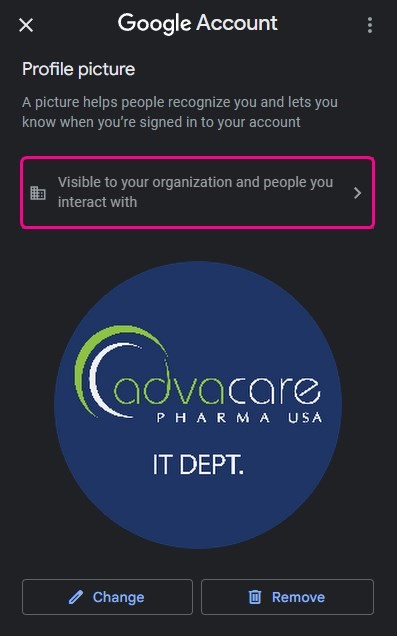
Click on "Visible to you organization..."
Click on "Anyone".
2.14 In case the user is working remotelyIf the user will be working remotely, the following should be done:
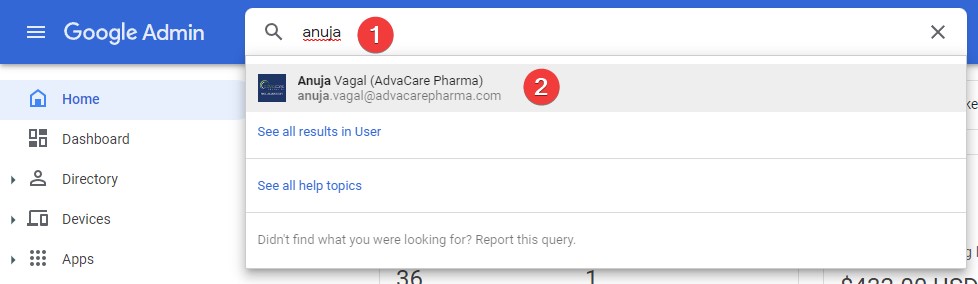
2.15 Modify existing user in Google Admin ConsoleNote: In some situations it isn’t required to create a new user in Google, so in this case, only the existing user must be modified and the Google account must be re-assigned. To modify an existing user, type the name of the user to be replaced in the search field and click the name of the user that is displayed as a suggested result.
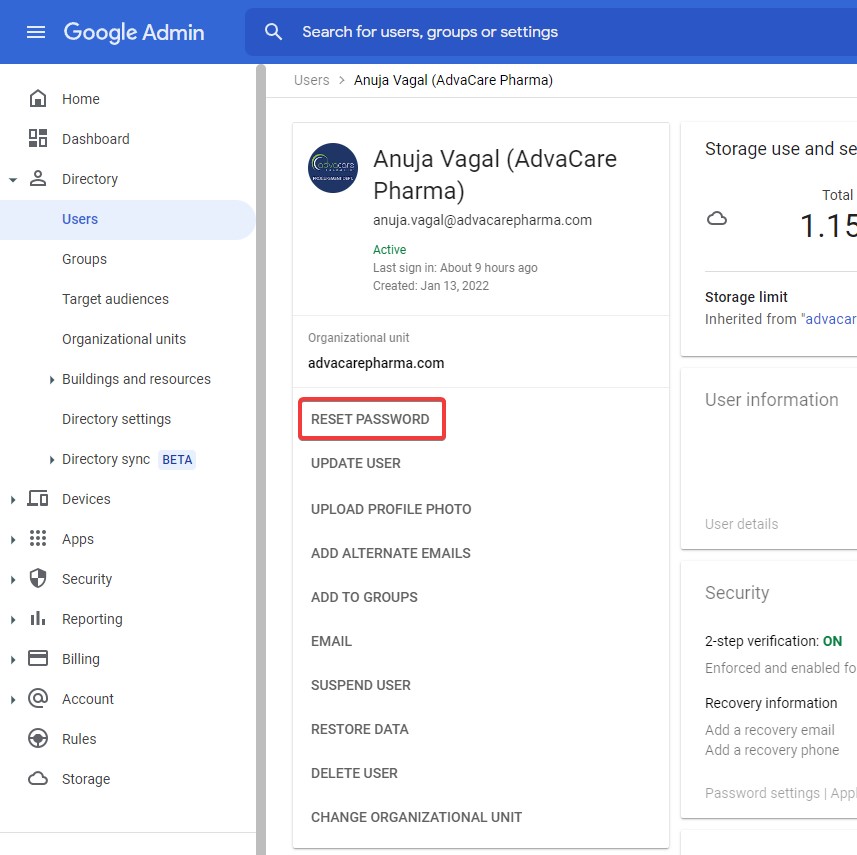
Click on “Reset password”:
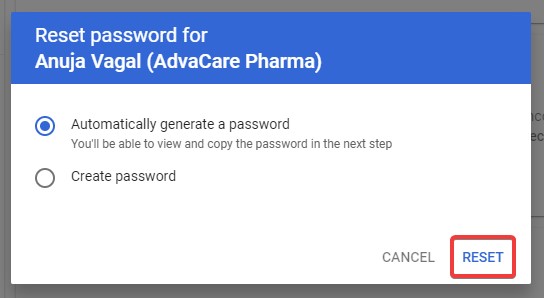
Then click on the “Reset” button:
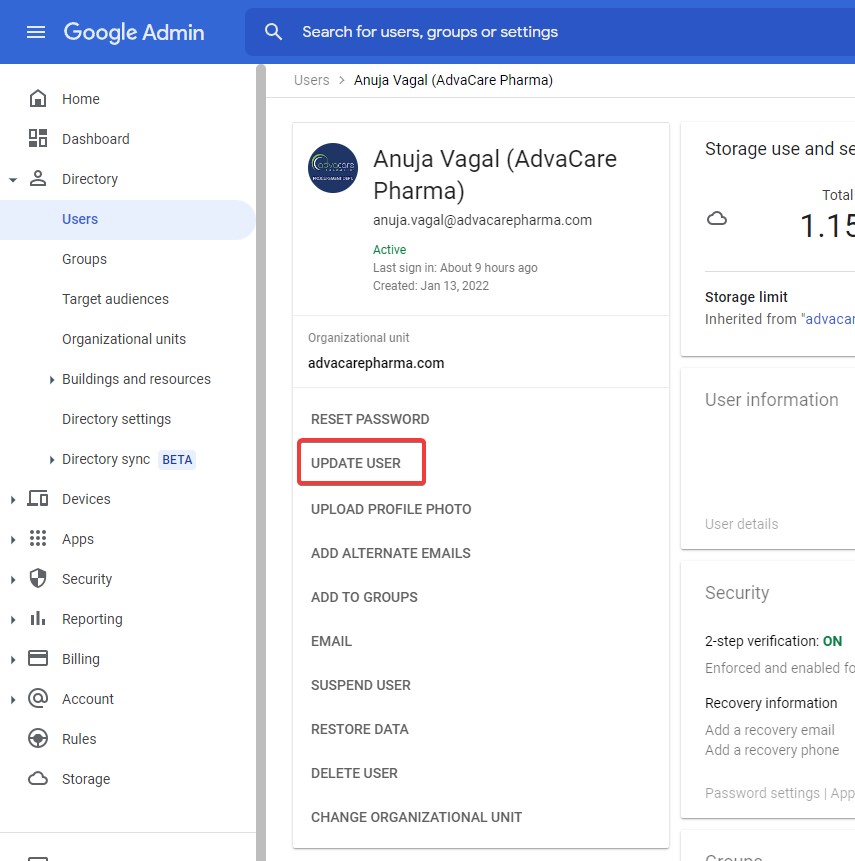
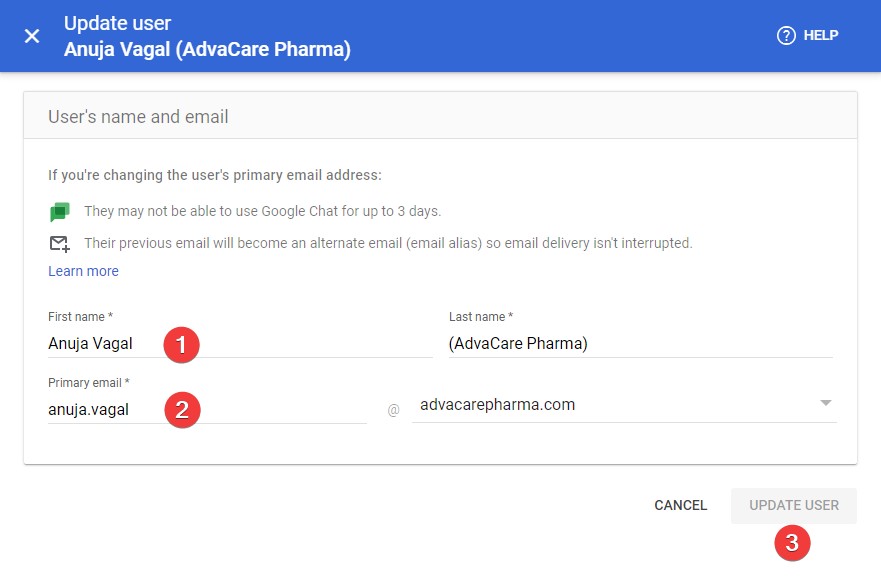
Now, update the new password in the Excel file AdvaCare IT Assets » Gmail Access sheet » Column D. Now, let's update the user's basic information. For that, the IT member will have to click on the “Update user” button:
In the “First name” field, write the full name of the user, add the user of the main email and finally click on the “Update user” button.
Update the new information in the Excel file AdvaCare IT Assets » Gmail Access sheet » Columns A and C. Now, we only need to prove that the user has the correct information and has access. To do this, we can open an incognito window (inPrivate) with the keys Ctrl + Shift + N. Log in to GMail (gmail.com), click on the “Sign in” button at the top right of the screen and enter the user data just modified. Afterwards, GMail will ask the IT member to confirm that it is him or her by choosing between different options:
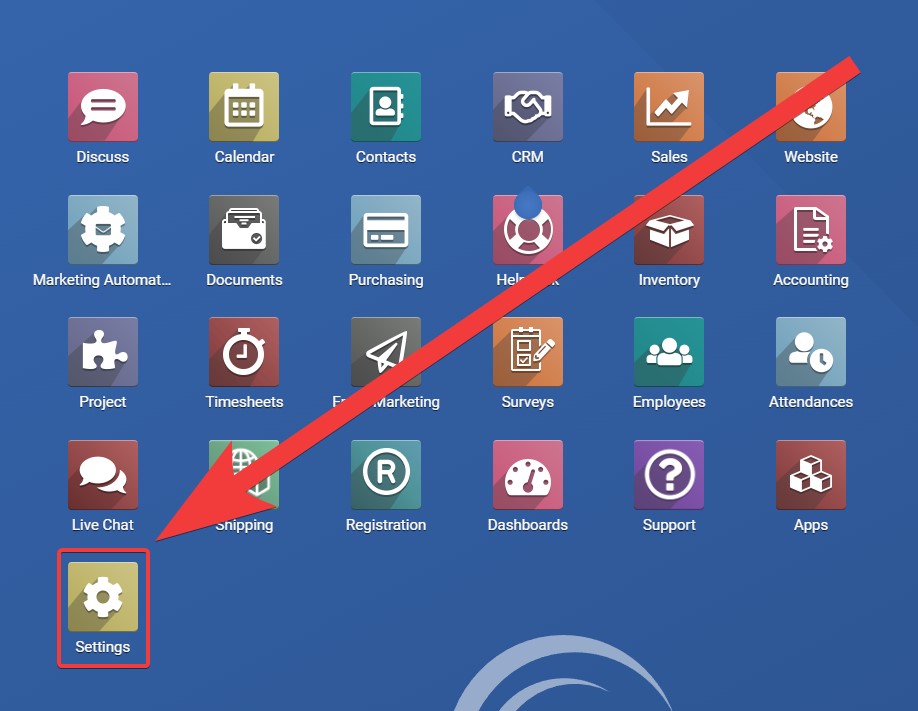
With the 8-digit backup code we can usually complete this step. The IT member can find these codes in GDrive, in the following path: Z:\Shared drives\AdvaCare IT Control\Access\Google Backup Codes If for some reason it is not possible to do this with the 8-digit backup codes, the IT member can choose the option to send the code as an SMS text message that will be sent to one of the supervisors. To know the phone numbers of the users, the IT member can open the Excel file “AdvaCare IT Assets ”, in the sheet “Employees Information ”, column “M ”. Identify which of the phone numbers ends in the two digits shown on the screen and kindly ask that person who sends the IT member the code they received as a text message on their cell phone. If everything went well, the IT member were able to access this user's email and since it is a modified user (it was a user that already existed), usually in the inbox there should already be messages received in the past. 3. Odoo Account SetupAccording to our process we create a user in the Odoo ERP which is usually referred to as the Production Environment of the ERP. This setup is handled with high priority since the ERP is the main system where all the communication and assignments are handled within the Company. 3.1 Create an Odoo userThe production environment ERP is as follows Dashboard » Settings.
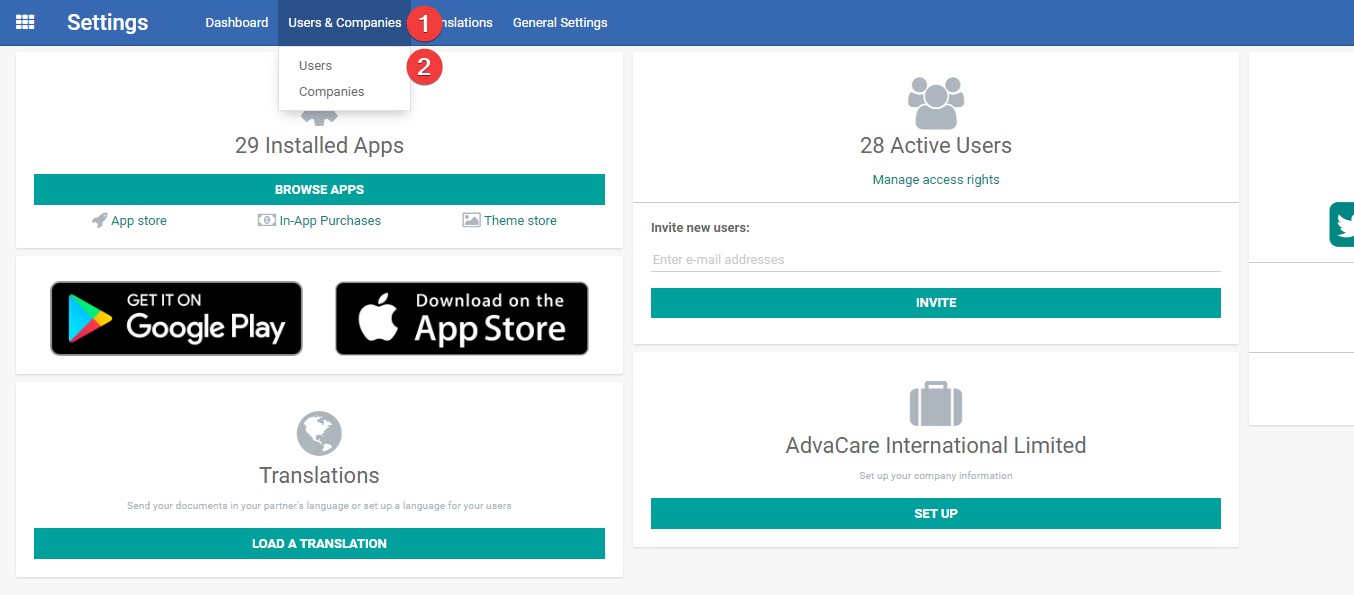
In the horizontal main menu located at the top of the screen: Users & Companies » Users.
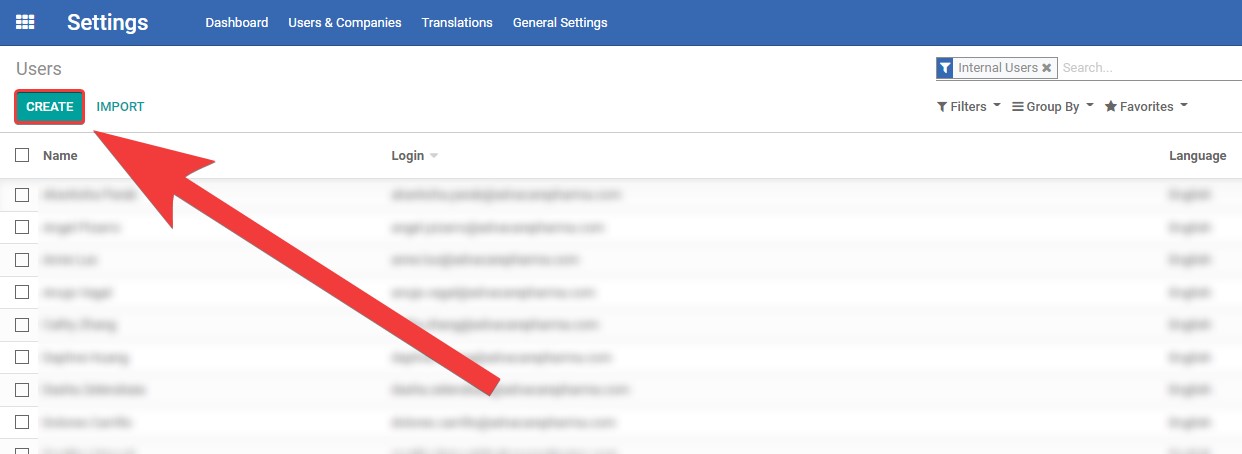
Click on the “Create” button.
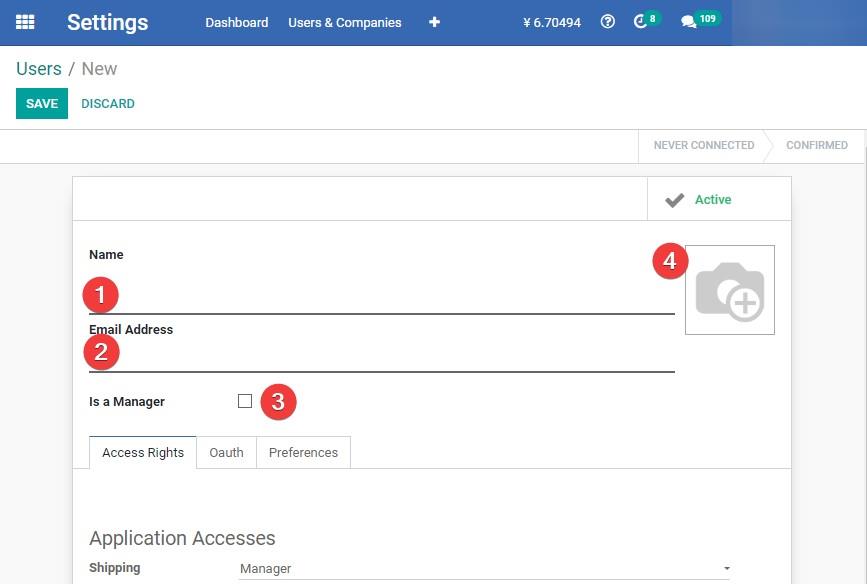
Enter the user's basic information following the format described below:
Z:\Shared drives\AdvaCare IT Control\Access\Profile Pictures
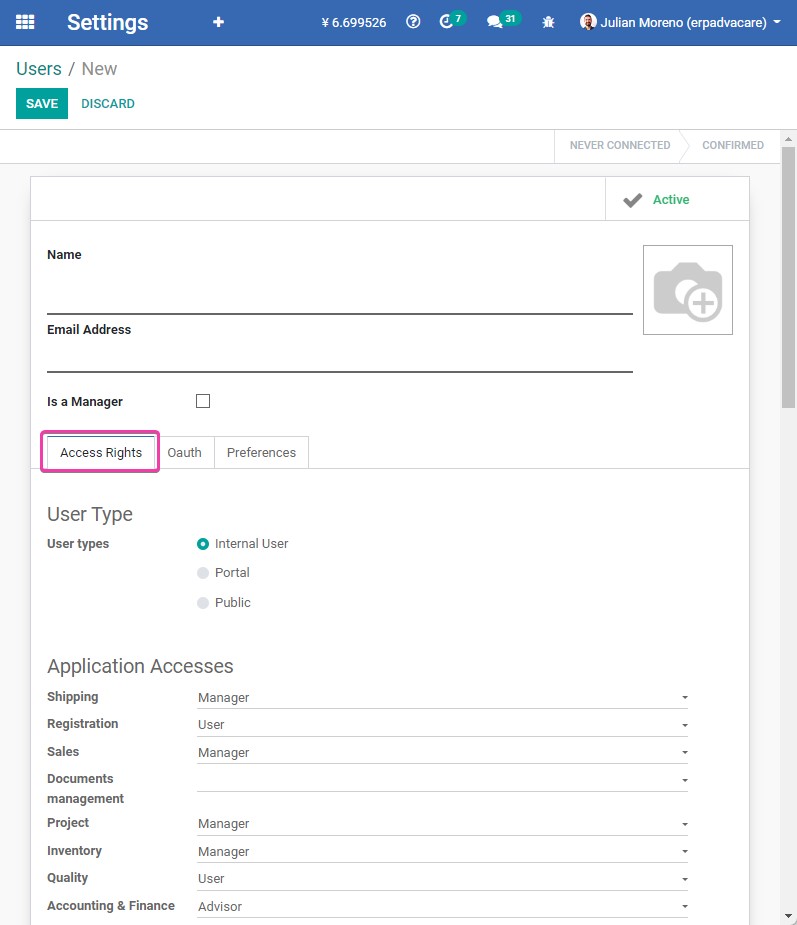
3.1.1 Access rights for a userTo configure the accesses to modules and features of a new User in Odoo, do the following:
Note: Repeat the step 3 for each of the modules and/or features where the new employee requires access.
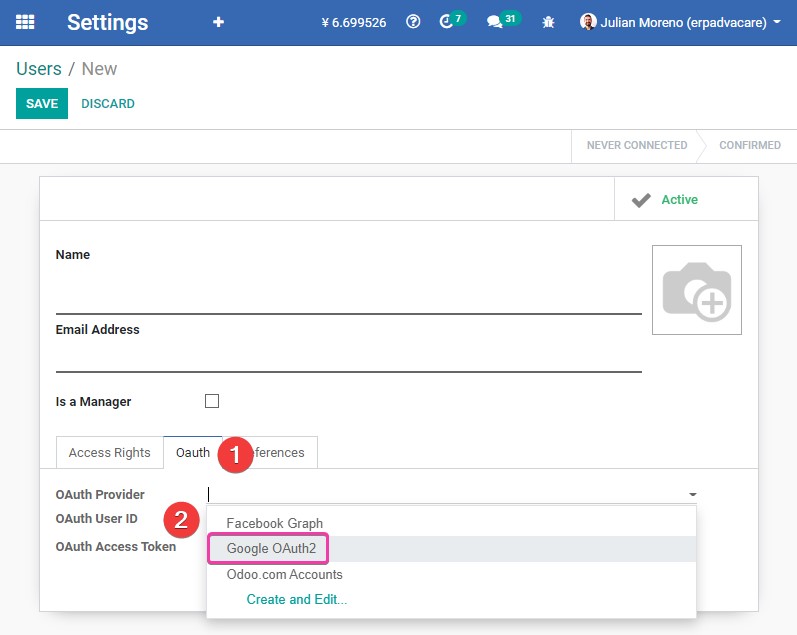
3.1.2 Oauth for a userOn the "Oauth" tab, in the OAuth Provider field, choose the "Google OAuth2" option. This is the only update required in this section, the other fields (OAuth User ID and OAuth Access Token) will be automatically filled in once the users login the ERP system using the Google SSO option of the Google account.
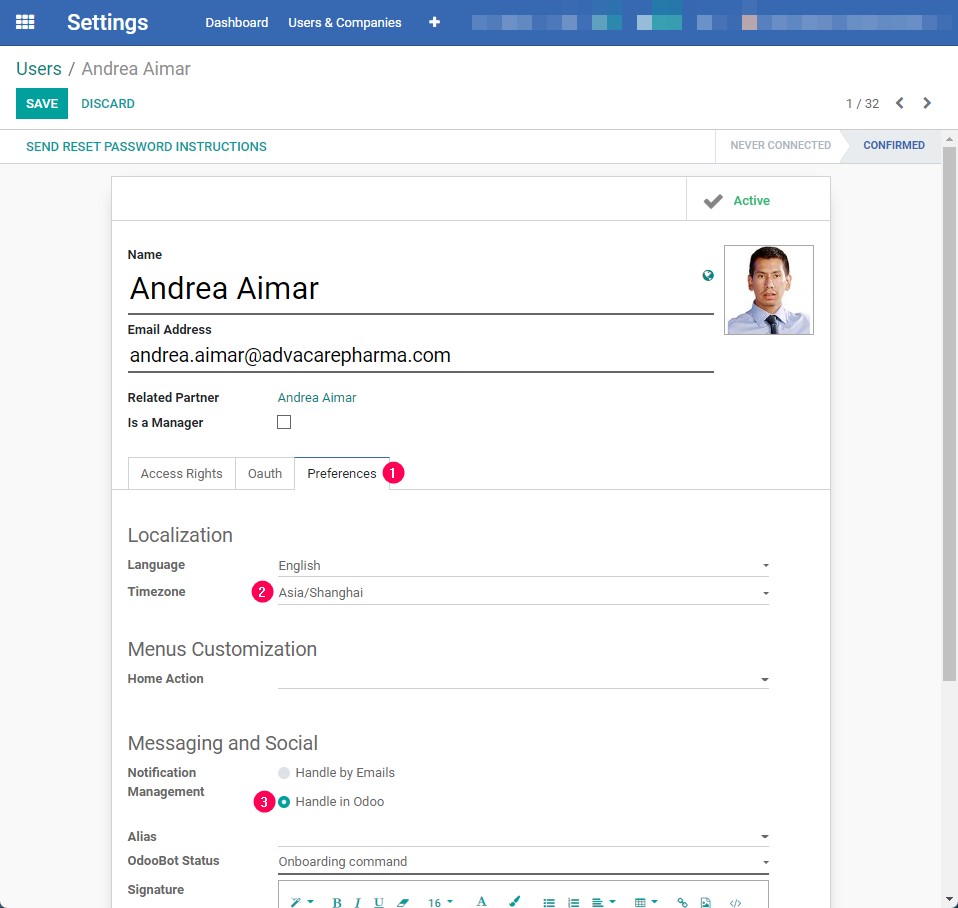
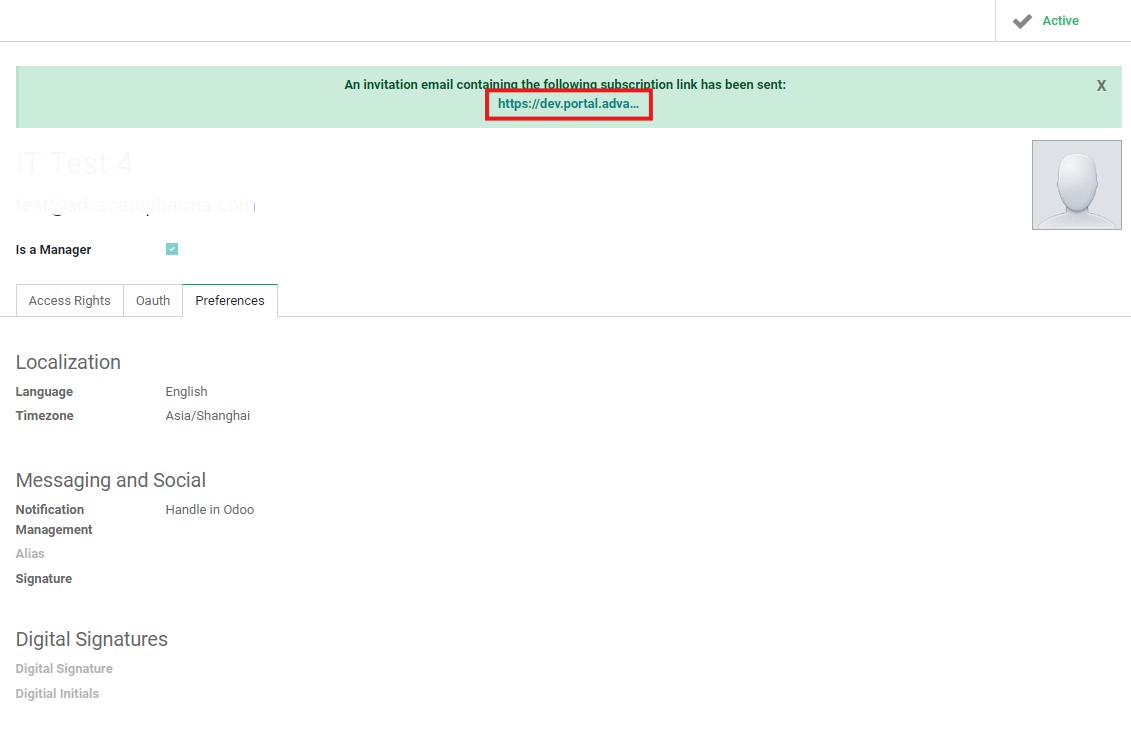
3.1.3 Preferences for a userOn the "Preferences" tab (point 1):
Choosing the Handle in Odoo option means that all notifications of all activities performed in Odoo will be received in the Odoo Inbox. Finally click on the "Save" button. 3.1.4 Google Oauth set upAfter the “Save" button is clicked on, the new User will be created and an invitation with a link for new User login will be displayed on top in a green notification bar:
The IT Operations Supervisor must click on the link to open it in a new tab:
On the screen above, click on the button Log in with Google and sign in from the new employee’s Google account. The fields “Password” and “Confirm Password” should remain empty. Make sure the login to the new User’s Odoo account is successful. If there is an error (for example, “Access Denied”), then IT Operations Supervisor must troubleshoot the problem by taking the following actions:
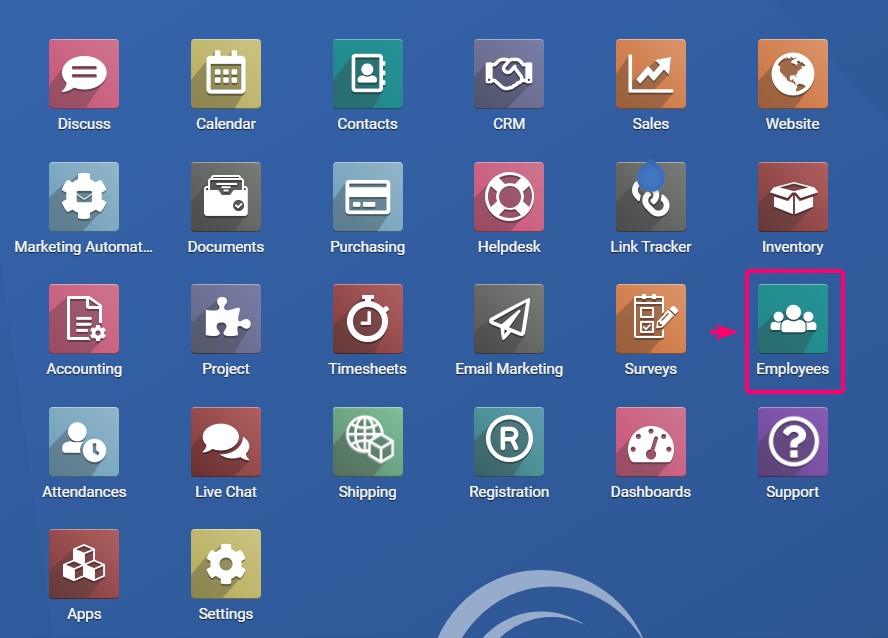
Note: Make sure to identify the old User of the same google account correctly. If IT Operations Supervisor does not know who was the previous Odoo User of the same google account, check the aliases of this google account. If all attempts failed and IT Operations Supervisor cannot resolve the issue with Google sign in, request assistance from Business Applications Manager. 3.2 Create an Odoo employeeThe production environment ERP is as follows Dashboard » Employees.
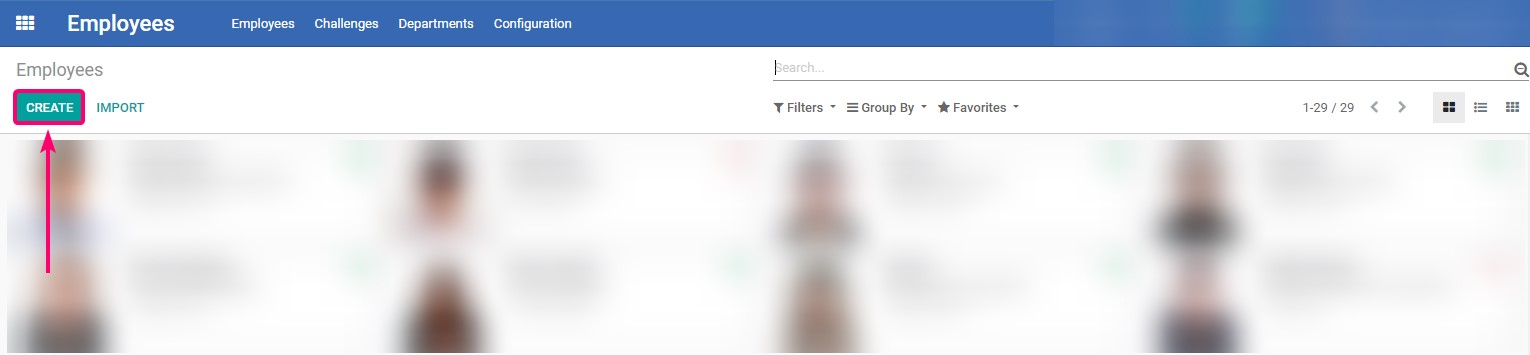
Click on the “Create” button.
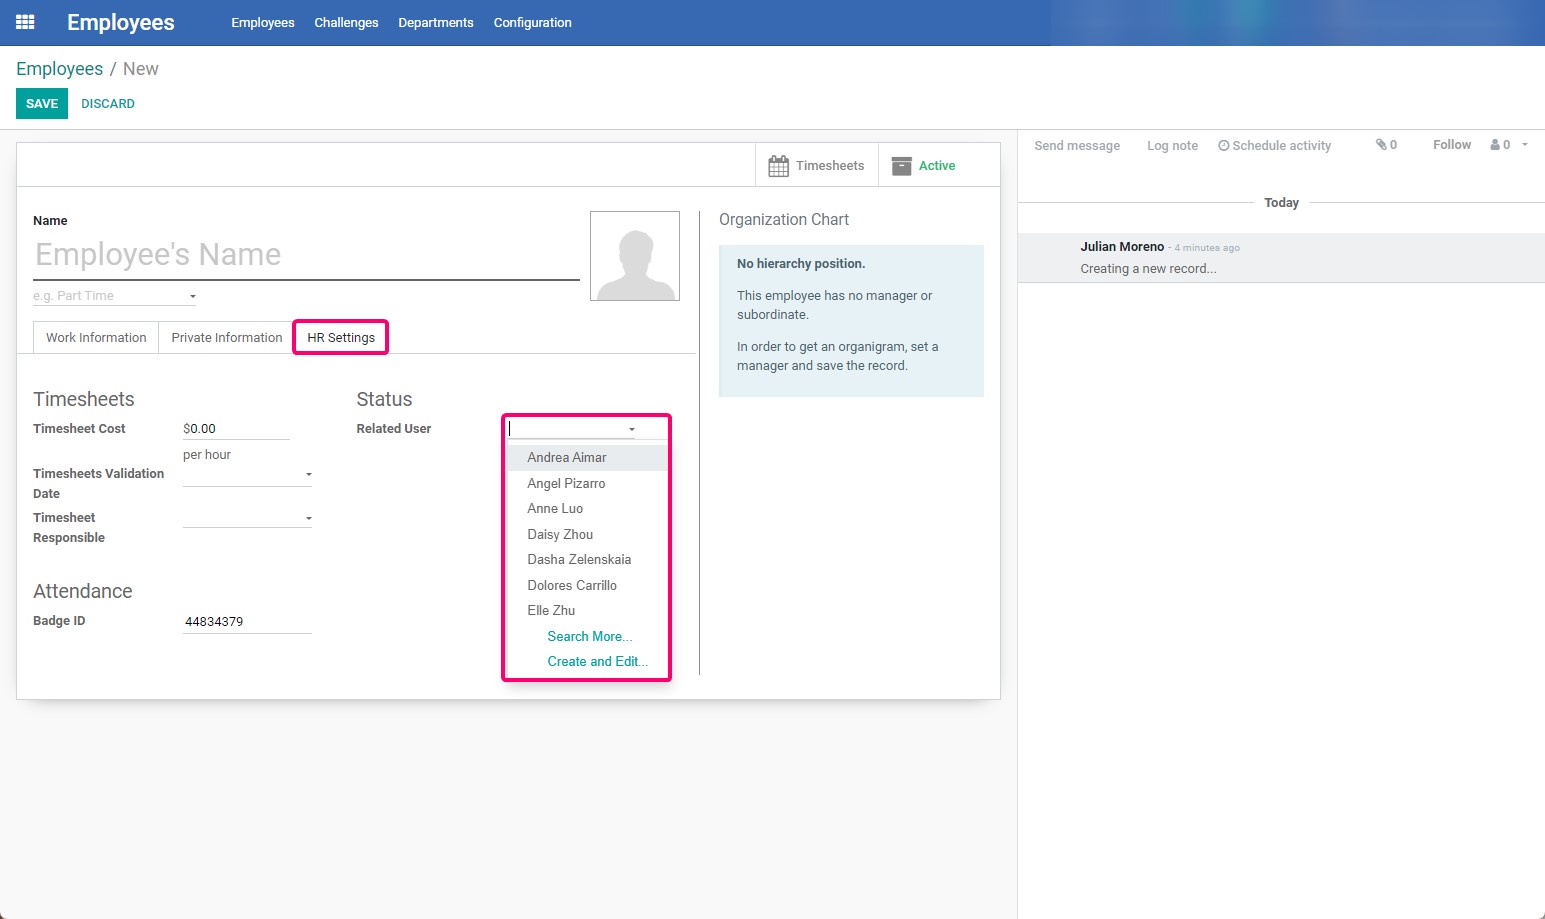
Enter the employee's general information following the sections described below: 3.2.1 HR settings for an employee
Note: At this point some of the employee's fields should be automatically filled in.
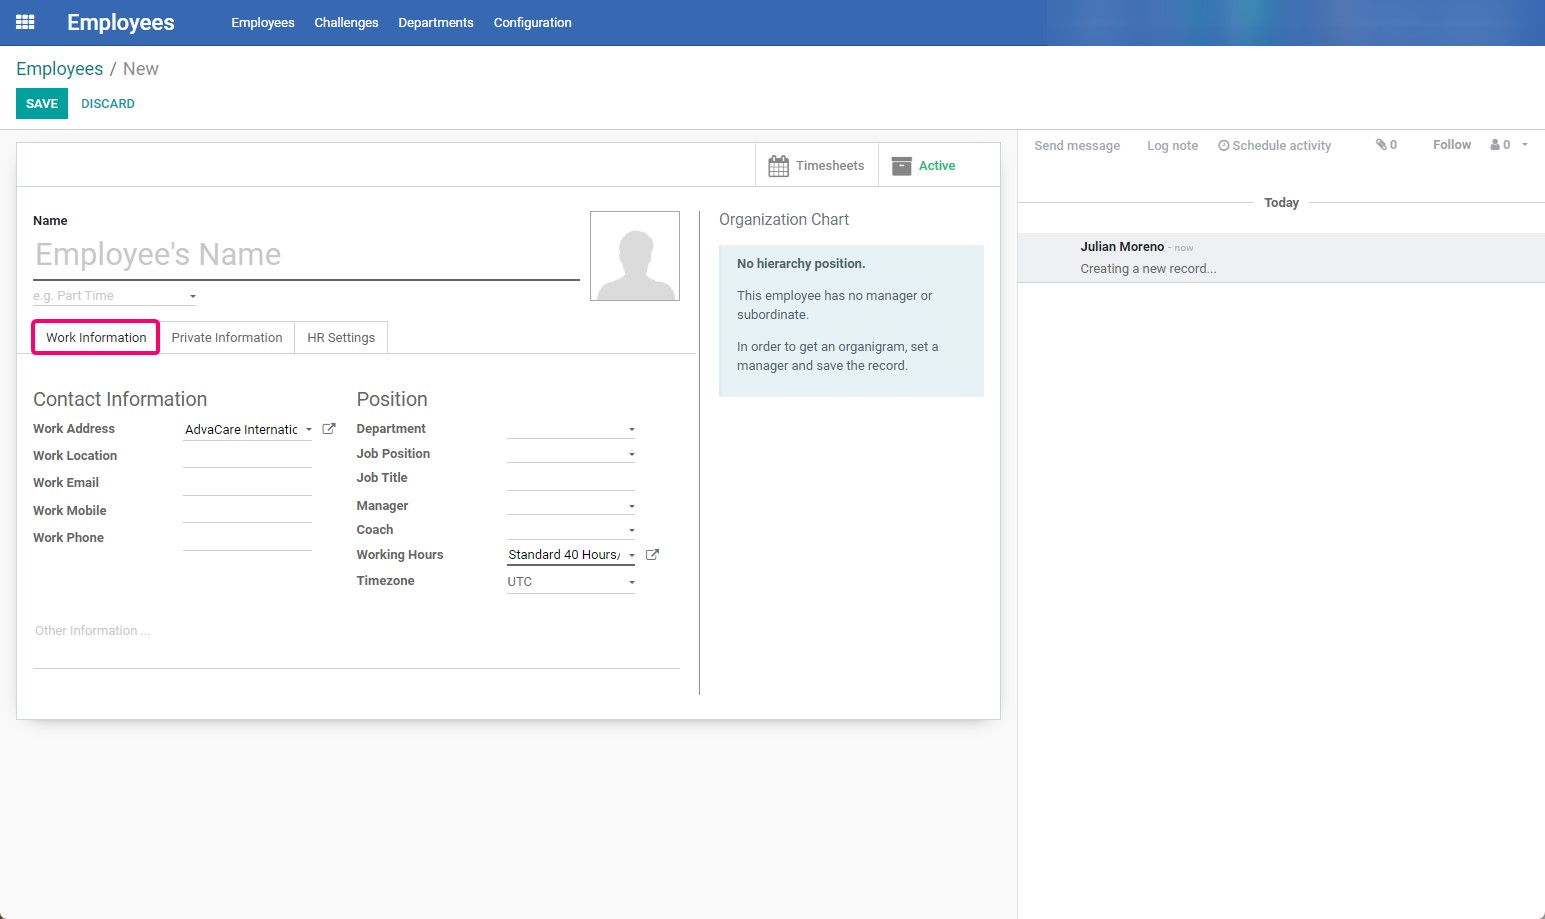
3.2.2 Work information for an employee
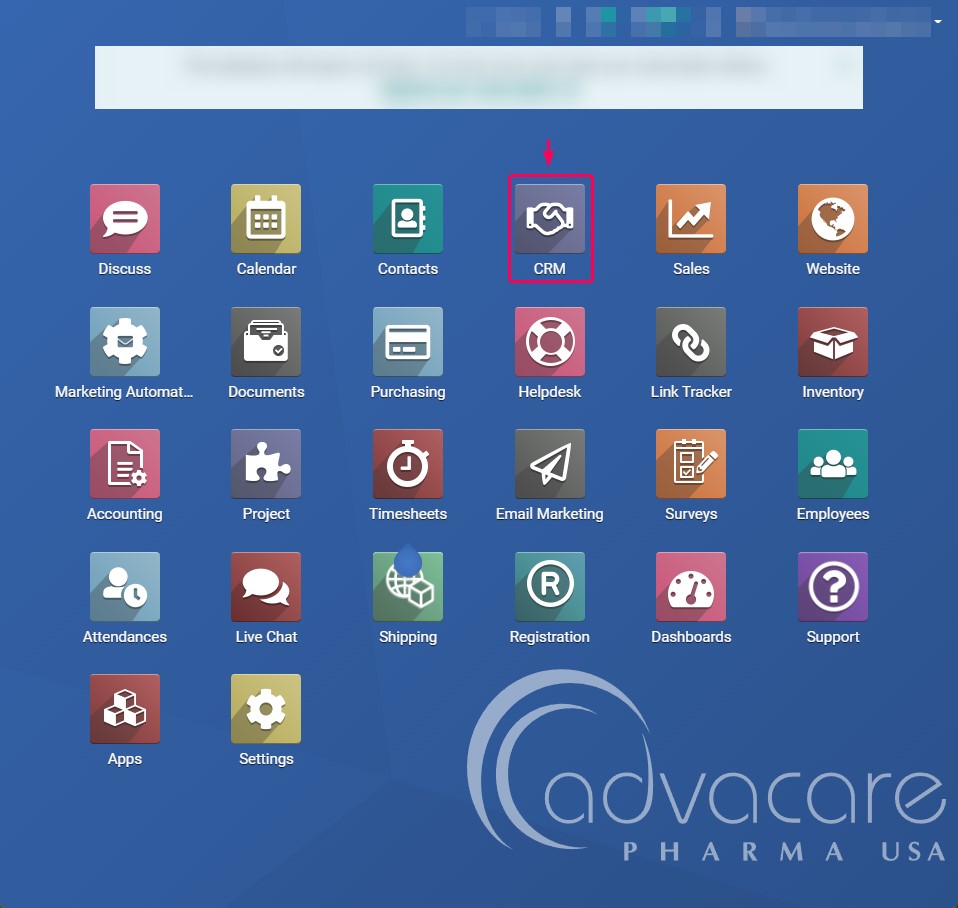
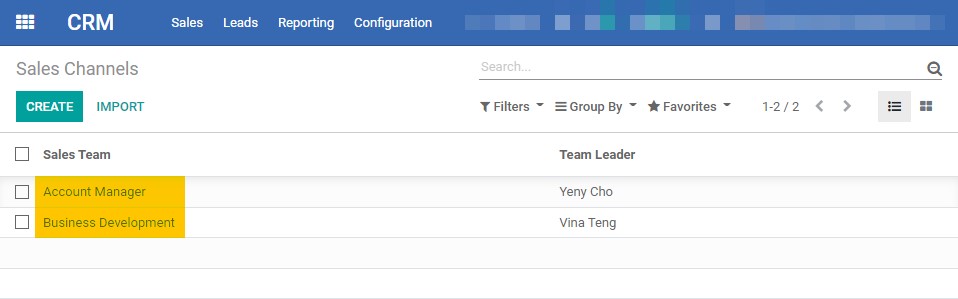
3.3 Update Sales teams in Odoo (only for Employees of Sales Department)To add a salesperson to a sales team, follow the steps below: Click on the CRM module.
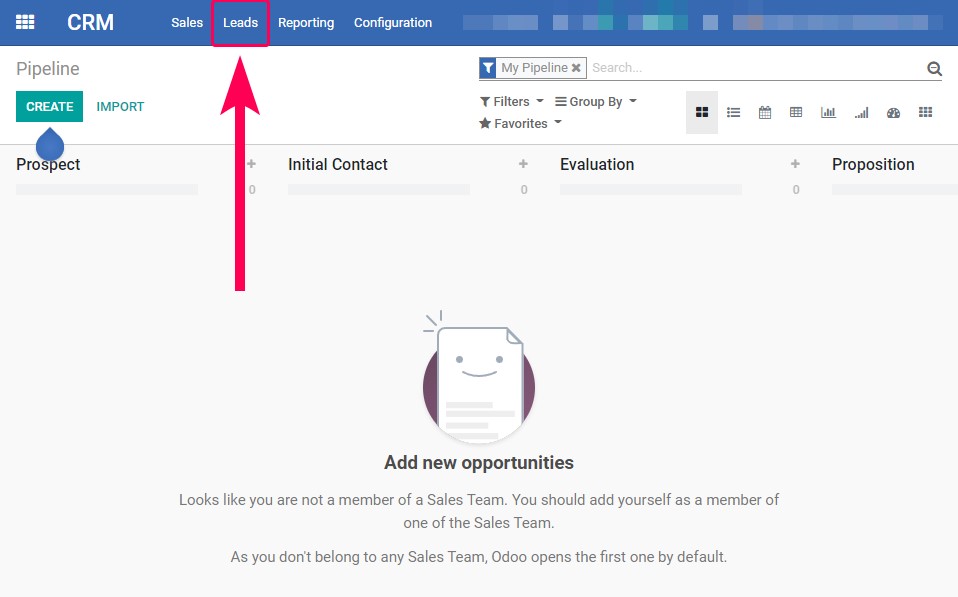
Click on the Leads menu.
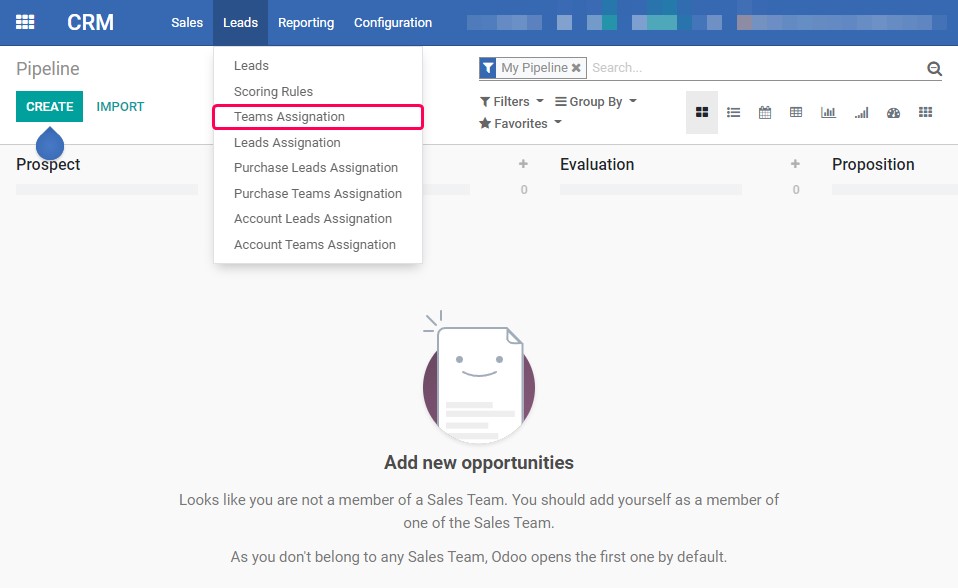
Click on the Teams Assignment submenu.
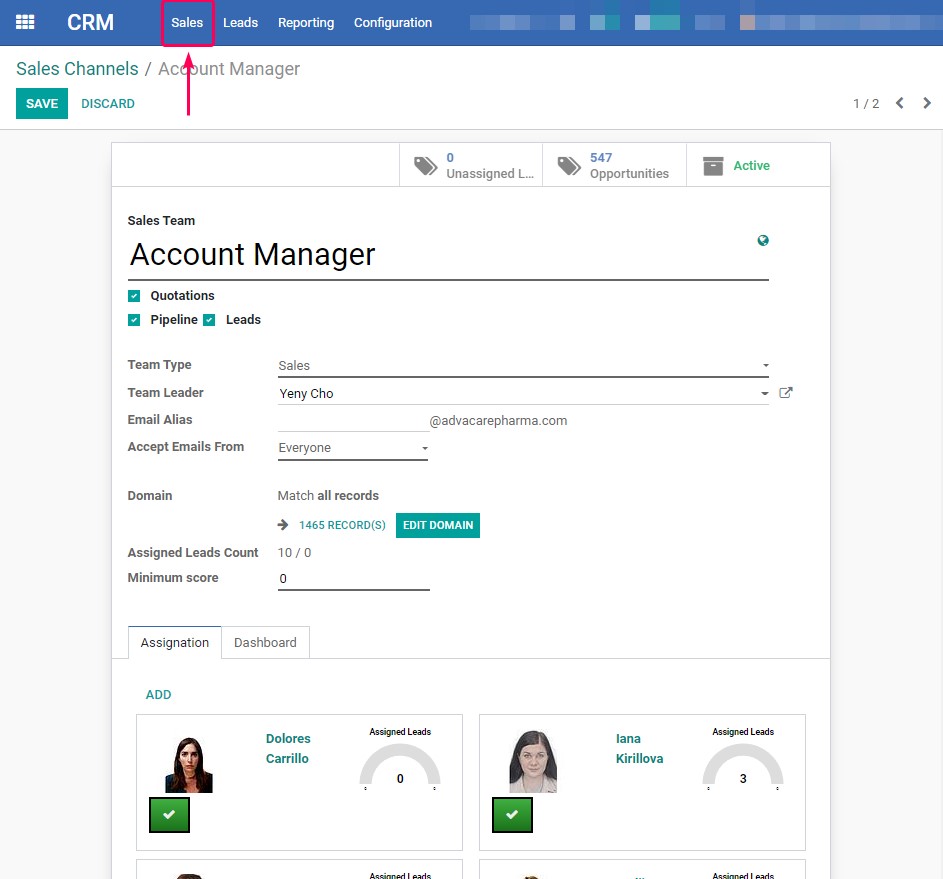
Click on the name of the sales team to which the new employee belongs. For this exercise, the Account Manager team will be chosen.
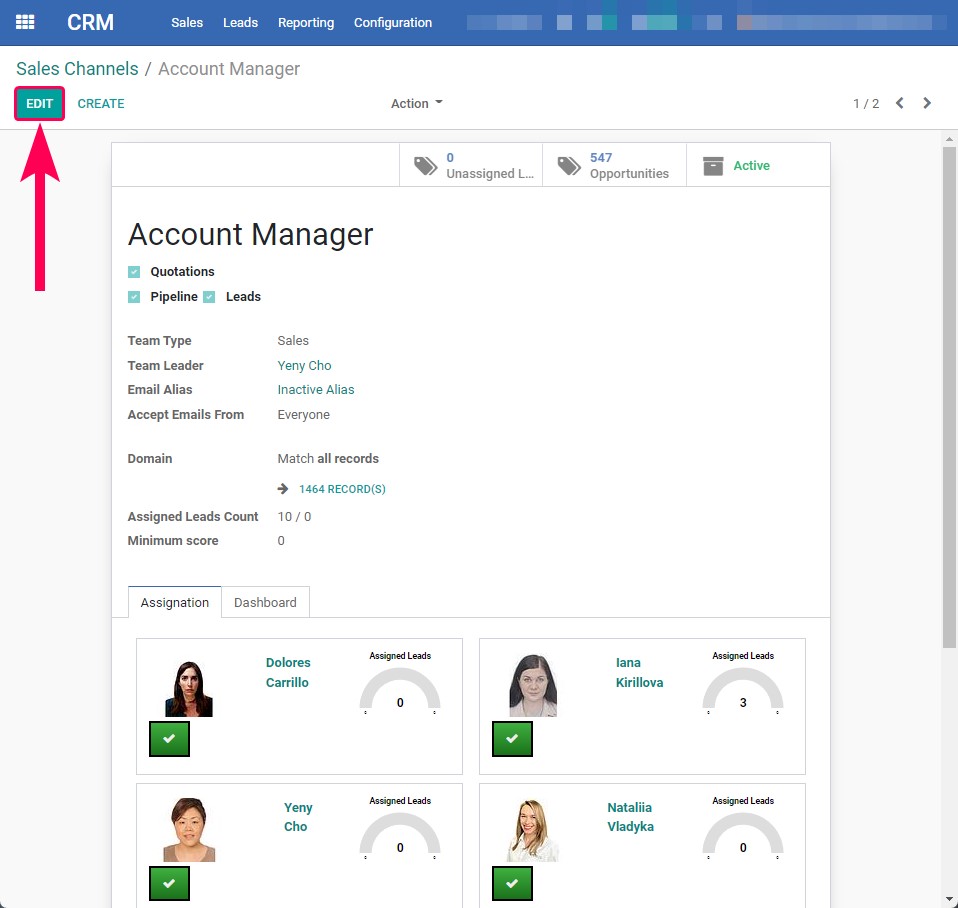
Click on the EDIT button.
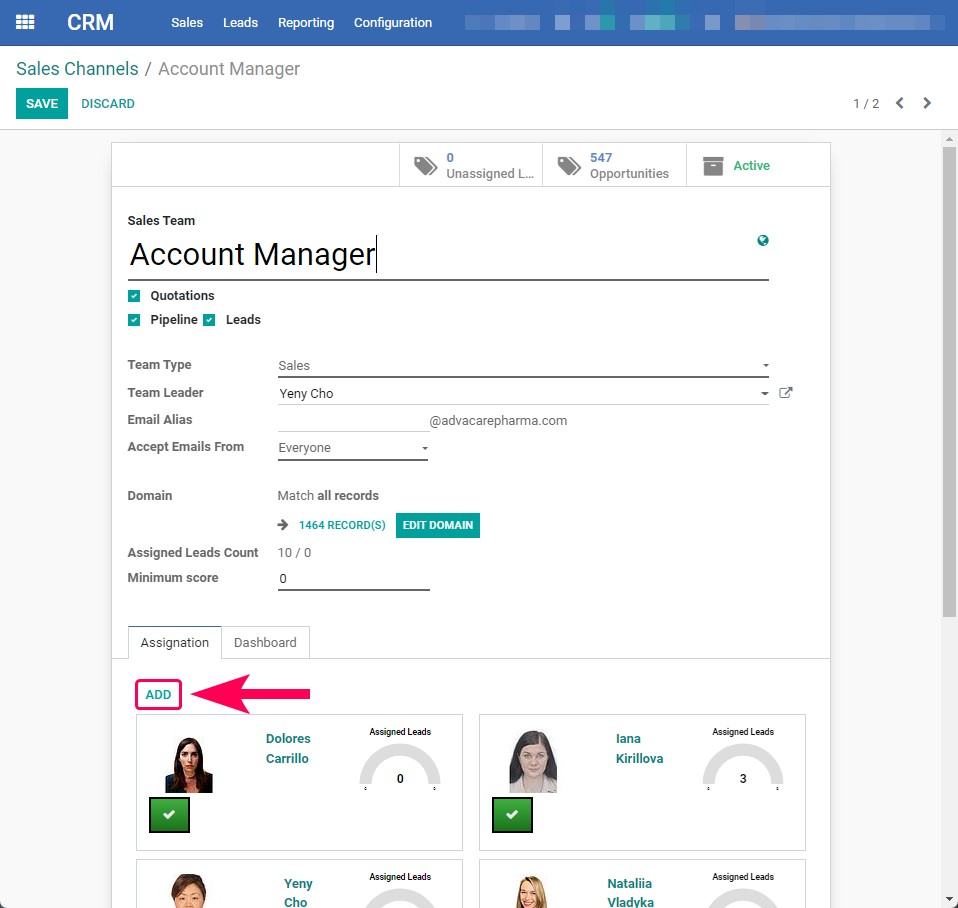
Click on the ADD button.
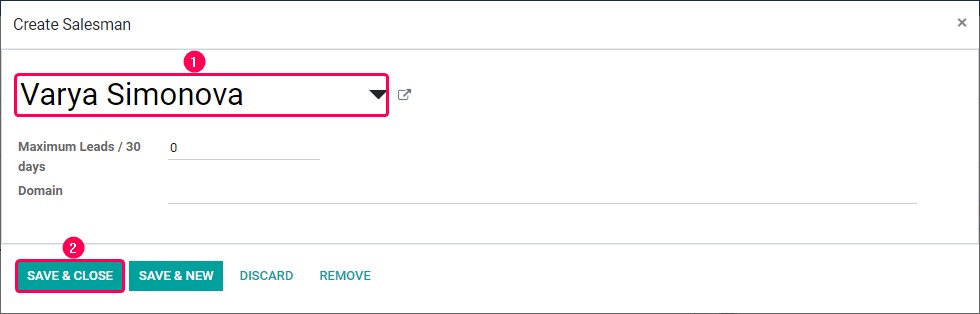
In the text field, type the full name of the new employee and click on the SAVE & CLOSE button.
Click on the X with a red background. It may be necessary to make 2 clicks.
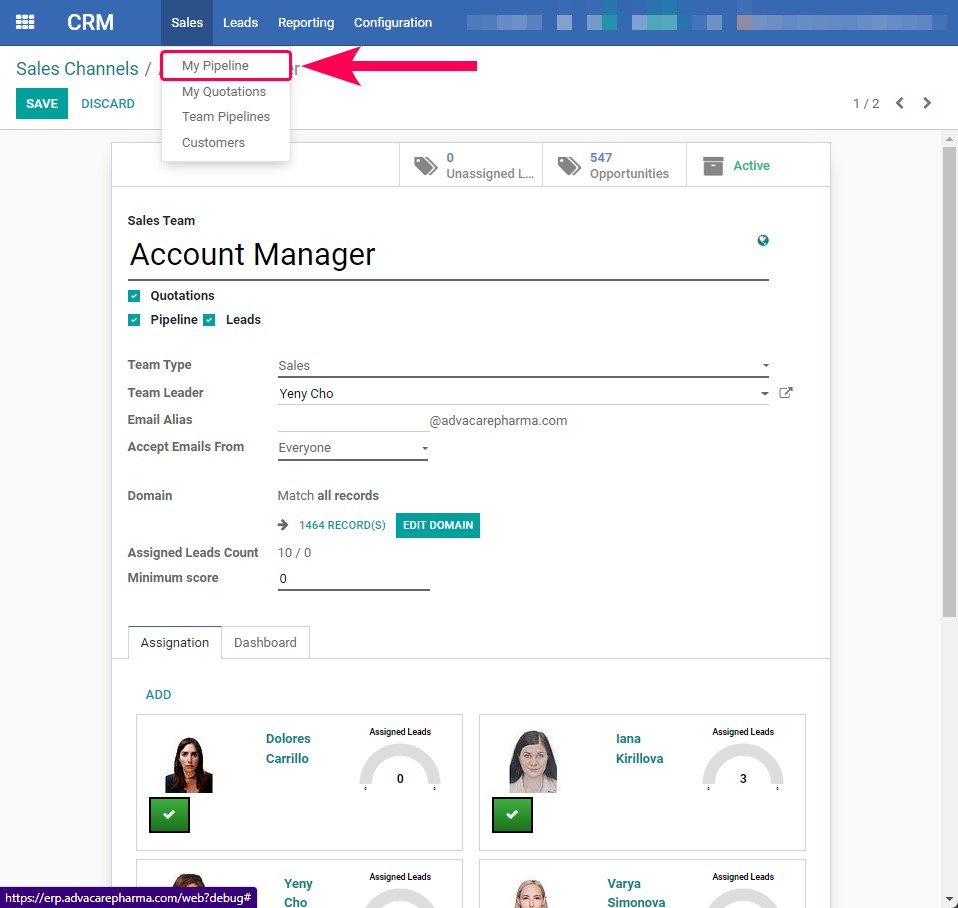
To test that the configuration is correct: Click on the Sales menu.
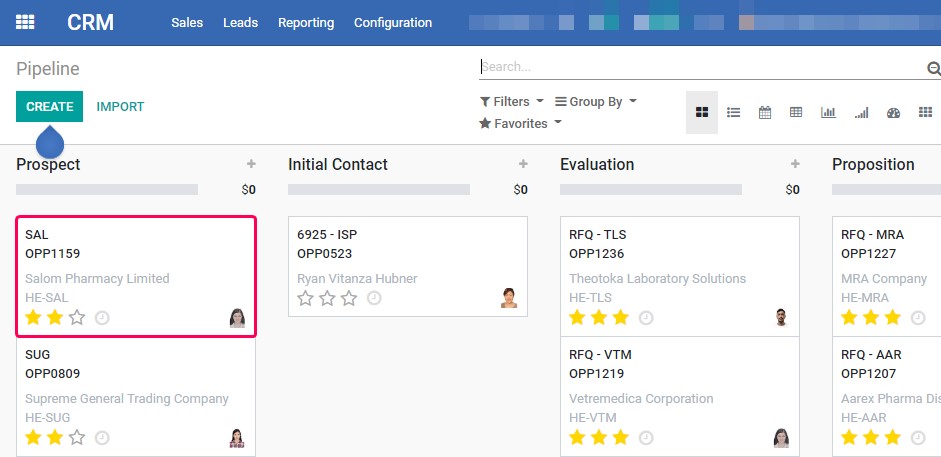
Click on the sub-menu My Pipeline.
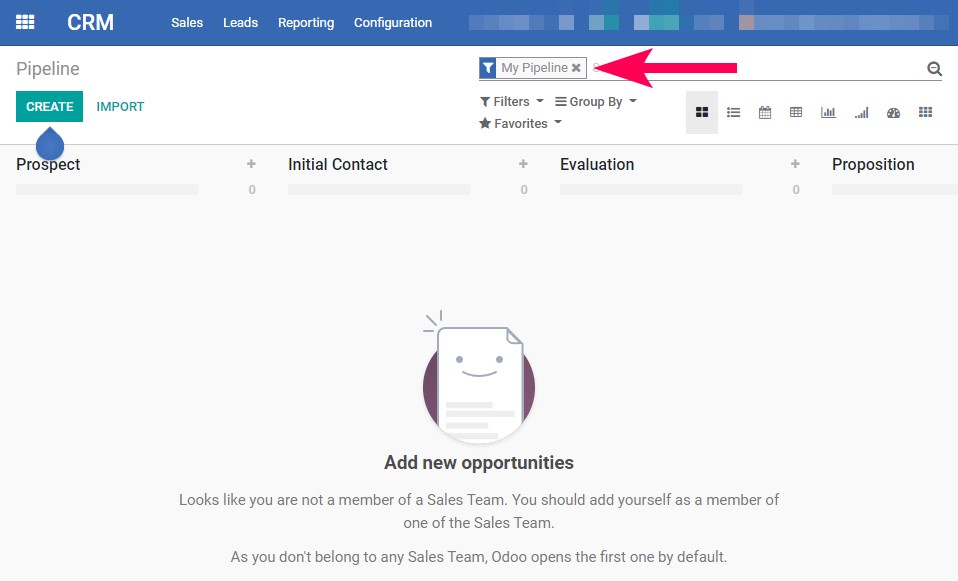
Click on the X to remove the My Pipeline filter.
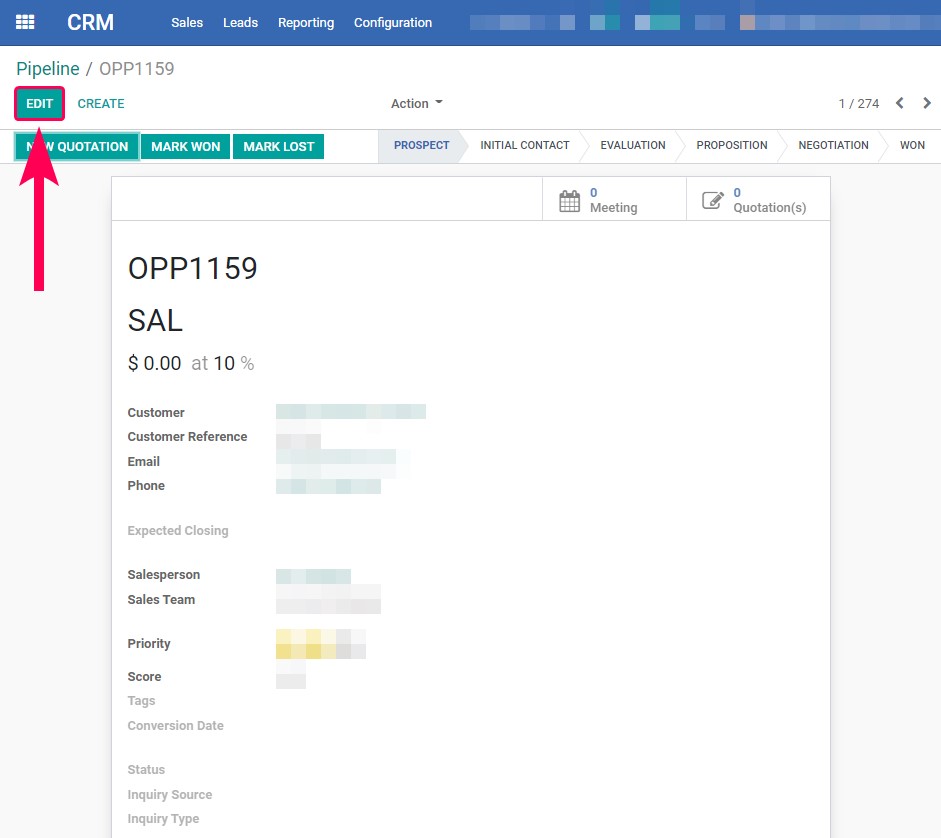
Choose any Pipeline. For this exercise, the Pipeline OPP1159 will be chosen.
Click on the EDIT button.
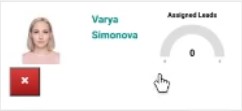
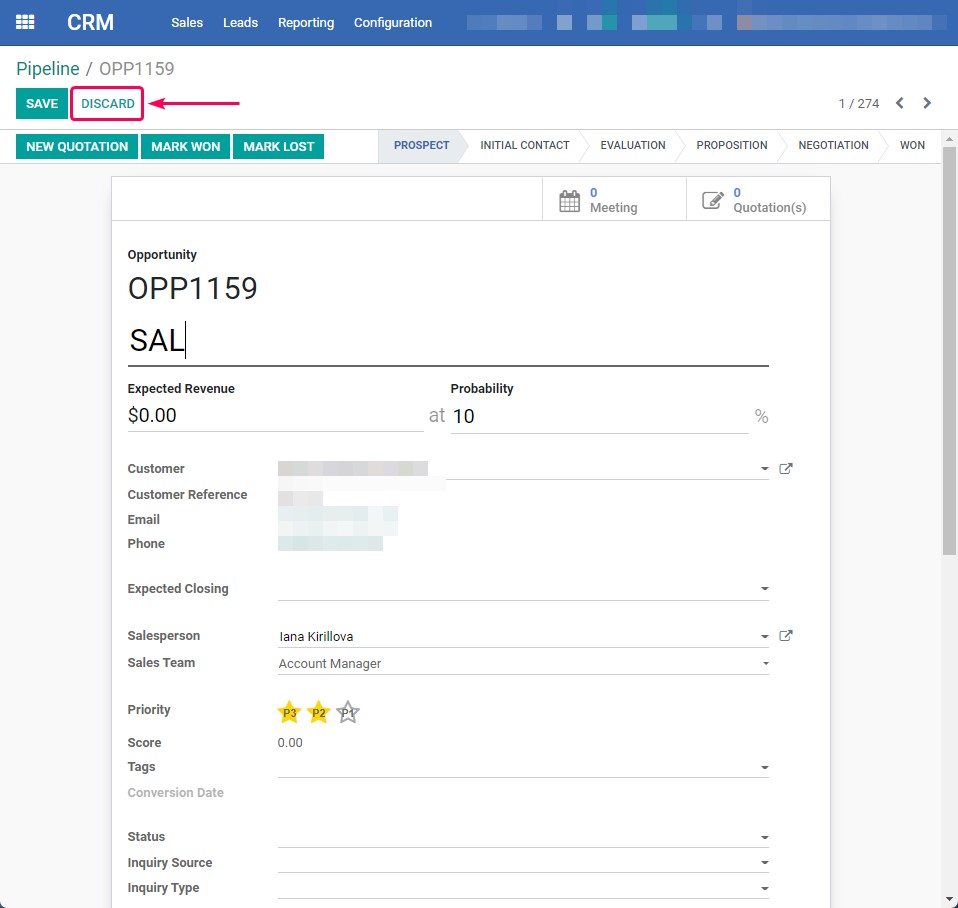
In the Salesperson field, type the employee's name. If configured correctly, the employee's name will be displayed in the drop-down list.
Finally, click on the DISCARD button.
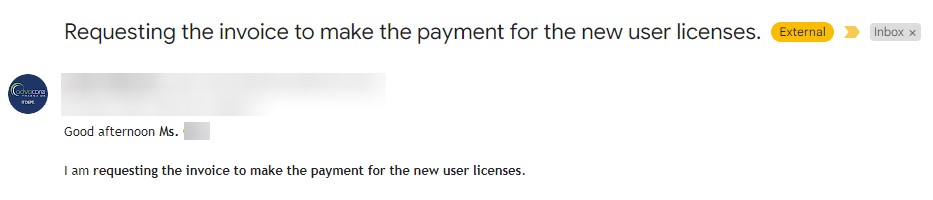
3.4 Pay for new Odoo user licensesThe Odoo partner must be contacted via email requesting the invoice to make the payment for the new user created:
Then, a task must be created in Odoo asking the Accounting staff to follow up on the response from the Odoo partner and then make the payment:
3.5 Modify existing user in Odoo (ERP) Production EnvironmentNote: In some situations it isn’t required to create a new user in Odoo, so in this case, only the existing user must be modified and the Odoo account must be re-assigned. According to our process we update a user in the Production Environment of Odoo ERP as an activity with high priority and then in Development and Testing Environments as another activity with normal priority. The link for the Production Environment is as follows: https://erp.advacarepharma.com/ Then, click on: Dashboard » Settings.
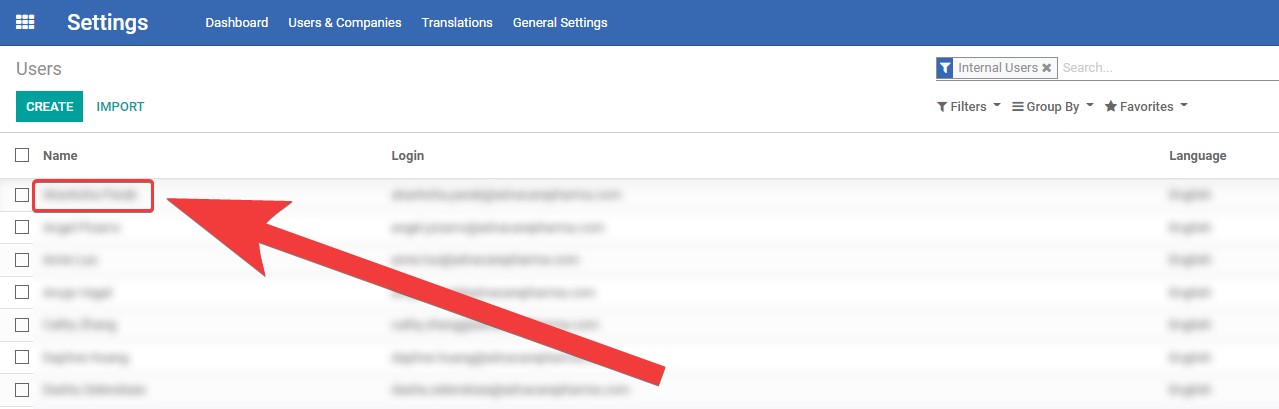
In the horizontal main menu located at the top of the screen: Users & Companies » Users.
Click on the name of the user to be modified.
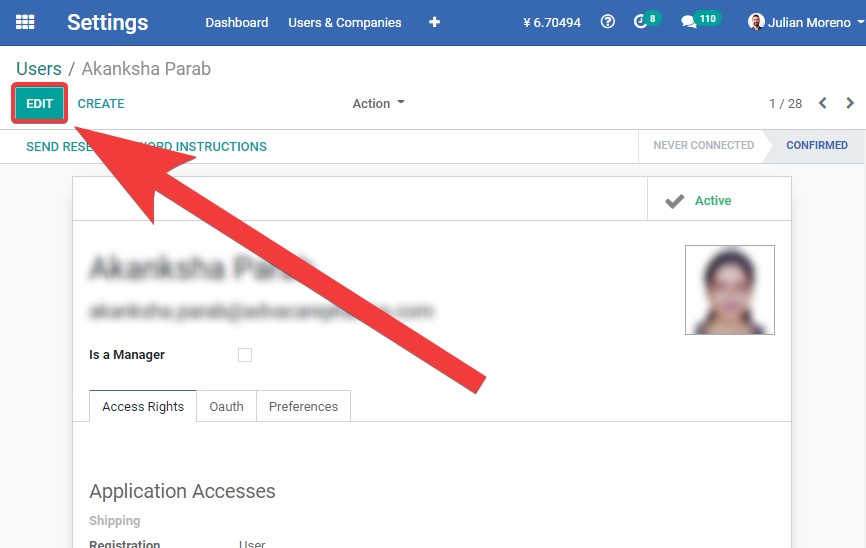
Click on the “Edit” button.
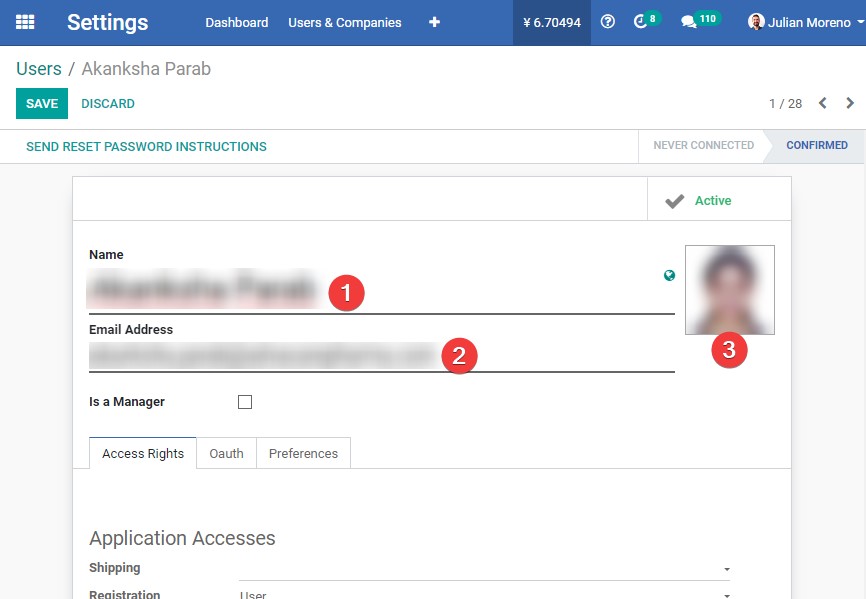
Edit the user information.
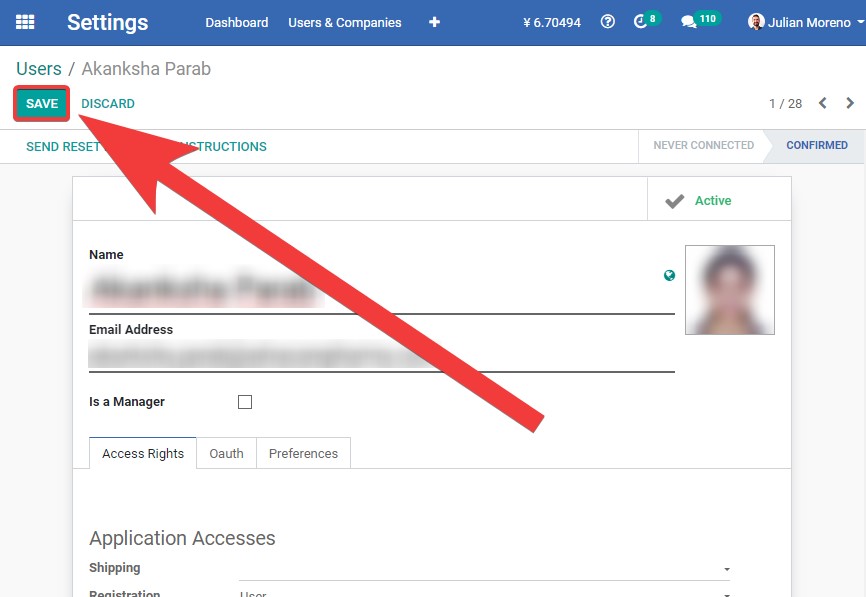
Depending on the existing user profile and the new user profile, make sure to change the information under “Access Rights", and under "Oauth". In the Oauth tab, clear the value in Oaut User ID field. If this action is not done, Google sign in of the User will not work correctly. Finally, click on the “Save” button.
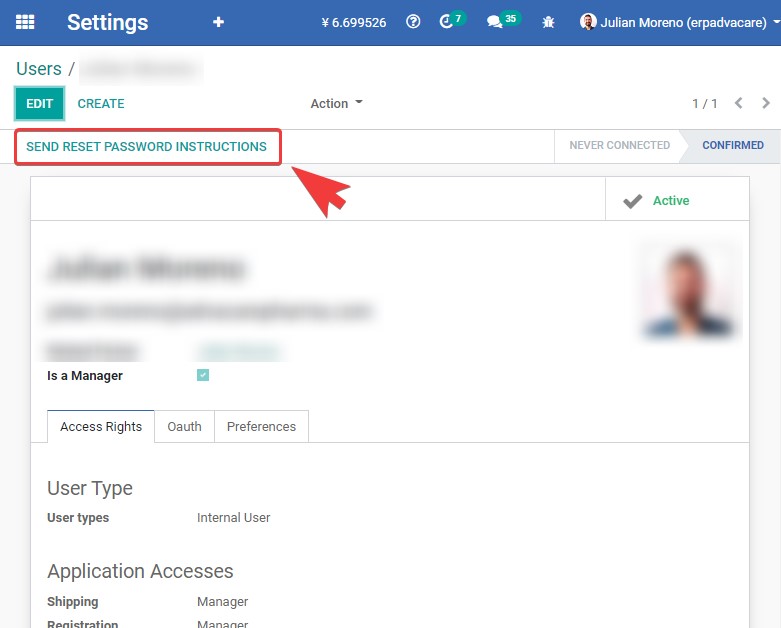
After saving, the IT member must activate the user by clicking on the "SEND RESET PASSWORD INSTRUCTIONS" button.
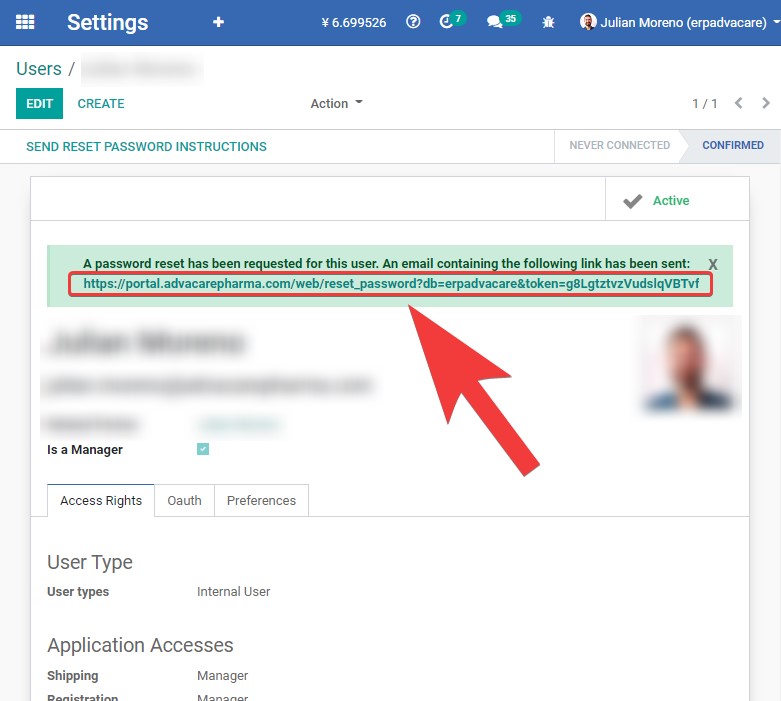
The IT member must click on the link to open it in a new tab:
Once opened, the web page should look like this:
On the screen above, click on the button Log in with Google and sign in from the new employee’s Google account. The fields “Password” and “Confirm Password” should remain empty. Make sure the login to the new User’s Odoo account is successful. If there is an error (for example, “Access Denied”), then IT Operations Supervisor must troubleshoot the problem by taking the following actions:
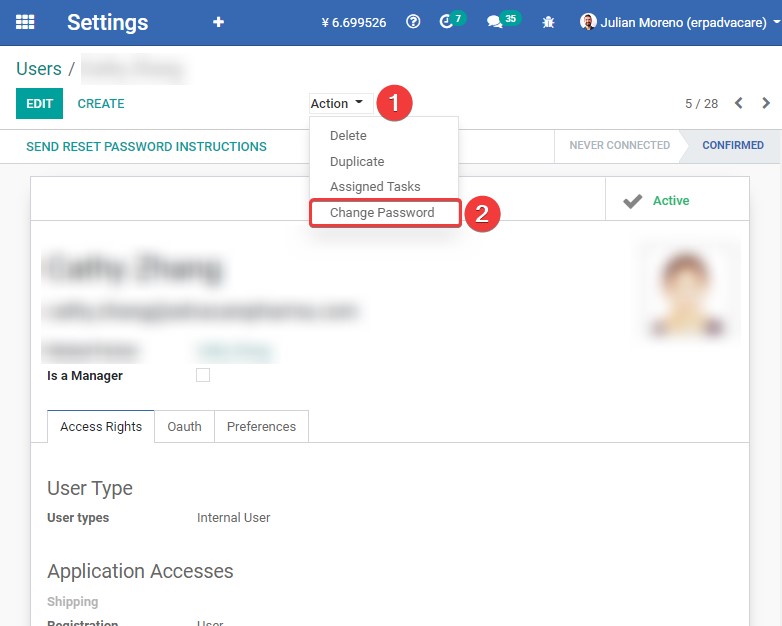
If all attempts failed and IT Operations Supervisor cannot resolve the issue with Google sign in, request assistance from Business Applications Manager. 3.6 Modify user and password (Different from Google)Note: Normally, all AdvaCare users login to Odoo via Google account login, however there are special scenarios where it is required to create or change the Odoo password. If for any reason (e.g. the IT Manager and the other user have a different time zone and the IT member can't connect through AnyDesk with them), the user is required to log in without using the Google button, a username and password can be configured as an alternative login method. In the user screen, click on the "Action" drop-down menu and choose the "Change Password" option.
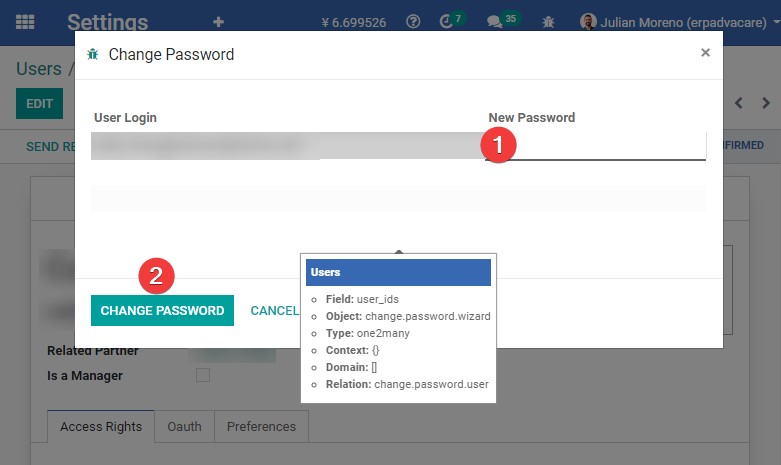
Add a new password and click on the "CHANGE PASSWORD" button.
After the password is set, IT Operations Supervisor MUST update the new password in the Gsheet AdvaCare IT Assets "Odoo Users Access" sheet Columns A, B and C. 3.7 Creation of users and employees in Development and Testing environments of OdooThe Development and Test environments for Odoo ERP are quite similar to its Production environment. The steps of how to create a user and employee (described in the ERP Production environment section of this document) can be re-used for the Development and Testing environments.
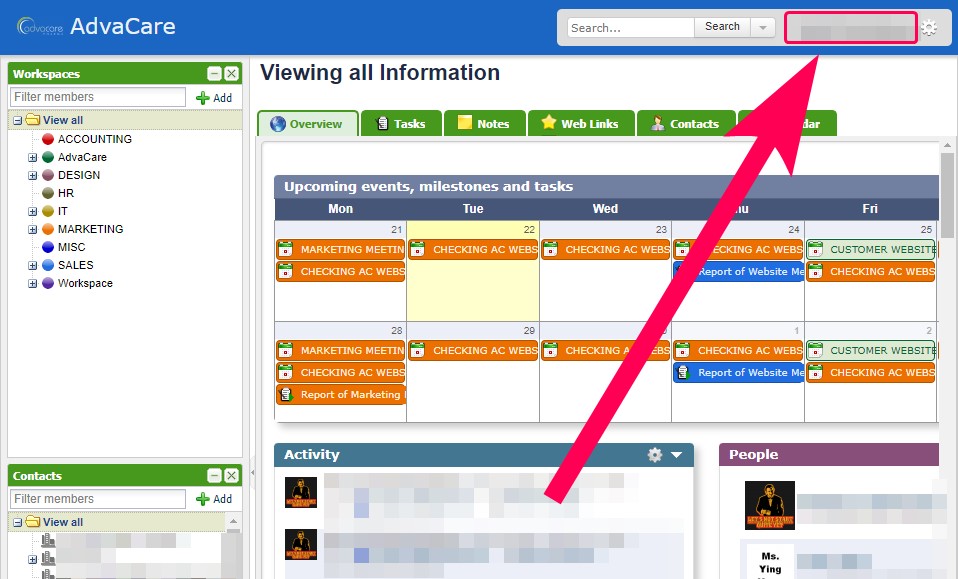
Note: there are no costs or additional charges of licenses when creating users in the Odoo dev and test environments since these instances are used for internal purposes of system developments and testing. 4. Create a PM & DB UserIf the new employee belongs to the International Sales department, a user must be created for this employee on the PM and DB websites. How to do this is detailed below. 4.1 Create user on the PM websiteGo to the PM website and log in using the Google link: https://pm.advacarepharma.com/ Click on the user name, located at the top right of the screen.
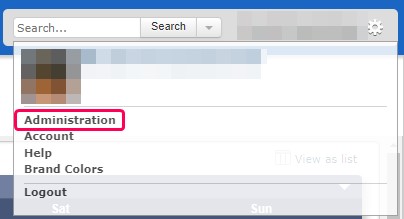
Choose the Administration option.
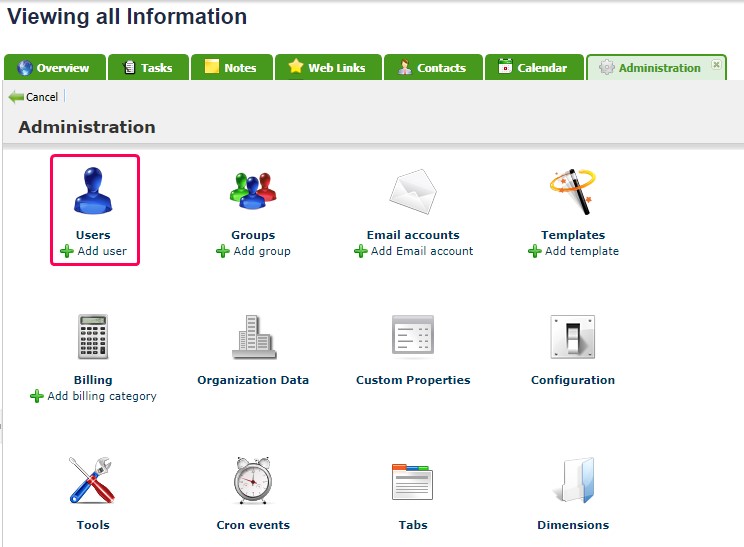
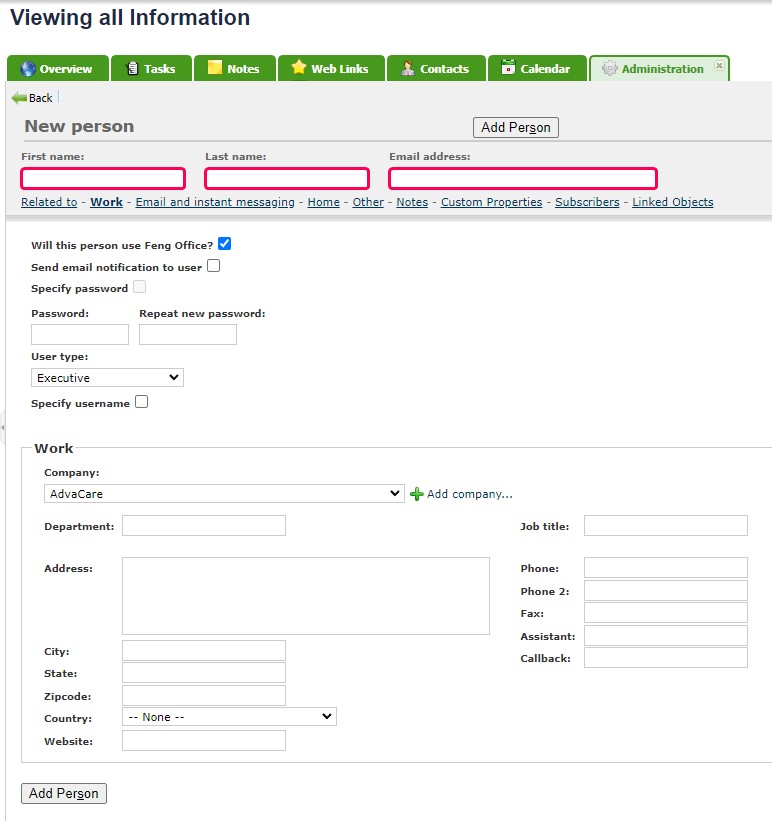
On the Administration page, click on the Users module (Add user).
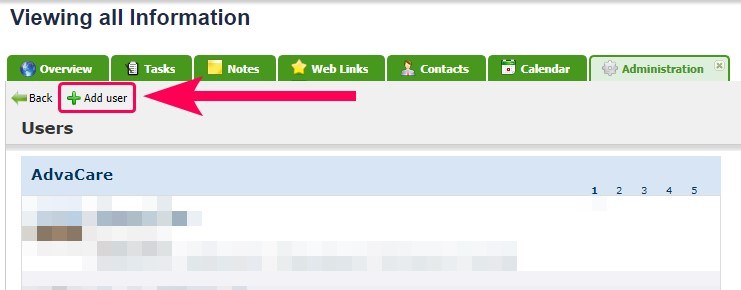
Click on the Add user button.
Please enter the information in the 3 required fields:
Leave the other fields as they are. There is no need to change anything else.
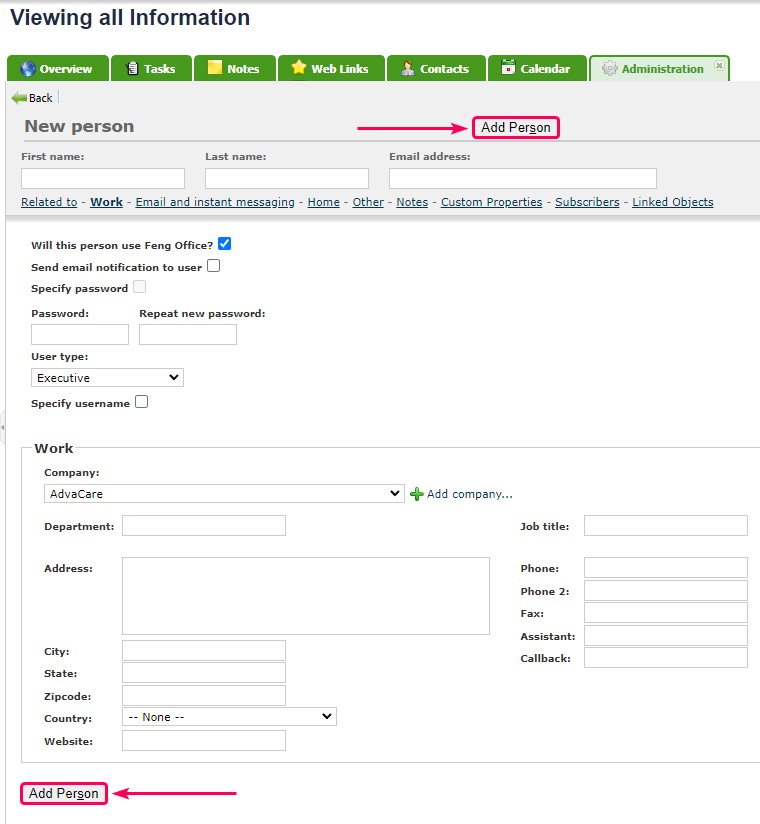
Click on the Add Person button. Either of the two buttons available on the screen can be used.
Verify the existence of the newly created user. Since the list of users is sorted alphabetically, the position of the user may vary. Use the pagination located at the top right of the panel.
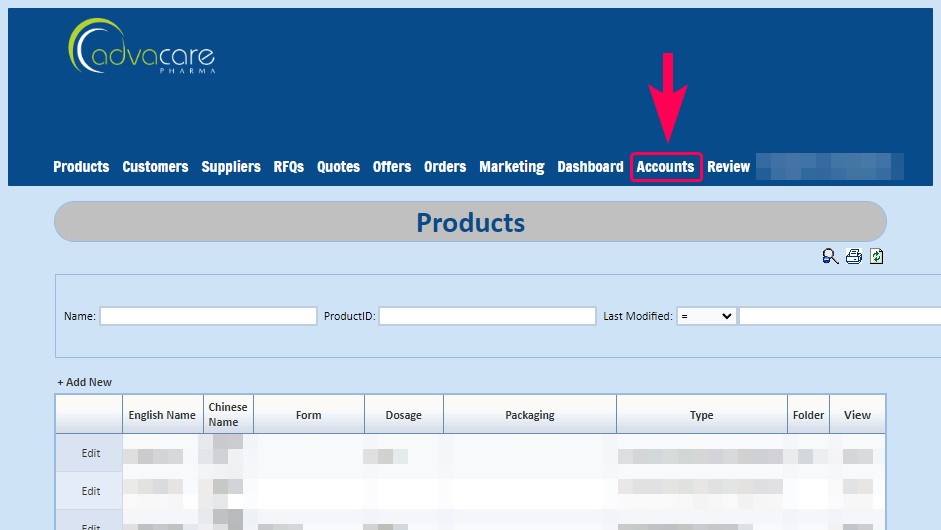
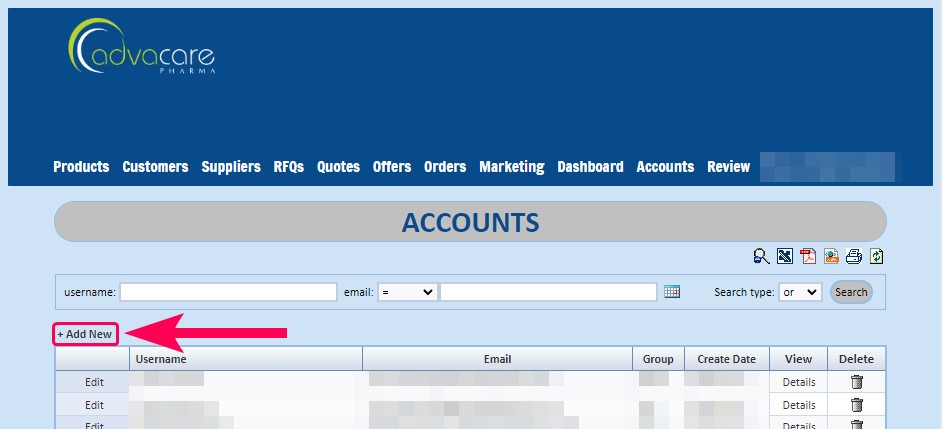
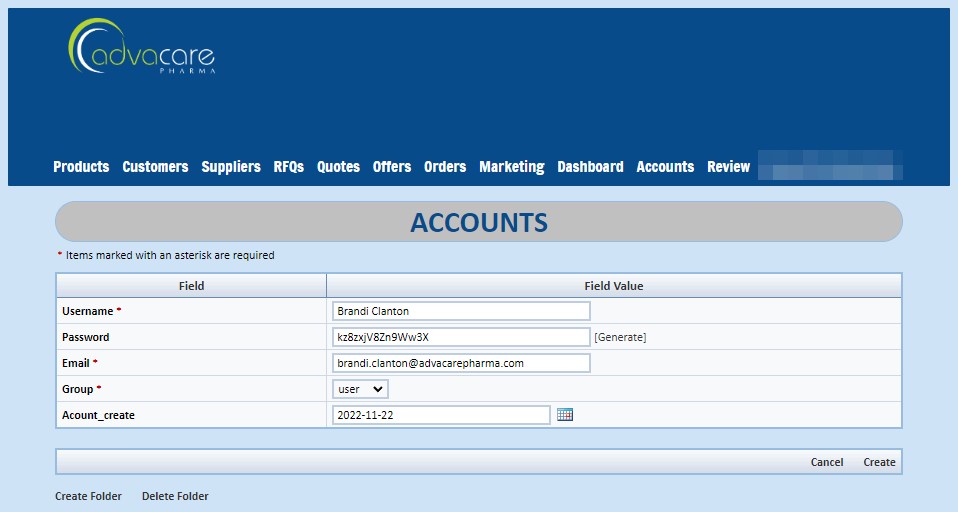
Perform a test by logging in with the created user. 4.2 Create user on the DB websiteGo to the DB website and log in using the Google button: Access the Accounts page by clicking on the Accounts menu.
Click on the + Add New button.
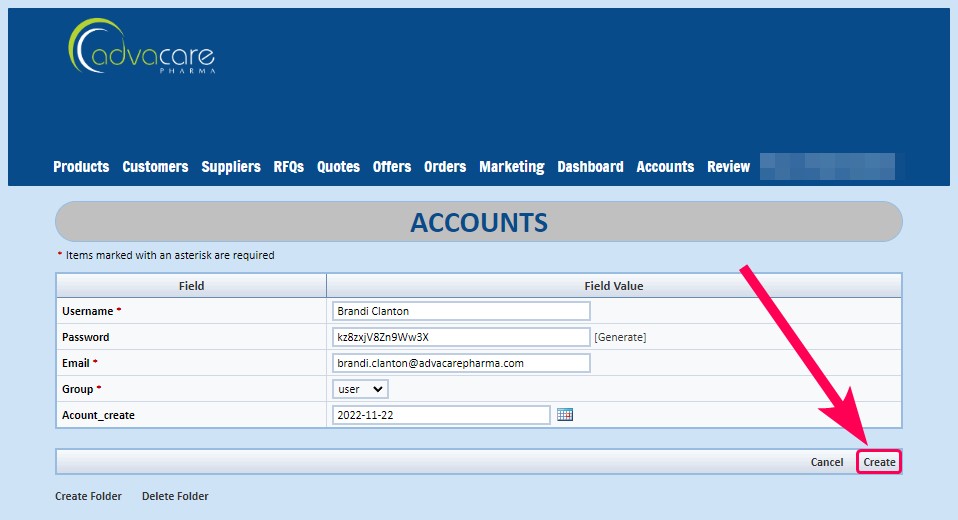
Enter user information:
Click on the Create button.
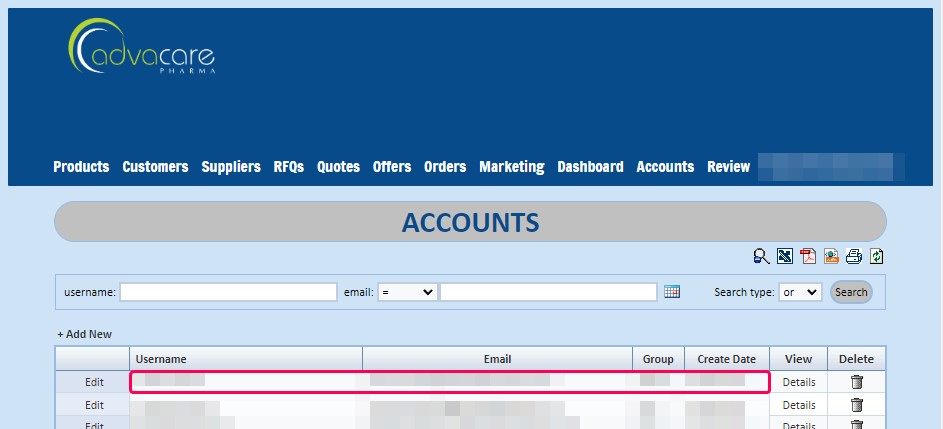
After creating the user, the IT member should see the record of the newly created user listed on the Accounts page.
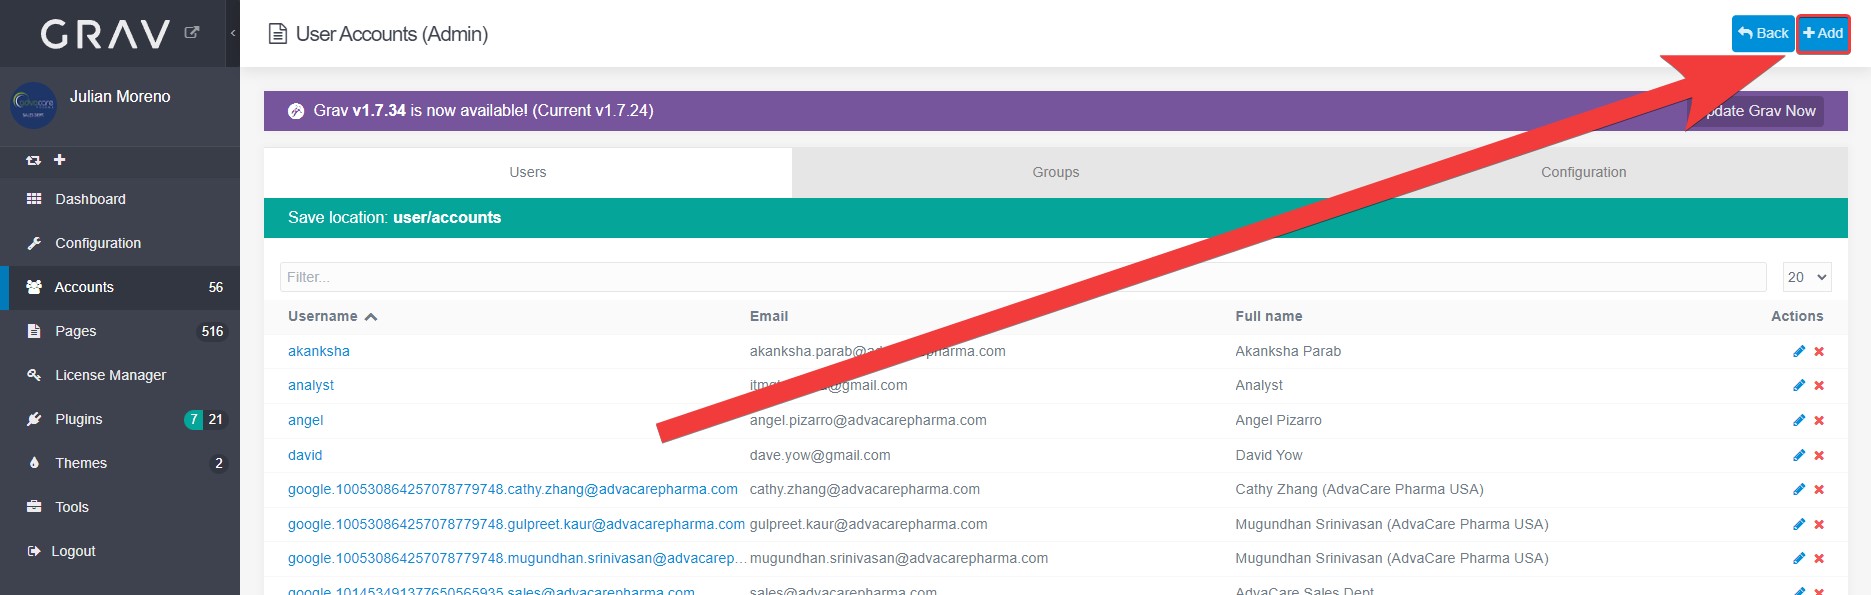
Perform a test by logging in with the created user. 5. Create a user on the Support websiteThis system is used by AdvaCare employees as well as visitors (external people), so the first thing the IT member should do is to identify which of these two cases it is. 5.1 The new user will be an AdvaCare employeeIn case the new user is going to be an AdvaCare employee, no action is required because the system is ready to receive the user when he/she clicks on the Google button to log in. At that time, the system will automatically register the user in the user database. 5.2 The new user will be a visitorIn case the new user is a visitor, the IT member must enter at least his/her email and a password. To do this, the IT member must follow the steps below: To enter the Support administration page, the IT member must type the following link in the address bar of the web browser: https://support.advacarepharma.com/admin/ On the left side the main menu is located, there the IT member must click on the “Accounts” menu.
Click on the “Add” button.
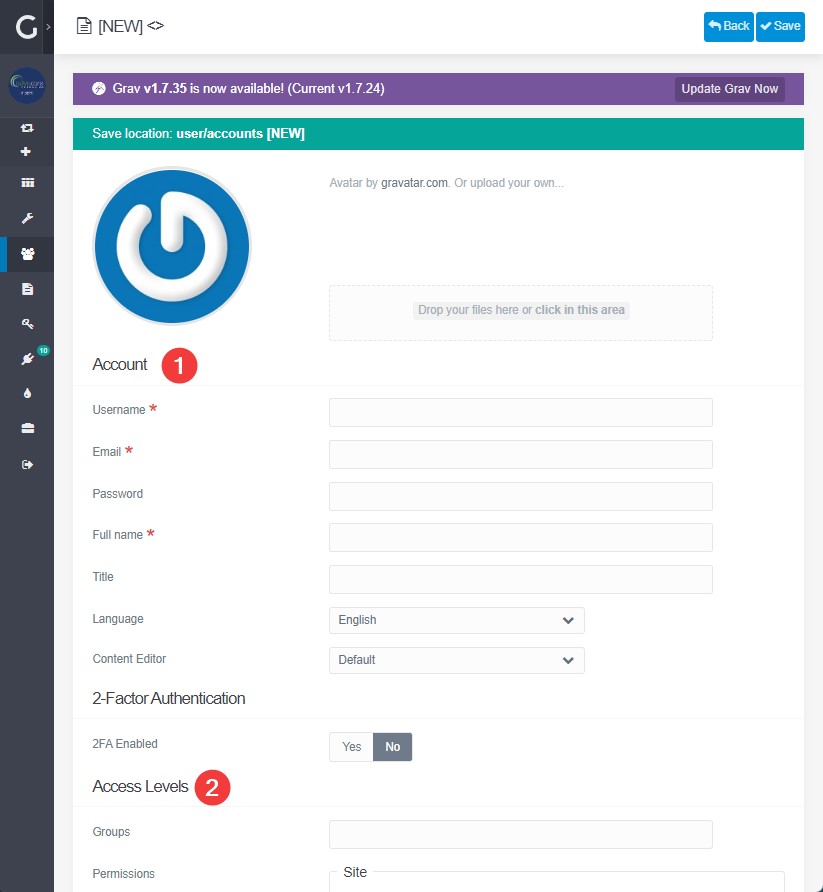
Enter the username, email, full name of the user. Note: There is no need to create a password for the user because the user will log in with his/her Google account.
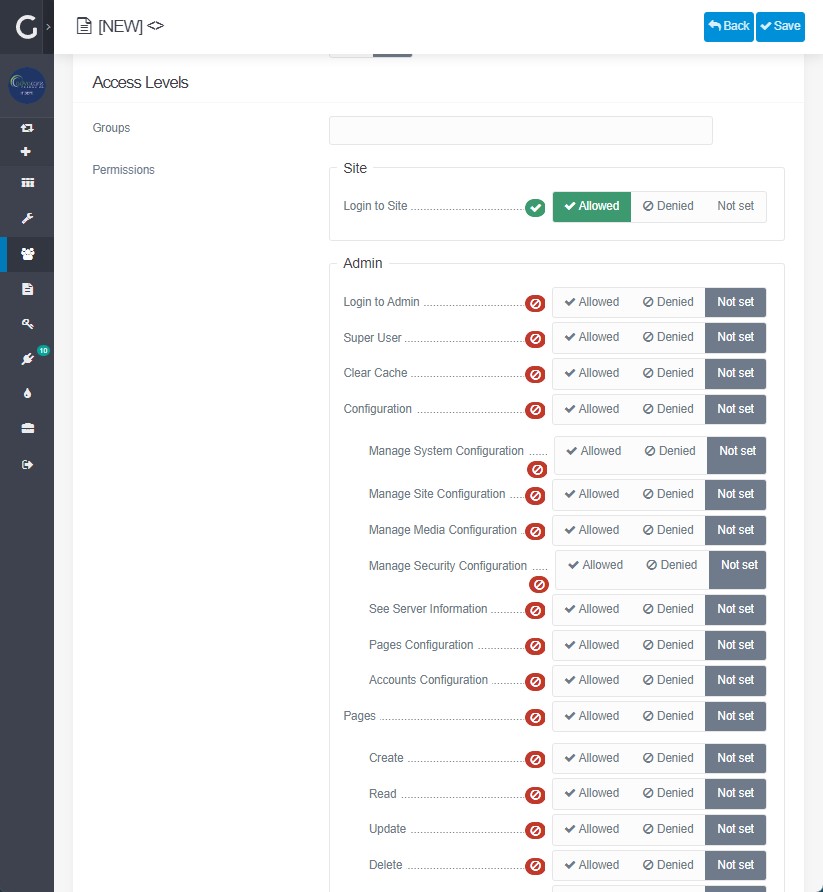
Add the necessary permissions for that user. The IT Administrator can copy the privileges of another employee in the same department and assign them to the new user.
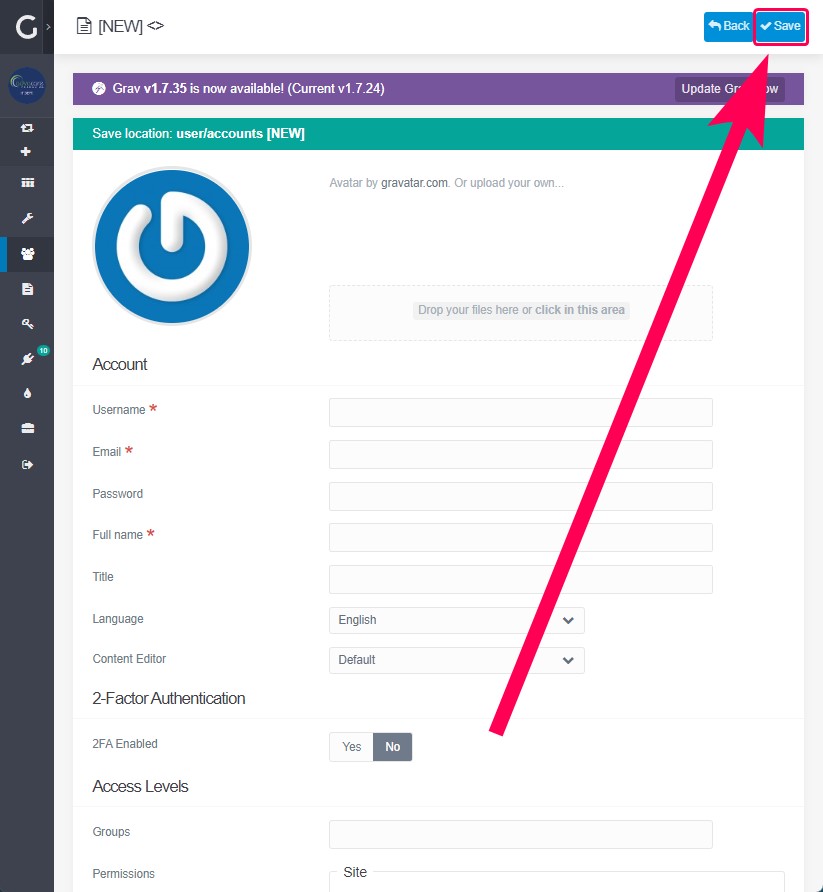
Finally click on the “Save” button.
6. Setting up QQ, WhatsApp, Skype accounts6.1 Setting up QQ accountThe following job positions must have a QQ account:
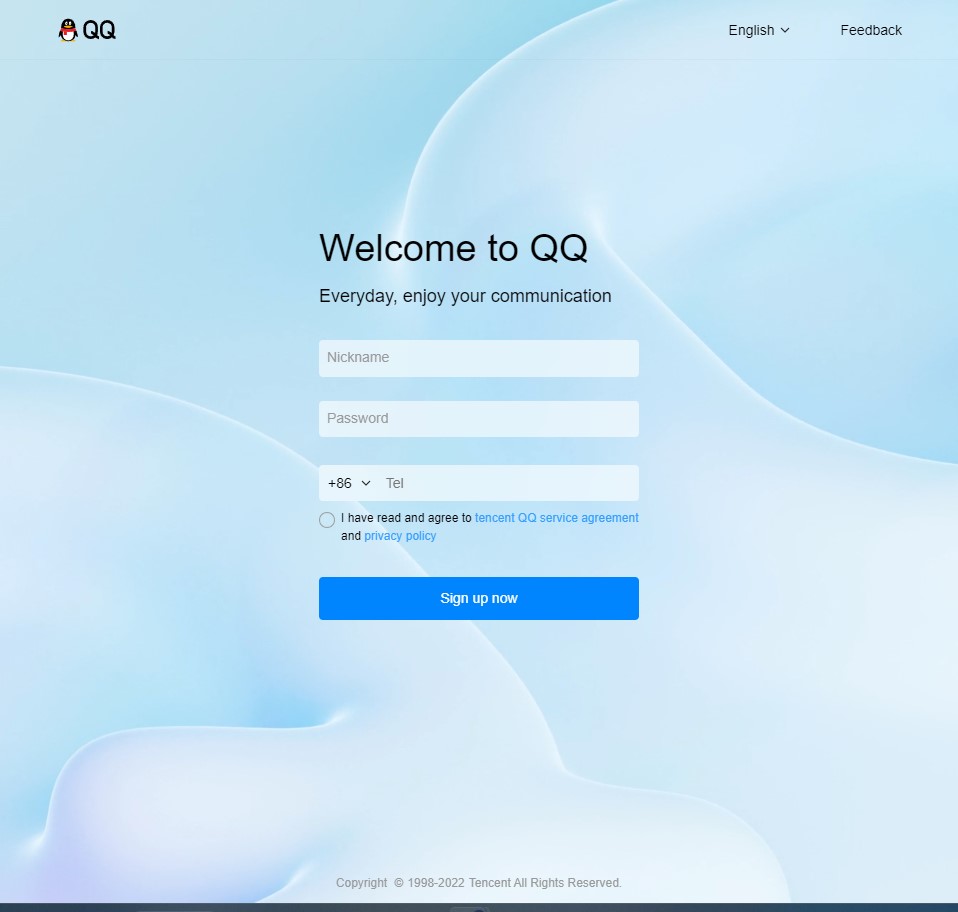
Basically all chinese staff. Now, to set up a QQ account, follow the steps below. 6.1.1 The job position already has an existing QQ accountIt is only necessary to enter the QQ account number and password. Note: The system may ask for validation by scanning a QR code with Ryan or Yeny's phone. 6.1.2 The job position does not have a QQ account yetOpen the QQ page. https://ssl.zc.qq.com/v3/index-en.html
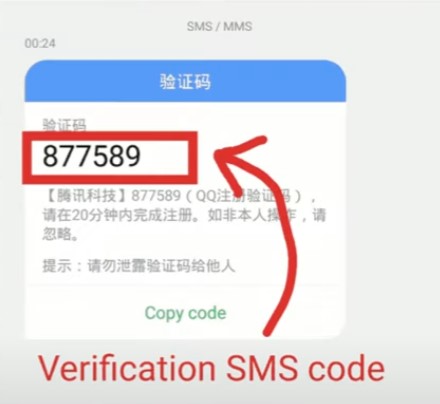
Ask the manager for the SMS verification code he or she has received on his or her cell phone.
Type the verification code in the requested field. 6.2 Setting up WhatsApp accountTo set up a WhatsApp account, follow the steps below. About changing phonesThe IT Operations Supervisor can either move to the same type of phone, such as Android to Android, or move to a different type of phone, such as iPhone to Android. In instances where the IT Operations Supervisor needs to ensure the account is secure, the IT Operations Supervisor may have to wait to receive the verification code. Unfortunately, there isn’t an option to speed up this wait time. Note: The IT Operations Supervisor might receive a notification on the old phone to confirm that it is the IT Operations Supervisor trying to change devices. In this case, simply confirm the IT Operations Supervisor is moving WhatsApp to the new phone. Move to the same type of phone:If the IT Operations Supervisor is moving to the same type of phone, make sure the chats are backed up before restoring them on the new phone. Learn how to back up and restore the chat history in the article How to restore your chat history . Move to a different type of phone:If the IT Operations Supervisor is moving to a different type of phone, the account information including the profile photo, about, individual chats, group chats, and settings will be retained. Transferring chat history cross-platform is currently available when moving from an iPhone to an Android device or an Android device to an iPhone. Learn how to migrate from an iPhone to an Android device in the article How to move chats from an iPhone to an Android device . Learn how to migrate from an Android device to an iPhone in the article How to move chats from an Android device to an iPhone . Keep the phone number:Download WhatsApp on the new phone to re-register the phone number. When re-registration is complete on the new phone, the IT Operations Supervisor will be logged out on the old phone. Note: If two-step verification is activated, the IT Operations Supervisor will receive a prompt to enter the PIN created when setting up 2FA verification. The PIN is different from the 6-digit registration code. Receive code on an old device:When getting a new phone, the IT Operations Supervisor can switch the WhatsApp account onto the new phone without receiving an SMS code. If the phone number is eligible, it can be verified using the old device. WhatsApp will send a push notification to the old device that will provide the 6-digit code to enter on the new device. If this option is not chosen, the IT Operations Supervisor will be prompted to verify the phone number via SMS. Open WhatsApp on the new Android. Choose the language, then tap the green arrow button. On the Welcome screen, tap AGREE AND CONTINUE to accept the Terms of Service. Then, enter the phone number and tap NEXT. Confirm the correct phone number, then tap OK. Check the old phone for the 6-digit code. Enter this 6-digit code on the new phone and tap OK. Note: If there is trouble receiving the code on the old phone, choose to receive it via call or SMS. Make sure to tap Need help getting a code? to choose an option. How to edit the profileThe IT Operations Supervisor can edit the profile picture, name, and about information in WhatsApp Settings. Edit the profile picture:
Alternatively, click more options above the chats list > Settings > profile picture. Edit the profile name:
Alternatively, click more options above the chats list > Settings > profile picture. Edit the about information:
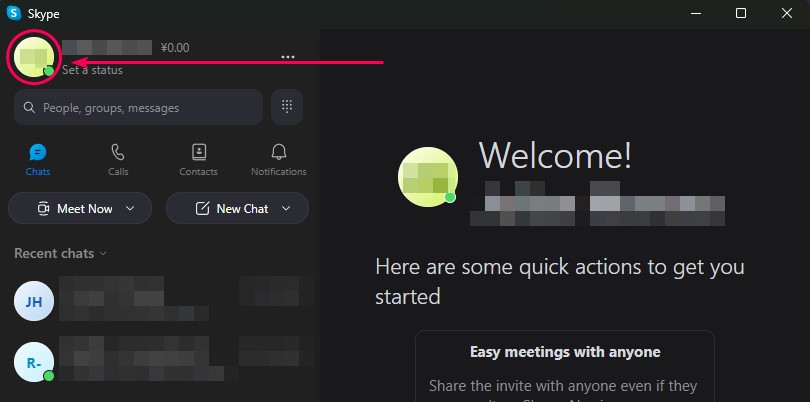
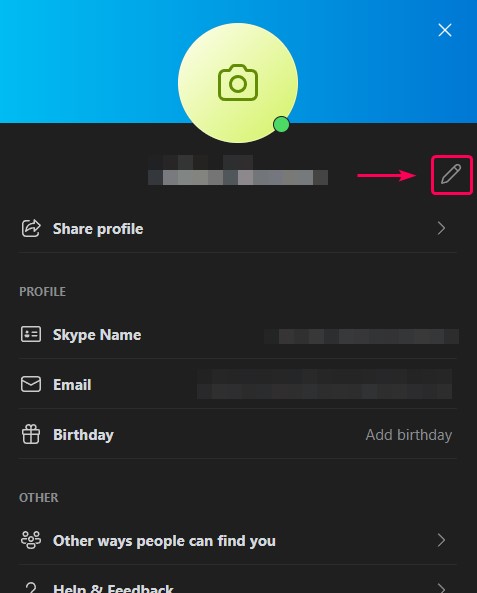
Alternatively, click more options above the chats list > Settings > profile picture. When this has been configured, the sales employee will be able to access WhatsApp also through the web browser, via the following link: 6.3 Setting up Skype accountTo set up a Skype account, follow the steps below. 6.3.1 The job position already has an existing Skype accountUsually the computer of the person who will occupy the job position already has the Skype application installed. If this is the case, follow the instructions below to replace the old employee's information with that of the new employee: Click on the profile image.
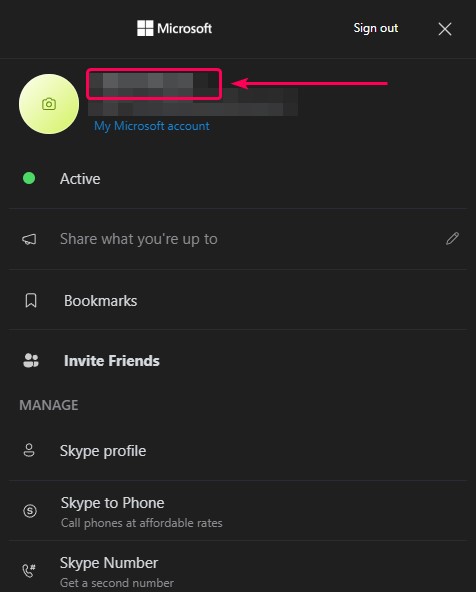
Click on the user's name.
Click on the pencil icon to edit the name.
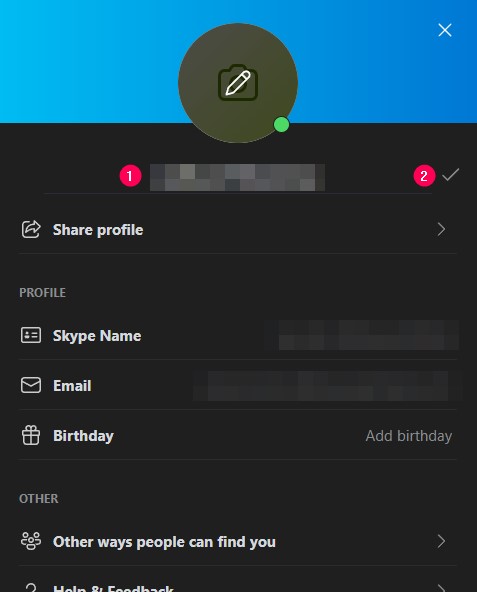
Edit the name of the old employee by the new one (point 1) and click on the check mark (point 2).
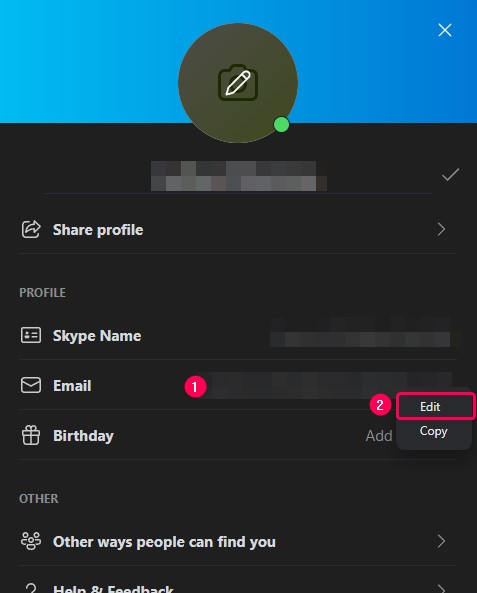
Click on the email (point 1) and choose the Edit option (point 2).
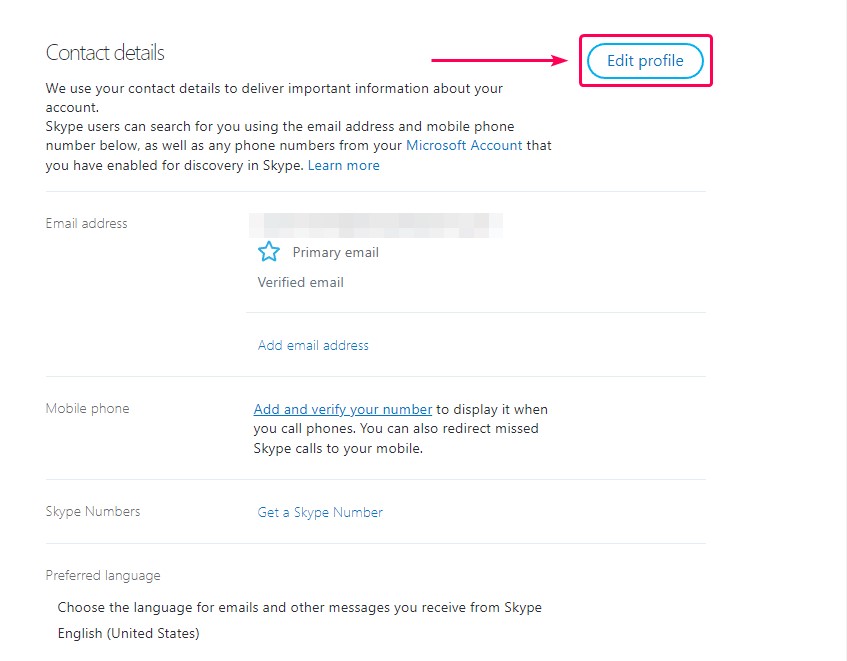
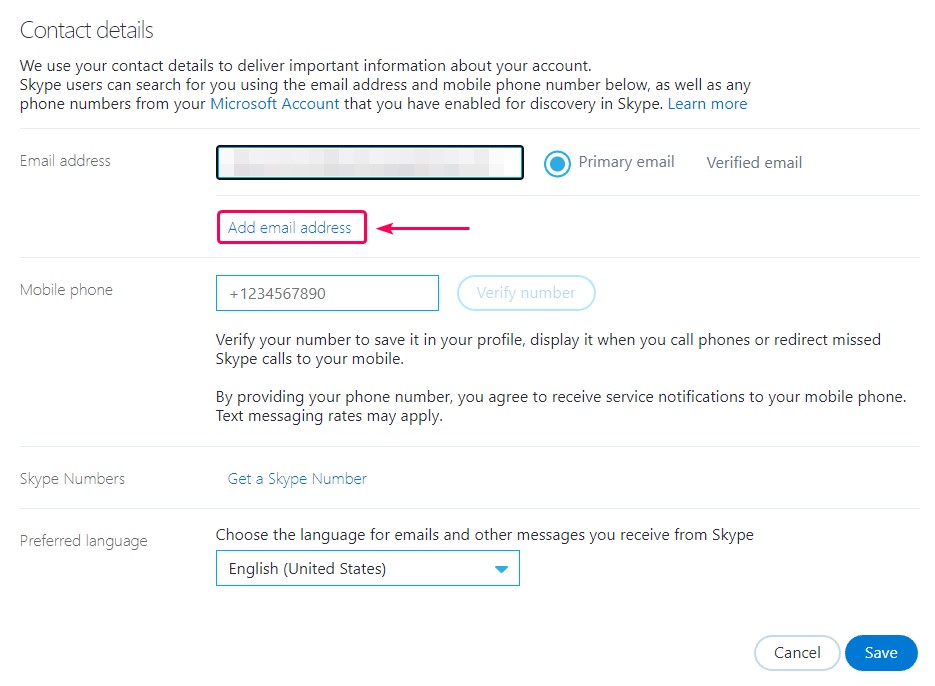
Click on the Edit profile button.
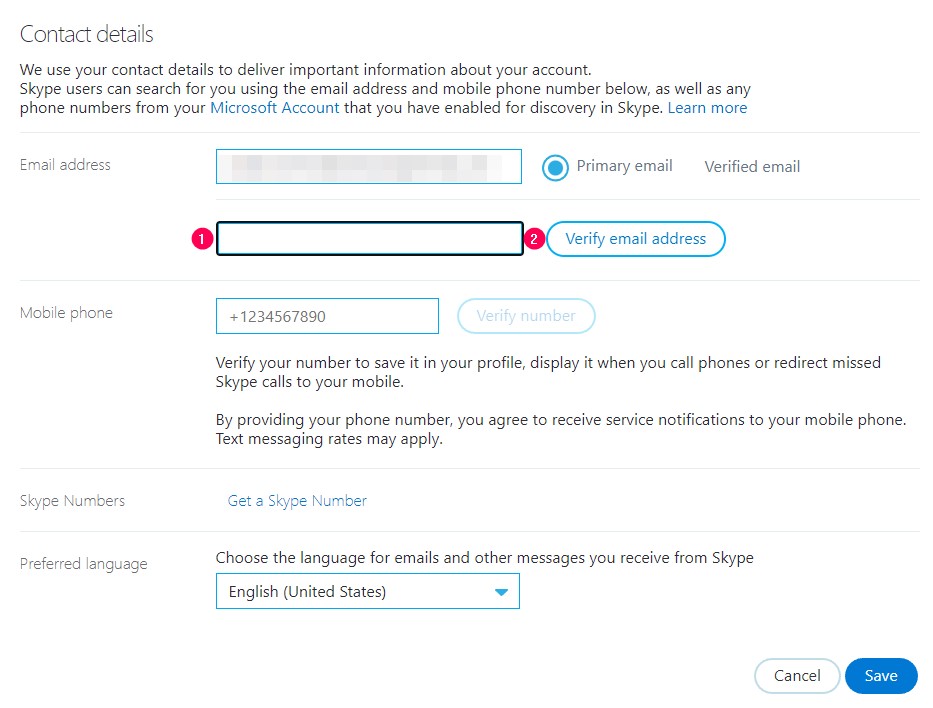
Click on the Add email address link.
Type the email address of the new employee and click on the Verify email address to verify the email.
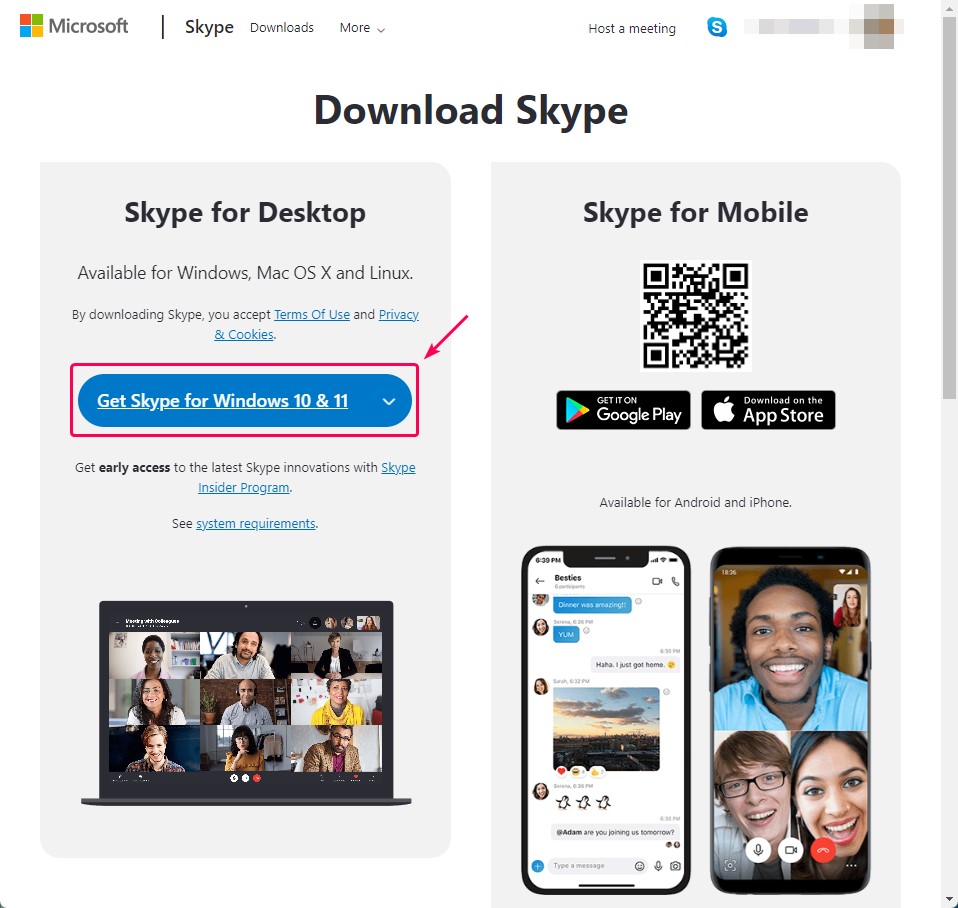
Subsequently, mark it as the primary email. 6.3.2 The job position does not have a Skype account yetDownload the Skype for Windows application: https://www.skype.com/en/get-skype/
7. Setting up ChatGPT on an employee's computerFollow the steps below:
8. If sales employee, set applications in taskbarThe following applications should be pinned to the taskbar:
9. Printer configurationA test print should be performed on each printer:
And the following must be set:
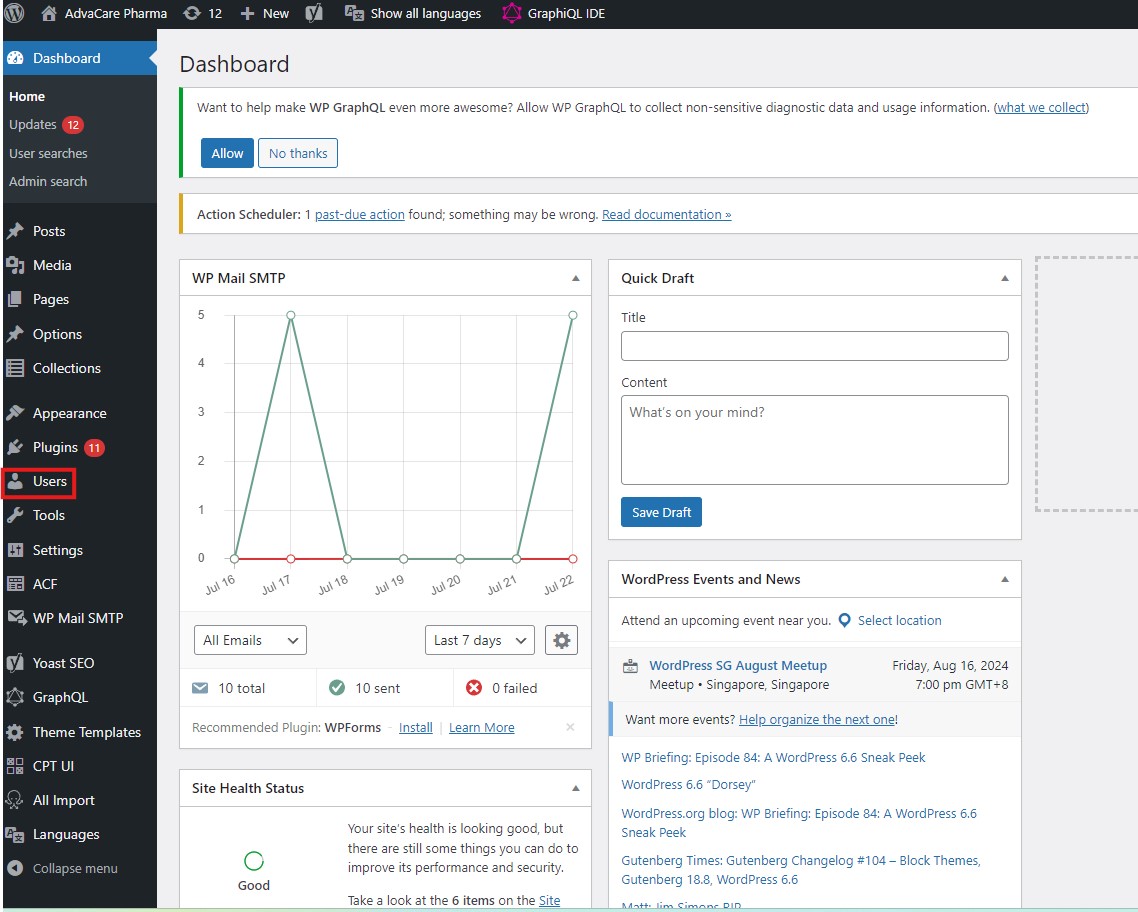
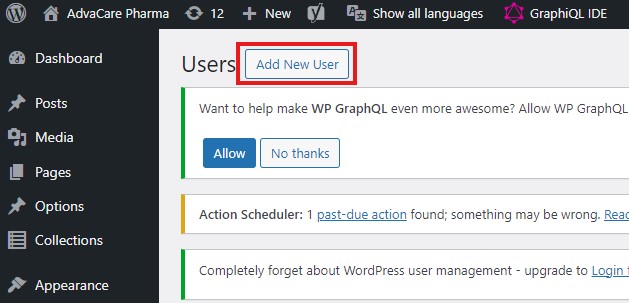
10. Wordpress Account Set UpNote: The access of Wordpress should be provided upon request from the Department Manager or as part of the onboarding task of a new employee. 10.1 Create user on the DEV websiteThe IT Operations Supervisor must connect to the Wordpress DEV website , and click on the icon Users.
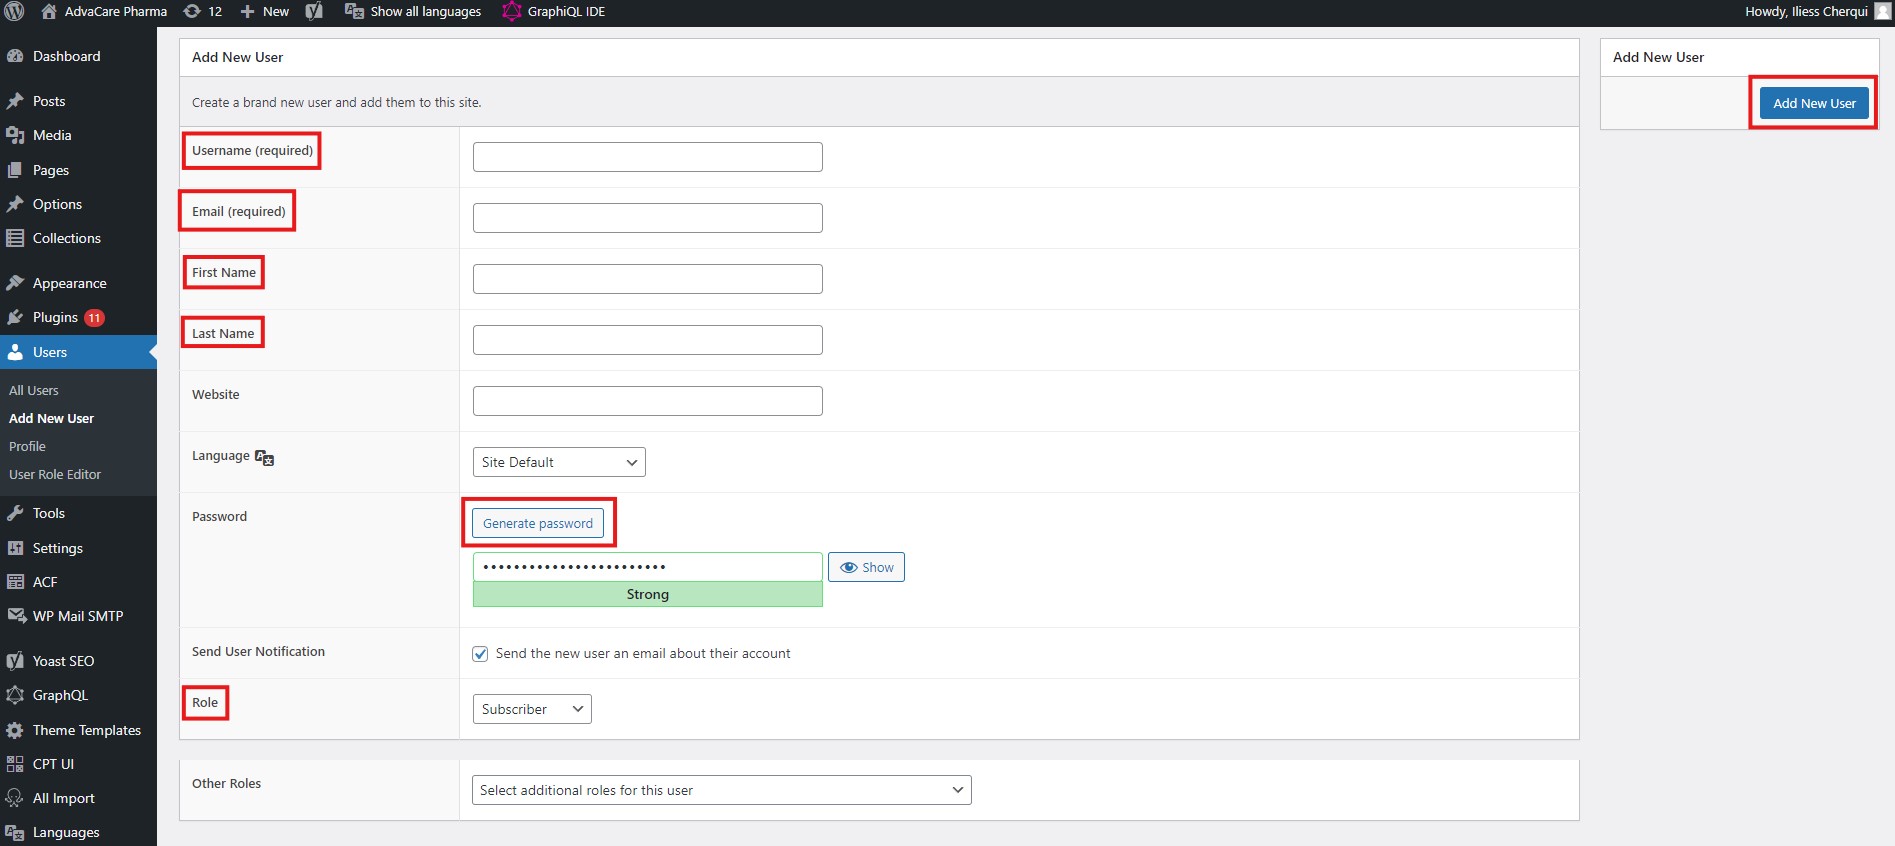
Click on the button Add New User.
Fill in the information below linked to the new User :
For the rest of the information, leave it blank or unchanged.
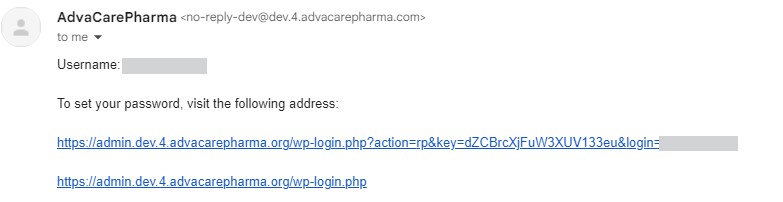
Click on the button Add User. IT Operations Supervisor must then inform the new employee that User has been created, and to always Sign in with Google to access WordPress. 10.2 User first connection end testingOnce the new User account is created, the employee will receive an invitation email:
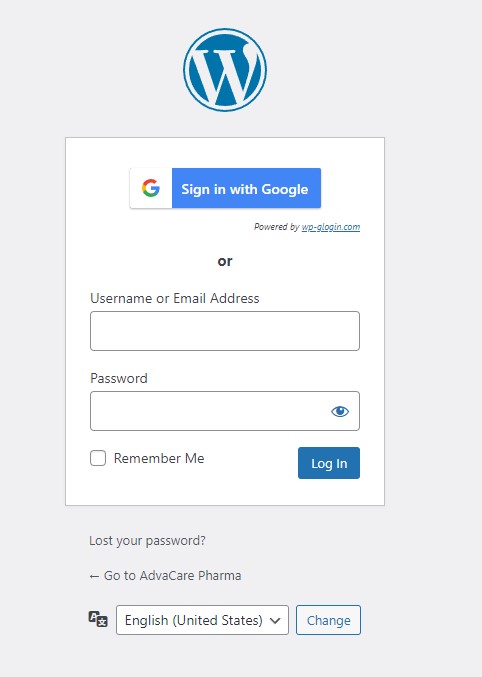
The new User needs to click on the second link to open this page:
The new employee should then click Sign in with Google button. Note: If there is any issue while clicking on this button, the new User should contact The IT Operations Supervisor. 10.3 Create user on the PROD websiteThe IT Operations Supervisor must connect to the Wordpress PROD website , and follow the same steps as for the User creation on the DEV website.. 11. Run IT Onboarding Meeting for new employeeAn event should be created in the calendar with the title "IT Onboarding Meeting for [employee's name]" with next Monday at 11am being the time to hold the meeting. The slide to be presented can be found at the following link: IT Training Itinerary for new Employee in General
After this meeting the Onboarding process is considered complete. |