Activate Leads Configuration in Odoo from Gmail
| 8 minutesThis SOP will guide the IT Team members (specifically the IT Operations Supervisor) for the activation of Leads in Odoo from Gmail. It requires:
Development Environment
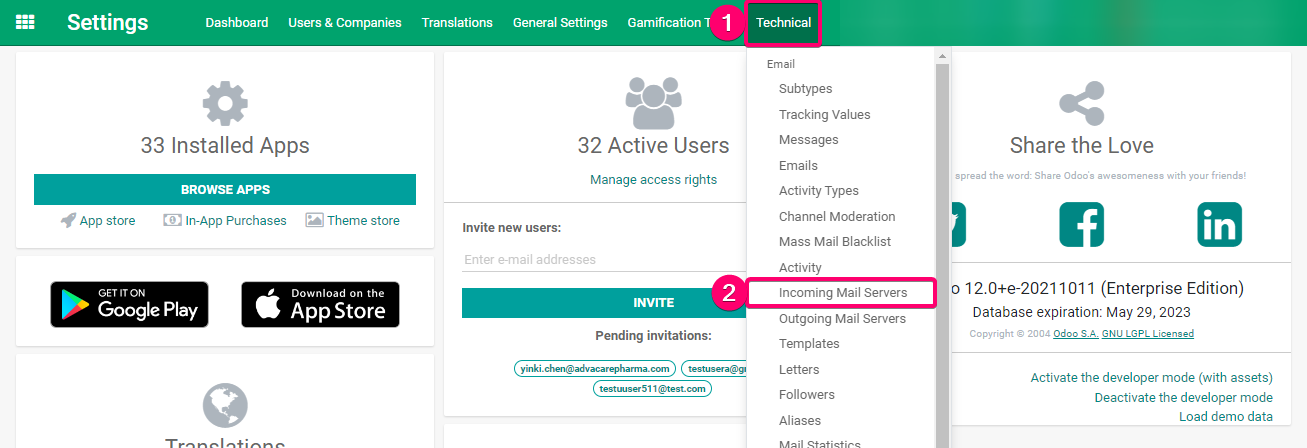
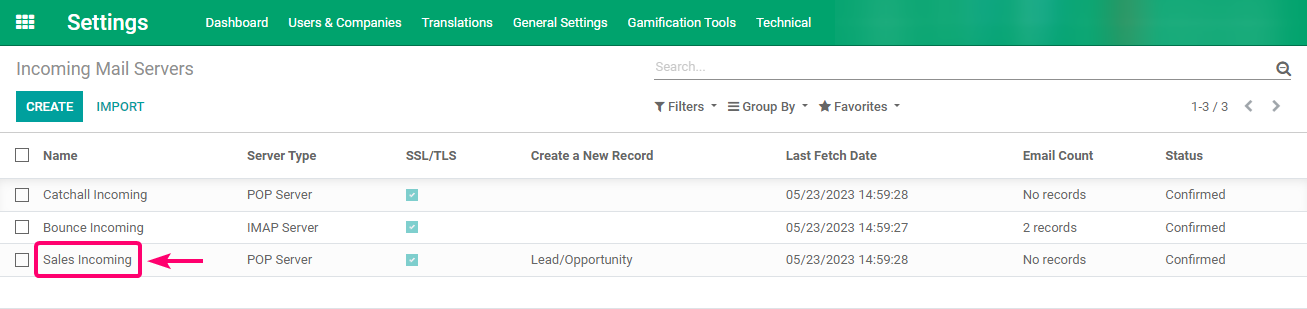
Inbound Configuration
Activation for Sales Dev
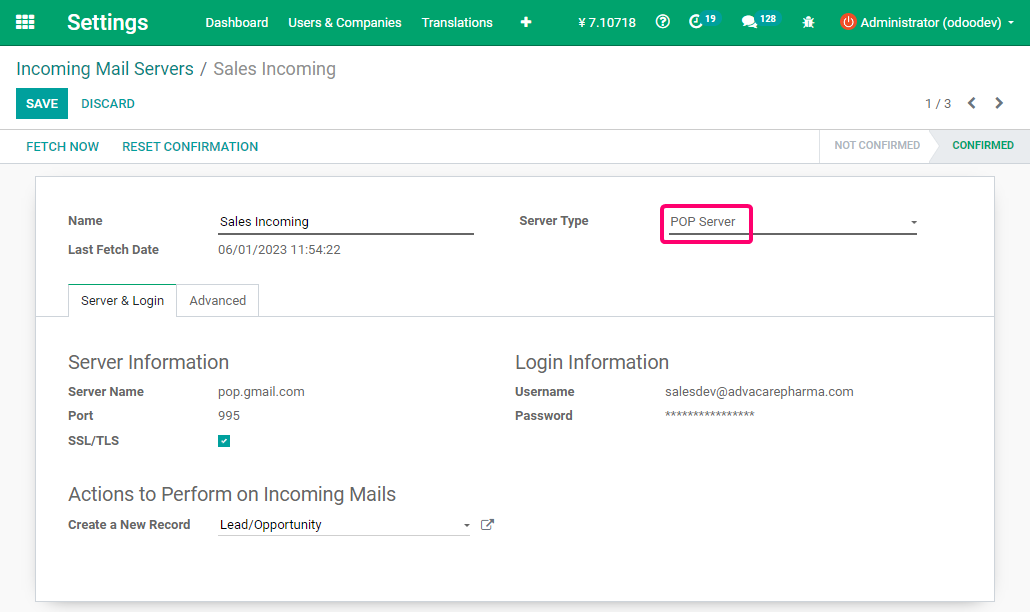
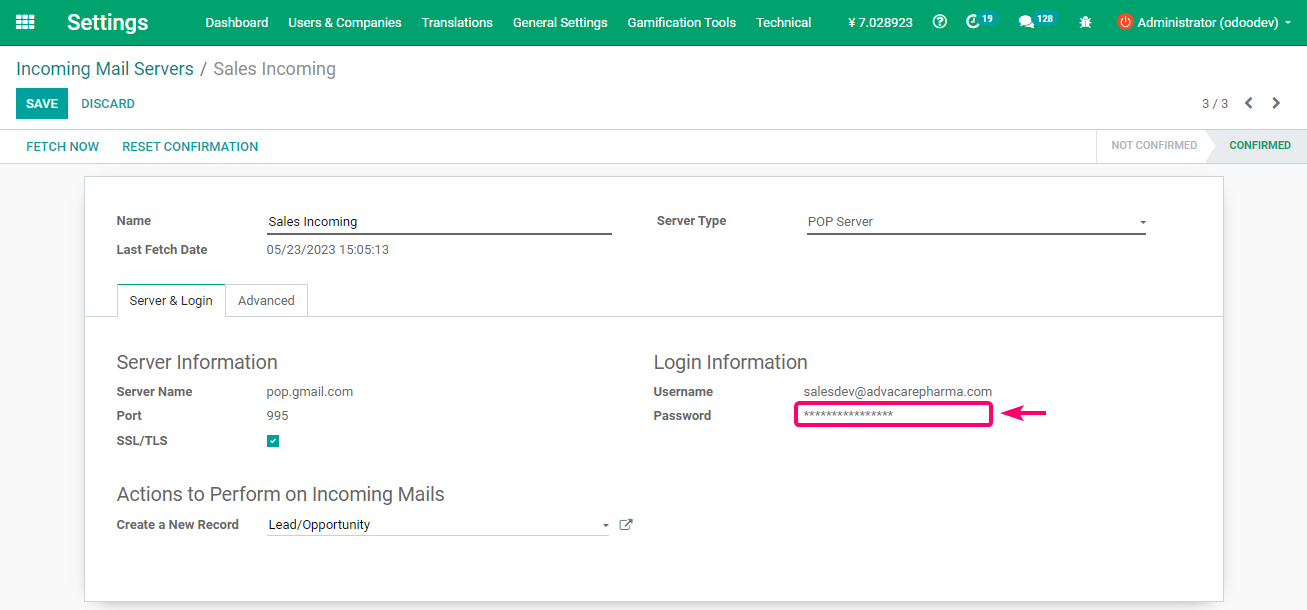
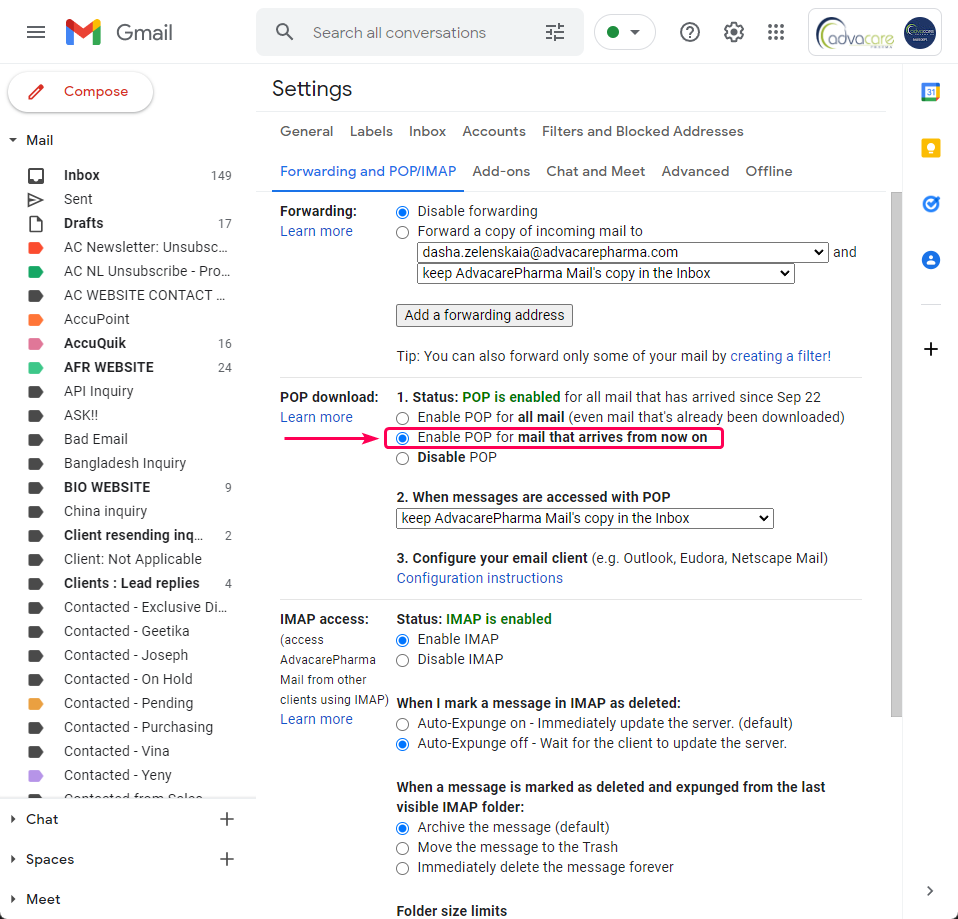
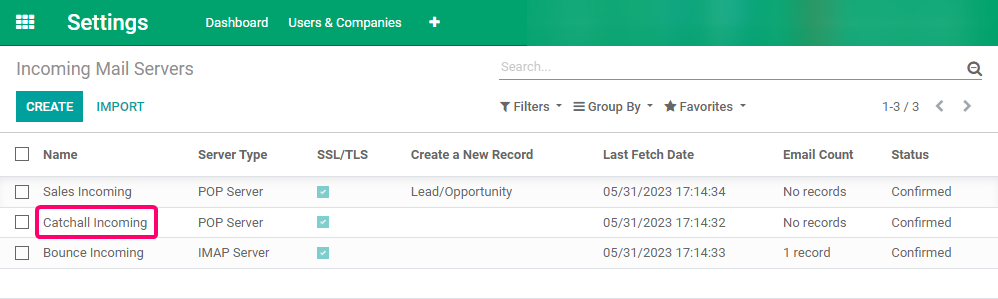
Our gmail inbox salesdev@advacarepharma.com is the main place where we centralize the incoming emails from different websites for development environment, contact channels, etc, so it’s required to make a configuration between Odoo DEV System and this Main Gmail Inbox.

Activation for Catchall Dev
Our gmail inbox catchalldev@advacarepharma.com is the main place where we centralize the incoming emails from different websites for development environment, contact channels, etc, so it’s required to make a configuration between Odoo DEV System and this Main Gmail Inbox.
Odoo


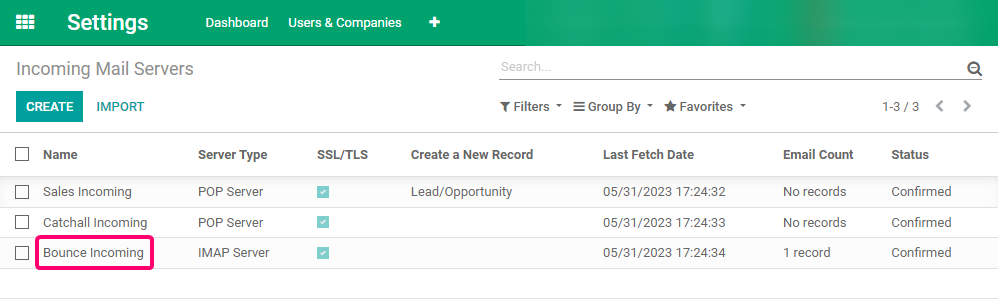
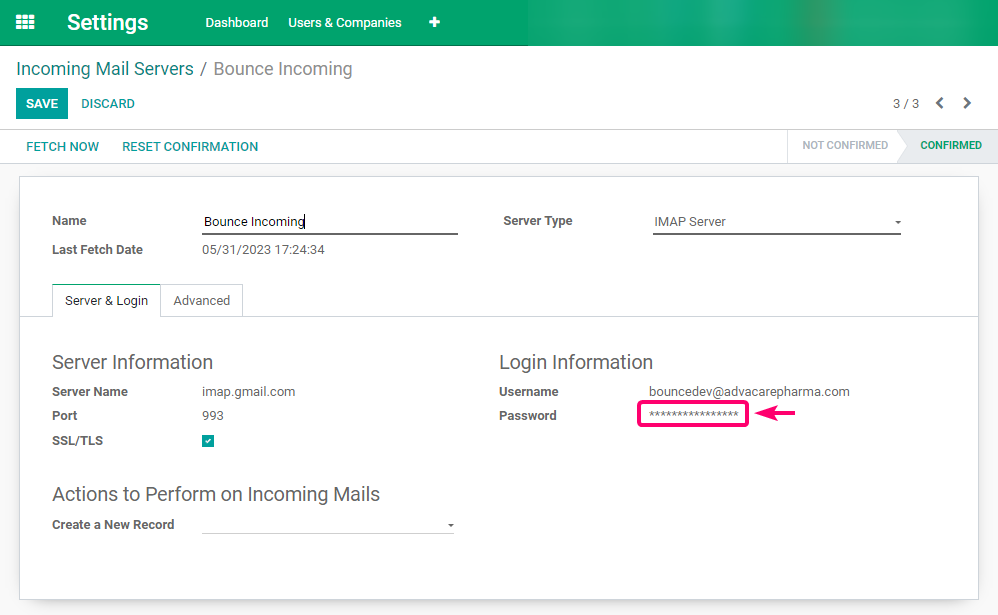
Activation for Bounce Dev
Our gmail inbox bouncedev@advacarepharma.com is the main place where we centralize the incoming emails from different websites for development environment, contact channels, etc, so it’s required to make a configuration between Odoo DEV System and this Main Gmail Inbox.

Odoo


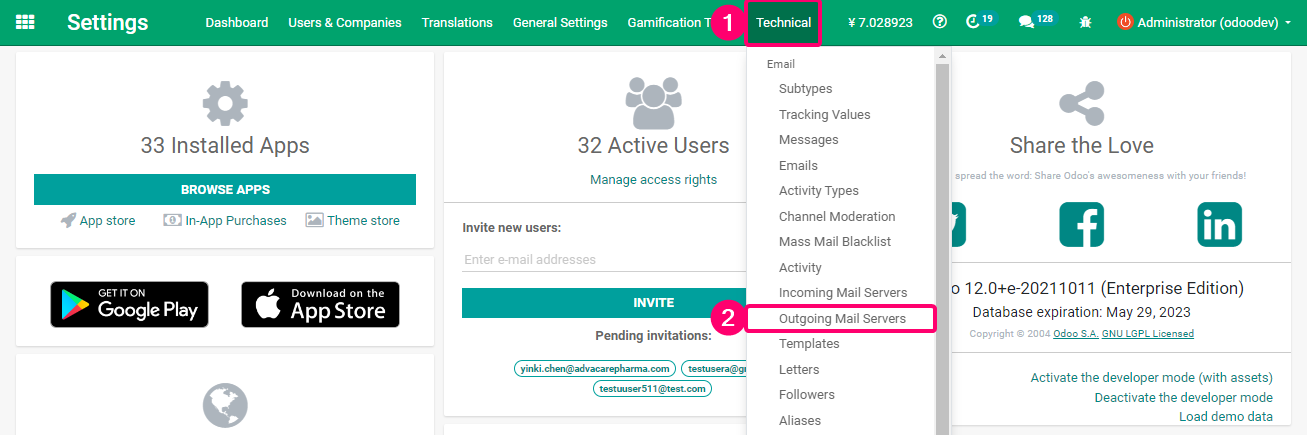
Outbound Configuration
Activation for Outbound Dev

Odoo


Production Environment
For the production environment follow the same steps mentioned in the sections and subsections from in the development environment, but consider to use the following related mailboxes as shown below: