Calendar is the central scheduling tool in Odoo expected to be widely used for organizational purposes.
Calendar is used for the scheduling of order and registration milestones, projects, meetings, events, department deadlines, etc.
Calendar is to be used on a company-level, department-level and individual-level basis for scheduling of anything that does not apply to the scheduling of an ‘activity’. The ‘activity’ tool applies only on a one-on-one basis within the ‘Chatter’ of a model (OPP, Task, SO, PO, etc.).
This SOP will explain how to use Calandar for the following purposes:
Events & Meetings;
Order & Registration Milestones.
Events & Meetings
Calendar Module allows users to create 2 types of objects: an Event and a Meeting. Events and meetings for the System are the same, but have different purposes for the user.
Meetings & Trips:
Calendar should be used to set:
● Inter-departmental meetings
● Cross-departmental meetings
● Customer meetings (office)
● Vendor meetings (office)
● Inspections
● Sales Dept business trips
● Purchase Dept vendor trips
● Company events
Events:
Any other event that has deadlines or requires tracking, reminders or the coordination of multiple users. Calendar should be used to track inter-departmental and cross-departmental projects including project stages, project deadlines, etc.
How to create an Event or a Meeting
1. Open Calendar module.
2. There are 2 ways to create an object in the Calendar.
Method 1
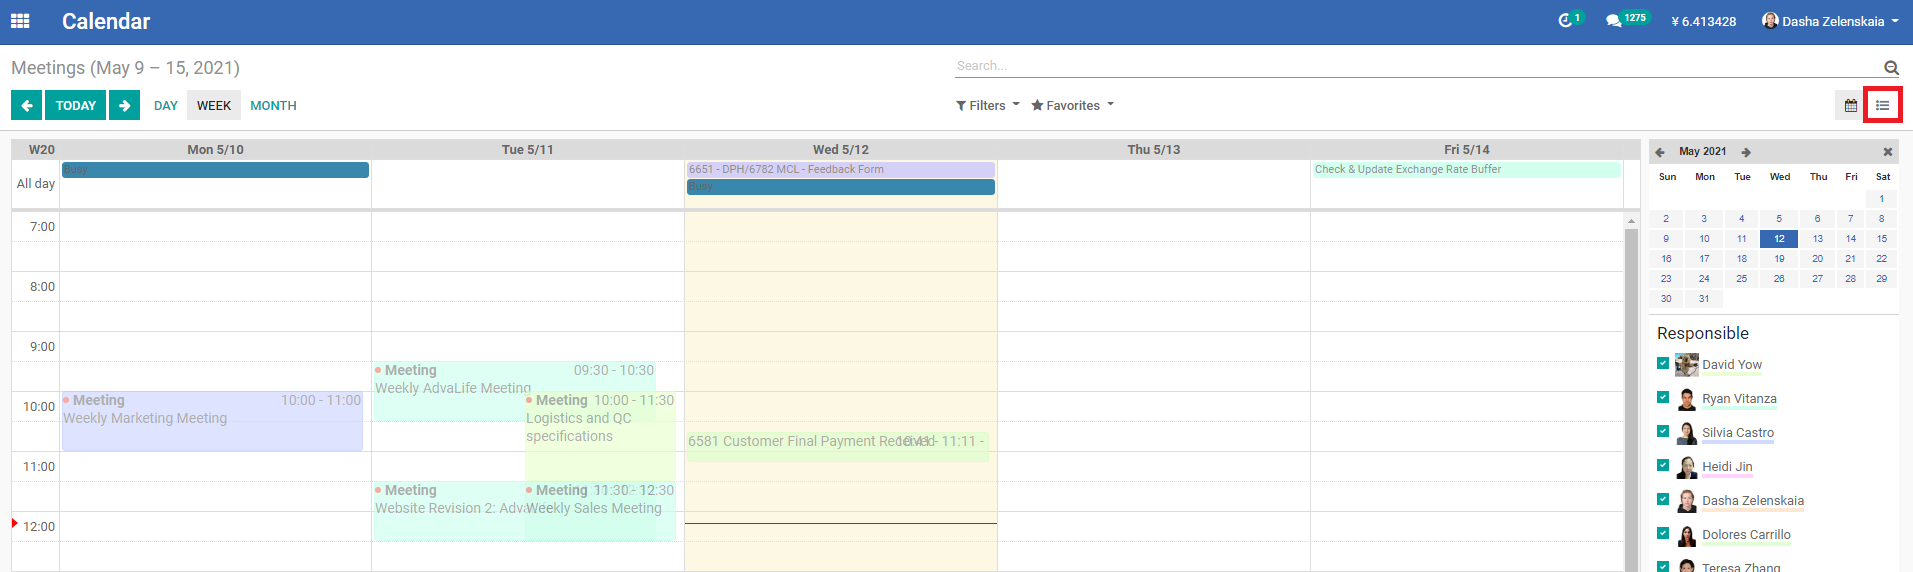
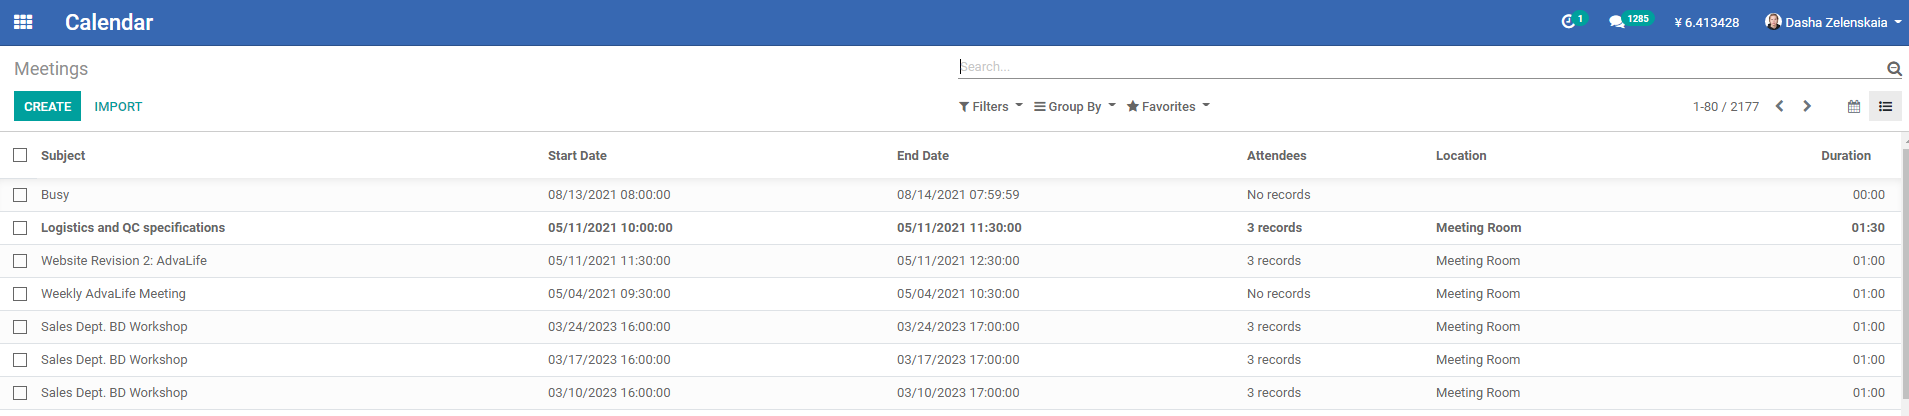
2.1 Switch to List view by clicking List icon on the right side of the screen.
2.2 Click 'CREATE'.
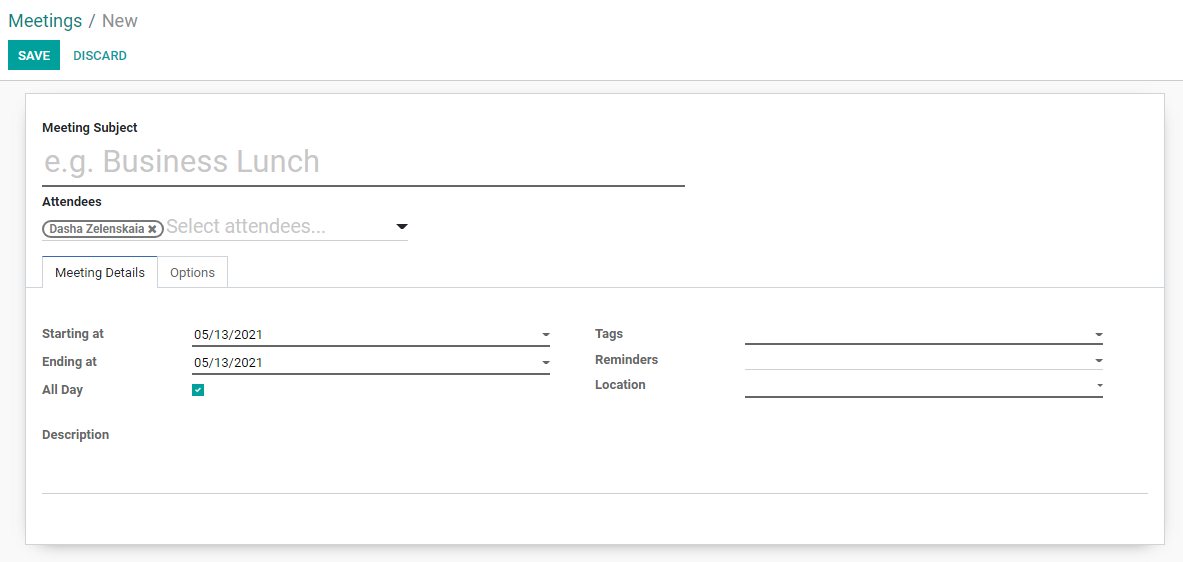
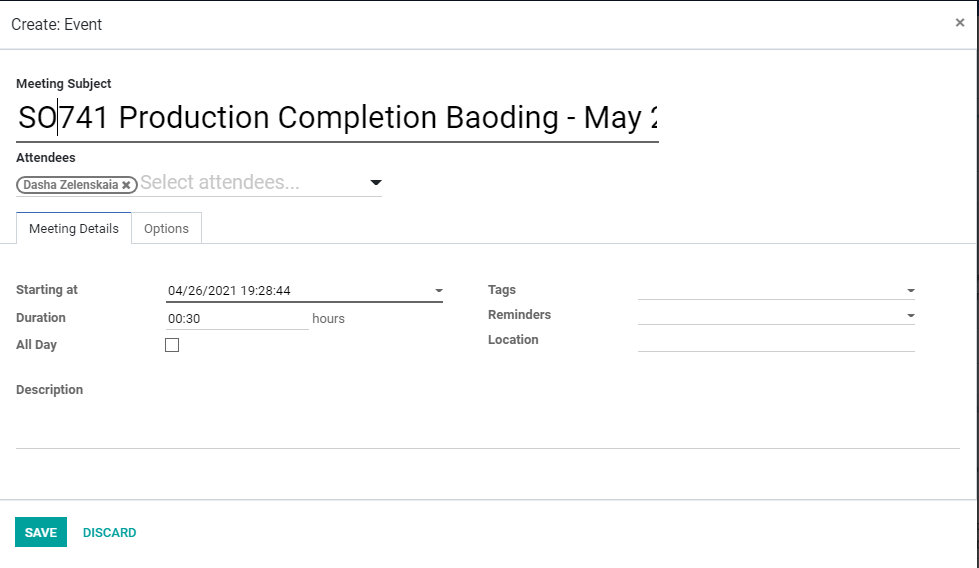
2.3 Fill out the name of the future meeting or event in 'Meeting Subject' field.
2.4 Add people that should receive the notifications of the future meeting or event in 'Attendees' field. For all kinds of meetings with a Customer or a Vendor, Customer or Vendor have to be added in 'Attendees' field.
Note: After Customer/Vendor is added into Attendees of an event, all meetings will be connected to Customer/Vendor page and will be visible under 'Meetings' smart-button on Contact page.
2.5 Fill out date and time of the future meeting or even in 'Starting at' field, set 'Duration' - this field is important for setting a meeting. Otherwise, it is possible to mark the checkbox 'All day' if an event that does not need to last for a certain time period.
2.6 Select 'Tags' to determine whether the future object will be an event or a meeting.
2.7 Select 'Reminders' - the time when notifications will be sent to every subscribed person's inbox.
2.8 Select 'Location' - this field is important for meetings. If the meeting is to be held in the Meeting Room, choose the relevant location. Otherwise, choose "Other" for any event or a meeting that will be held outside of the office.
Note: It is very important to set the location for meetings. Based on the location, the availability of the Meeting Room will be determined by other people in the company. Every meeting scheduled for any department must have the relevant entry in the Calendar.
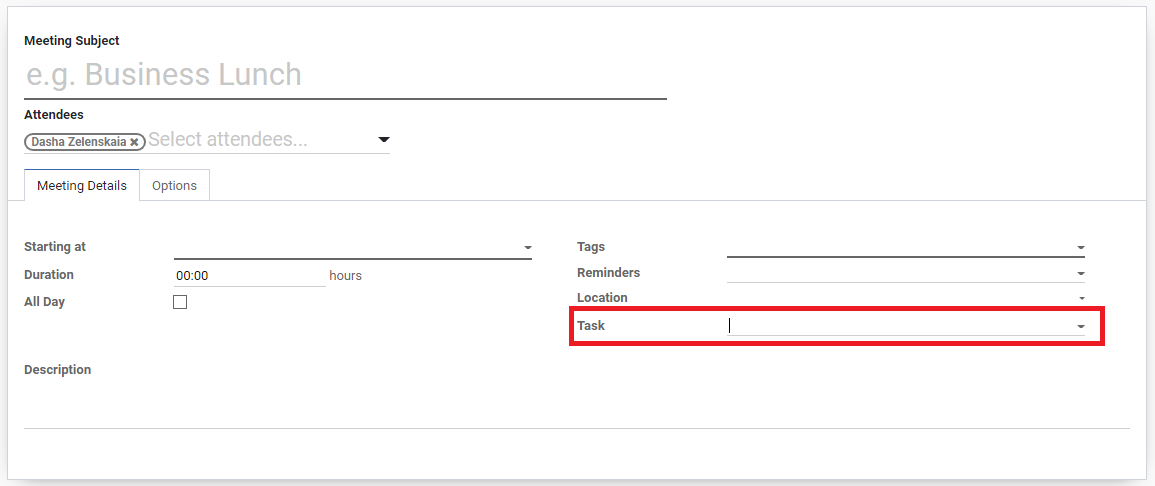
2.9 Select 'Task' - this field allows to connect an event/meeting to a task to be able to easily navigate through the system and organize all meetings/events related to one topic. For recurrent meetings general task from the related project is to be connected.
Note: Once 'Task' is connected to an event/meeting, all meetings/events connected to the task will be visible under 'Meetings' smart-button on Task page.
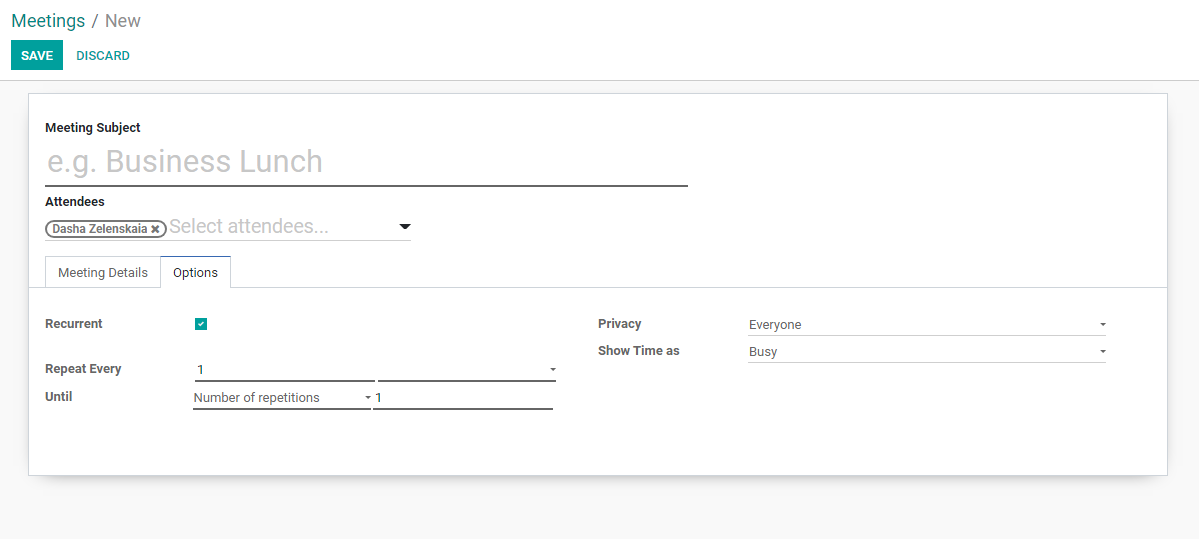
2.10 If the meeting is recurrent and repeats every week (or every two weeks, etc.), click 'Options' tab to set the details of a recurrent event. In this case, the reminders will be sent to every subsribed person's inbox every time before the recurrent meeting starts, according to 'Reminders' setting.
2.11 Click 'SAVE' on top of the screen.
Method 2
Locate the day and time of the future event and click on the empty space. In the pop up that will open upon the click, fill out the fields 'Summary', 'Tags', 'Location', and click 'CREATE'.
Note: This way to create an event or a meeting is not convenient as after creating the user will have to open it one more time to fill out the rest of the fields. So it is advised to use Method 1.
IMPORTANT:
Every meeting must have a relevant entry in the Calendar. Before scheduling a meeting that needs to be held in the Meeting Room, the user must check the availability of the Meeting Room at the desired day and time. If the Meeting Room is already booked for that date and time, the user must reschedule the meeting for the time when the Meeting Room is not booked according to the Calendar.
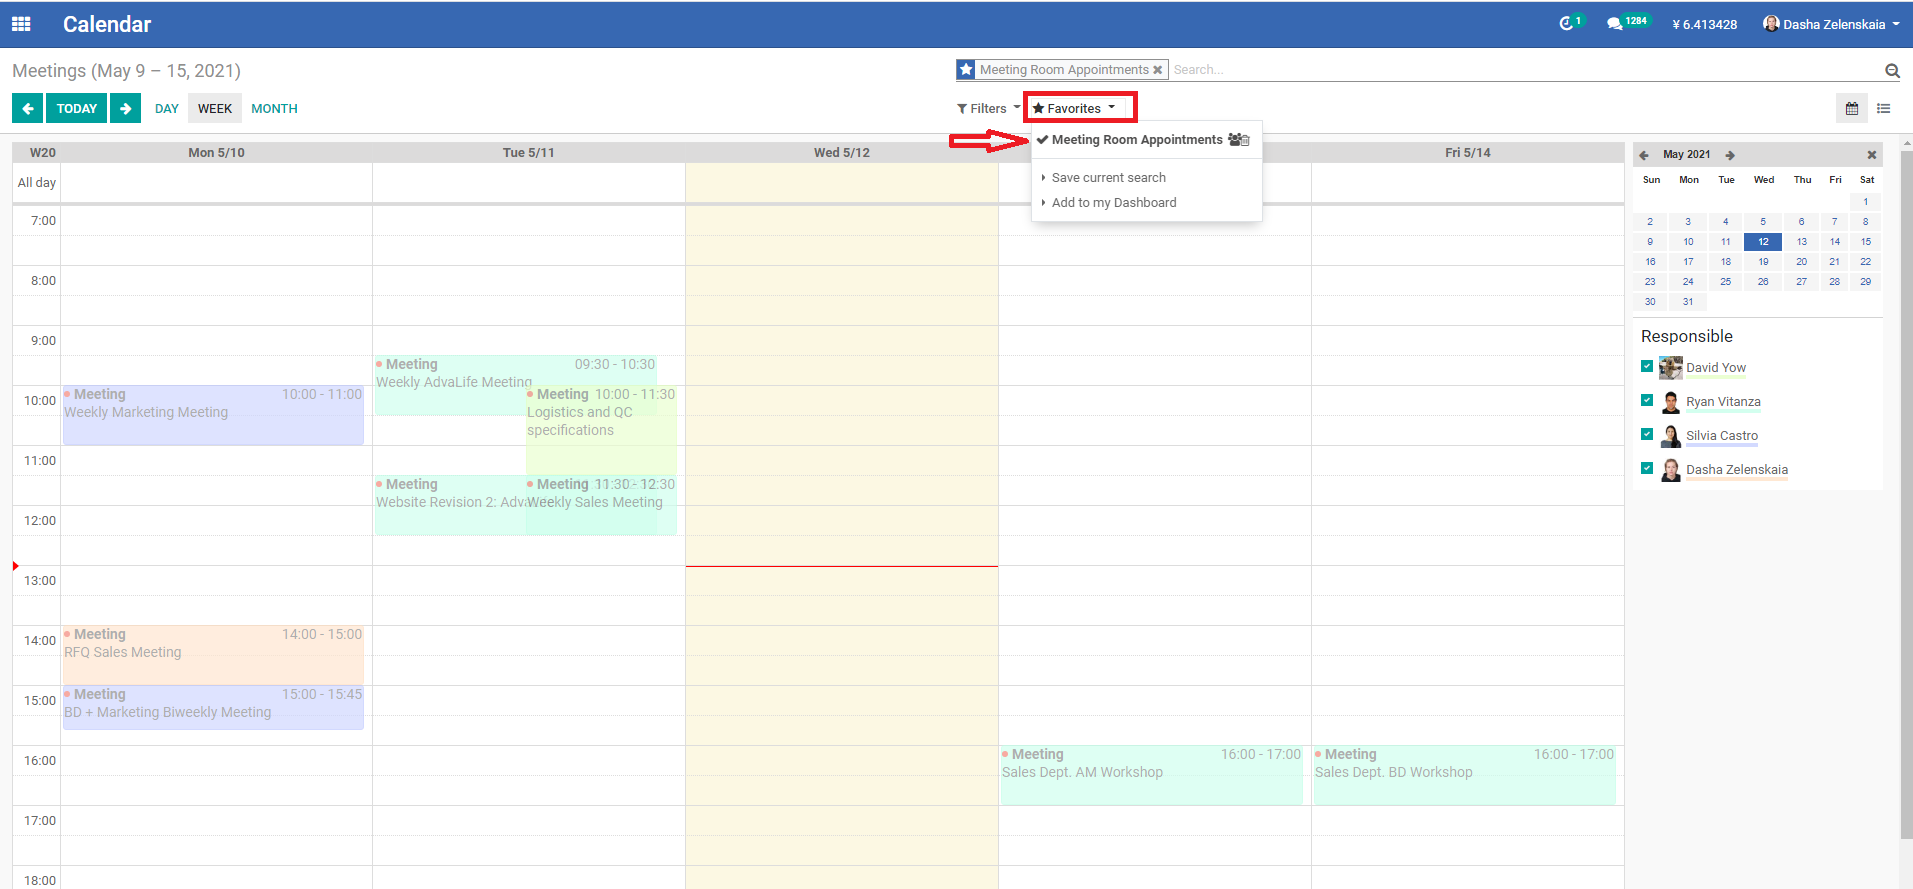
How to check Meeting Room availability
In Calendar module search bar click 'Favorites' and choose 'Meeting Room Appointments' filter. Search results will show all the meetings with Meeting Room location.
Order & Registration Milestones
Order Milestones is a section that is used to fill out the most important dates/steps of any Order. There are several purposes of Order Milestones section: * Record estimated dates of order steps; * Record actual dates of order steps; * Collect the information for future reference/reports.
Predefined milestones/dates of the steps of an order are important for tracking progress and ensuring every order is completed on-time.
Defining milestones/dates for company/facility/product registration is subject to circumstances outside of our immediate control, making setting accurate milestones difficult. However, regulating the parts of the process that are within our control and tracking the process are important to completing registrations in the shortest time possible.
How to fill out Estimated dates in Order Milestones
Estimated dates in Order Milestones have to be filled out as soon as estimated dates are received. For example, as soon as an order is confirmed with the manufacturer Purchasing Person needs to immediately fill out the estimated production completion date in Order Milestones table. Salesperson needs to fill out estimated date of Customer payment as soon as it is confirmed by the Customer.
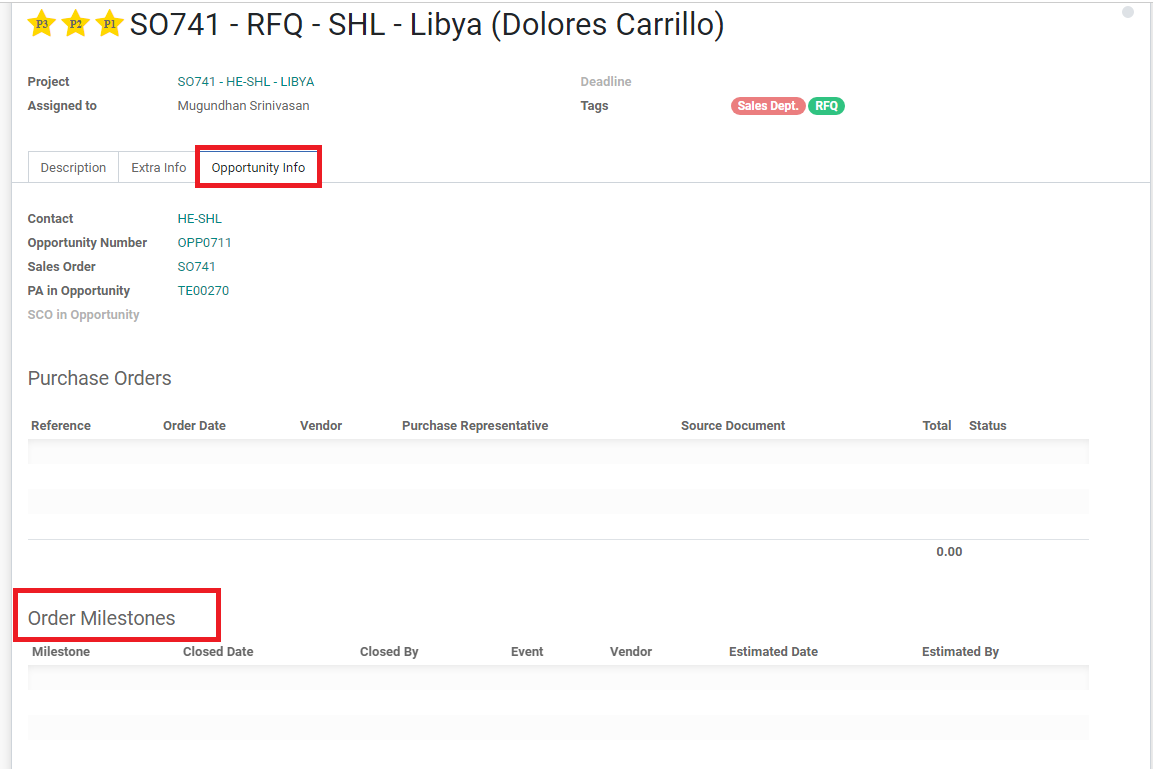
1. Locate Order Milestones table of the relevant order.
Note: Order Milestones table is located in the bottom of Opportunity Info tab in the Task, under Purchase Orders section.
2. Click 'EDIT' on top left of the screen.
3. Click 'Add a line' in Order Milestones table.
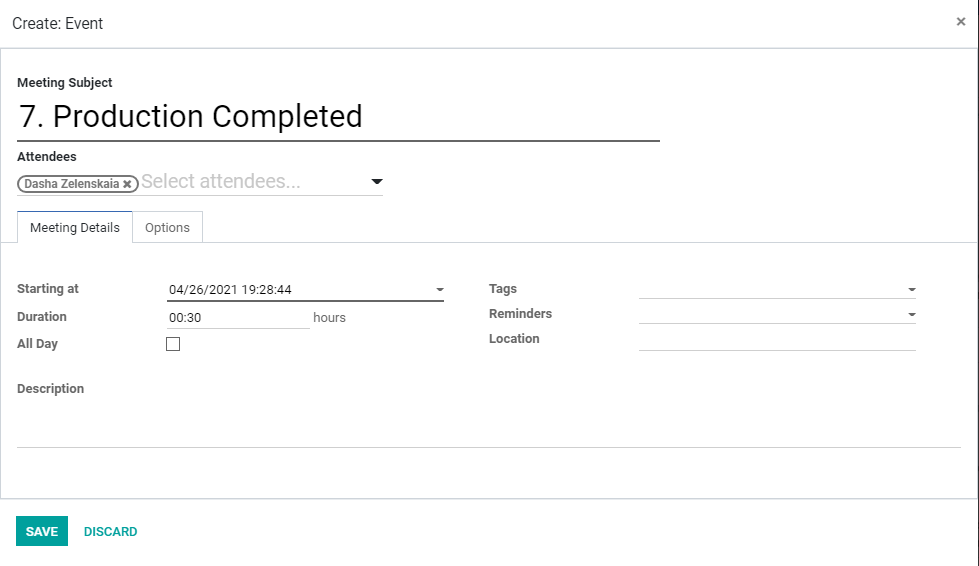
4. Select 'Milestone', for example: '3. Customer Payment Received' or '7. Production Completed'.
Note: After choosing the Milestone, additional field 'Event' will appear for those milestones that have an option for estimated dates. If there should be no estimated date, the field 'Event' will not appear.
4. Select 'Vendor' if required (for Purchasing Dept. Milestones).
Note: If there is more than one Vendor in the order, the System will show all of them in the dropdown. Estimated dates are to be added for every Vendor in the order.
5. Click 'Event', then 'Create and Edit'. New pop up window will open that will be used to create an Event in the Calendar. The event created from Order Milestones will be exactly the same as if created through Calendar directly.
6. Change the event name.
Note: For Production Completion event, follow the format for the event name: "SOXXX Production Completion 'Vendor Name' - YYYY.MM.DD". For example: "SO741 Production Completion Baoding - 2021.05.25". For Sales related events, follow the format for the event name: "SOXXX Milestone Name". For example: "SO717 Customer Payment Received".
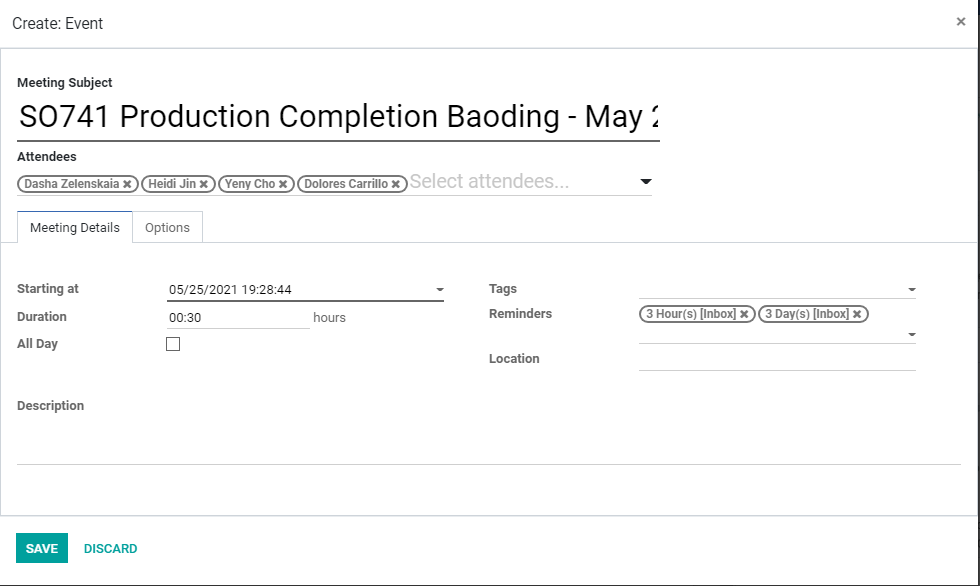
6. Add 'Attendees' - the people that will receive inbox notificaion of the event.
7. Select 'Starting at' - the estimated date of Production completion (or another milestone).
8. Select 'Reminders' - the time when notifications will be sent to every subscribed person inbox. For Production Completion Milestone, select '3 Day(s) [Inbox]', '3 Hour(s) [Inbox]' to receive notifications 3 days in advance to be able to follow up with the Vendor, and 3 hours in advance to get a reminder on the same day as production should be finished.
9. Once all the above points are done, click 'SAVE'.
10. When back to the previous Milestone pop up, click 'SAVE & CLOSE'.
11. If need to add more milestones, repeat the steps from 3 to 10.
Note: At this point of the process, there is no need to fill out the following fields: 'Closed Date', 'Closed By'. These 2 fields will be used at the stage of closing an order to record the actual dates of a milestone - the actual dates of production completion, receiving the payment, shipment departure, etc.
12. Click 'SAVE' on top left of the screen.
How to fill out Estimated dates in Registration Milestones
To fill out estimated dates of Registration Milestones follow the same steps as Order Milestones. Registration Dept. must fill out estimated dates for 'REG: 8. Documents Completed' Milestone of every registration.
When to use ‘Activity’ VS Calendar
The rules for when to use ‘activity’ vs calendar are simple, but it is imperative everyone follow these rules to keep a consistent logic for organization:
Activity:
1. A reminder attached to a specific message in Chatter between you and assignee (one-on-one).
2. A reminder attached to a specific model in Chatter for yourself.
Calendar:
1. A reminder not related to a specific message or model.
2. A reminder including more than 2 users (more than you and assignee).